- Best for
- anchoring a bed zone
- Time
- 1 weekend
- Total cost
- $630
- Renter-safe
- painting needs ownership
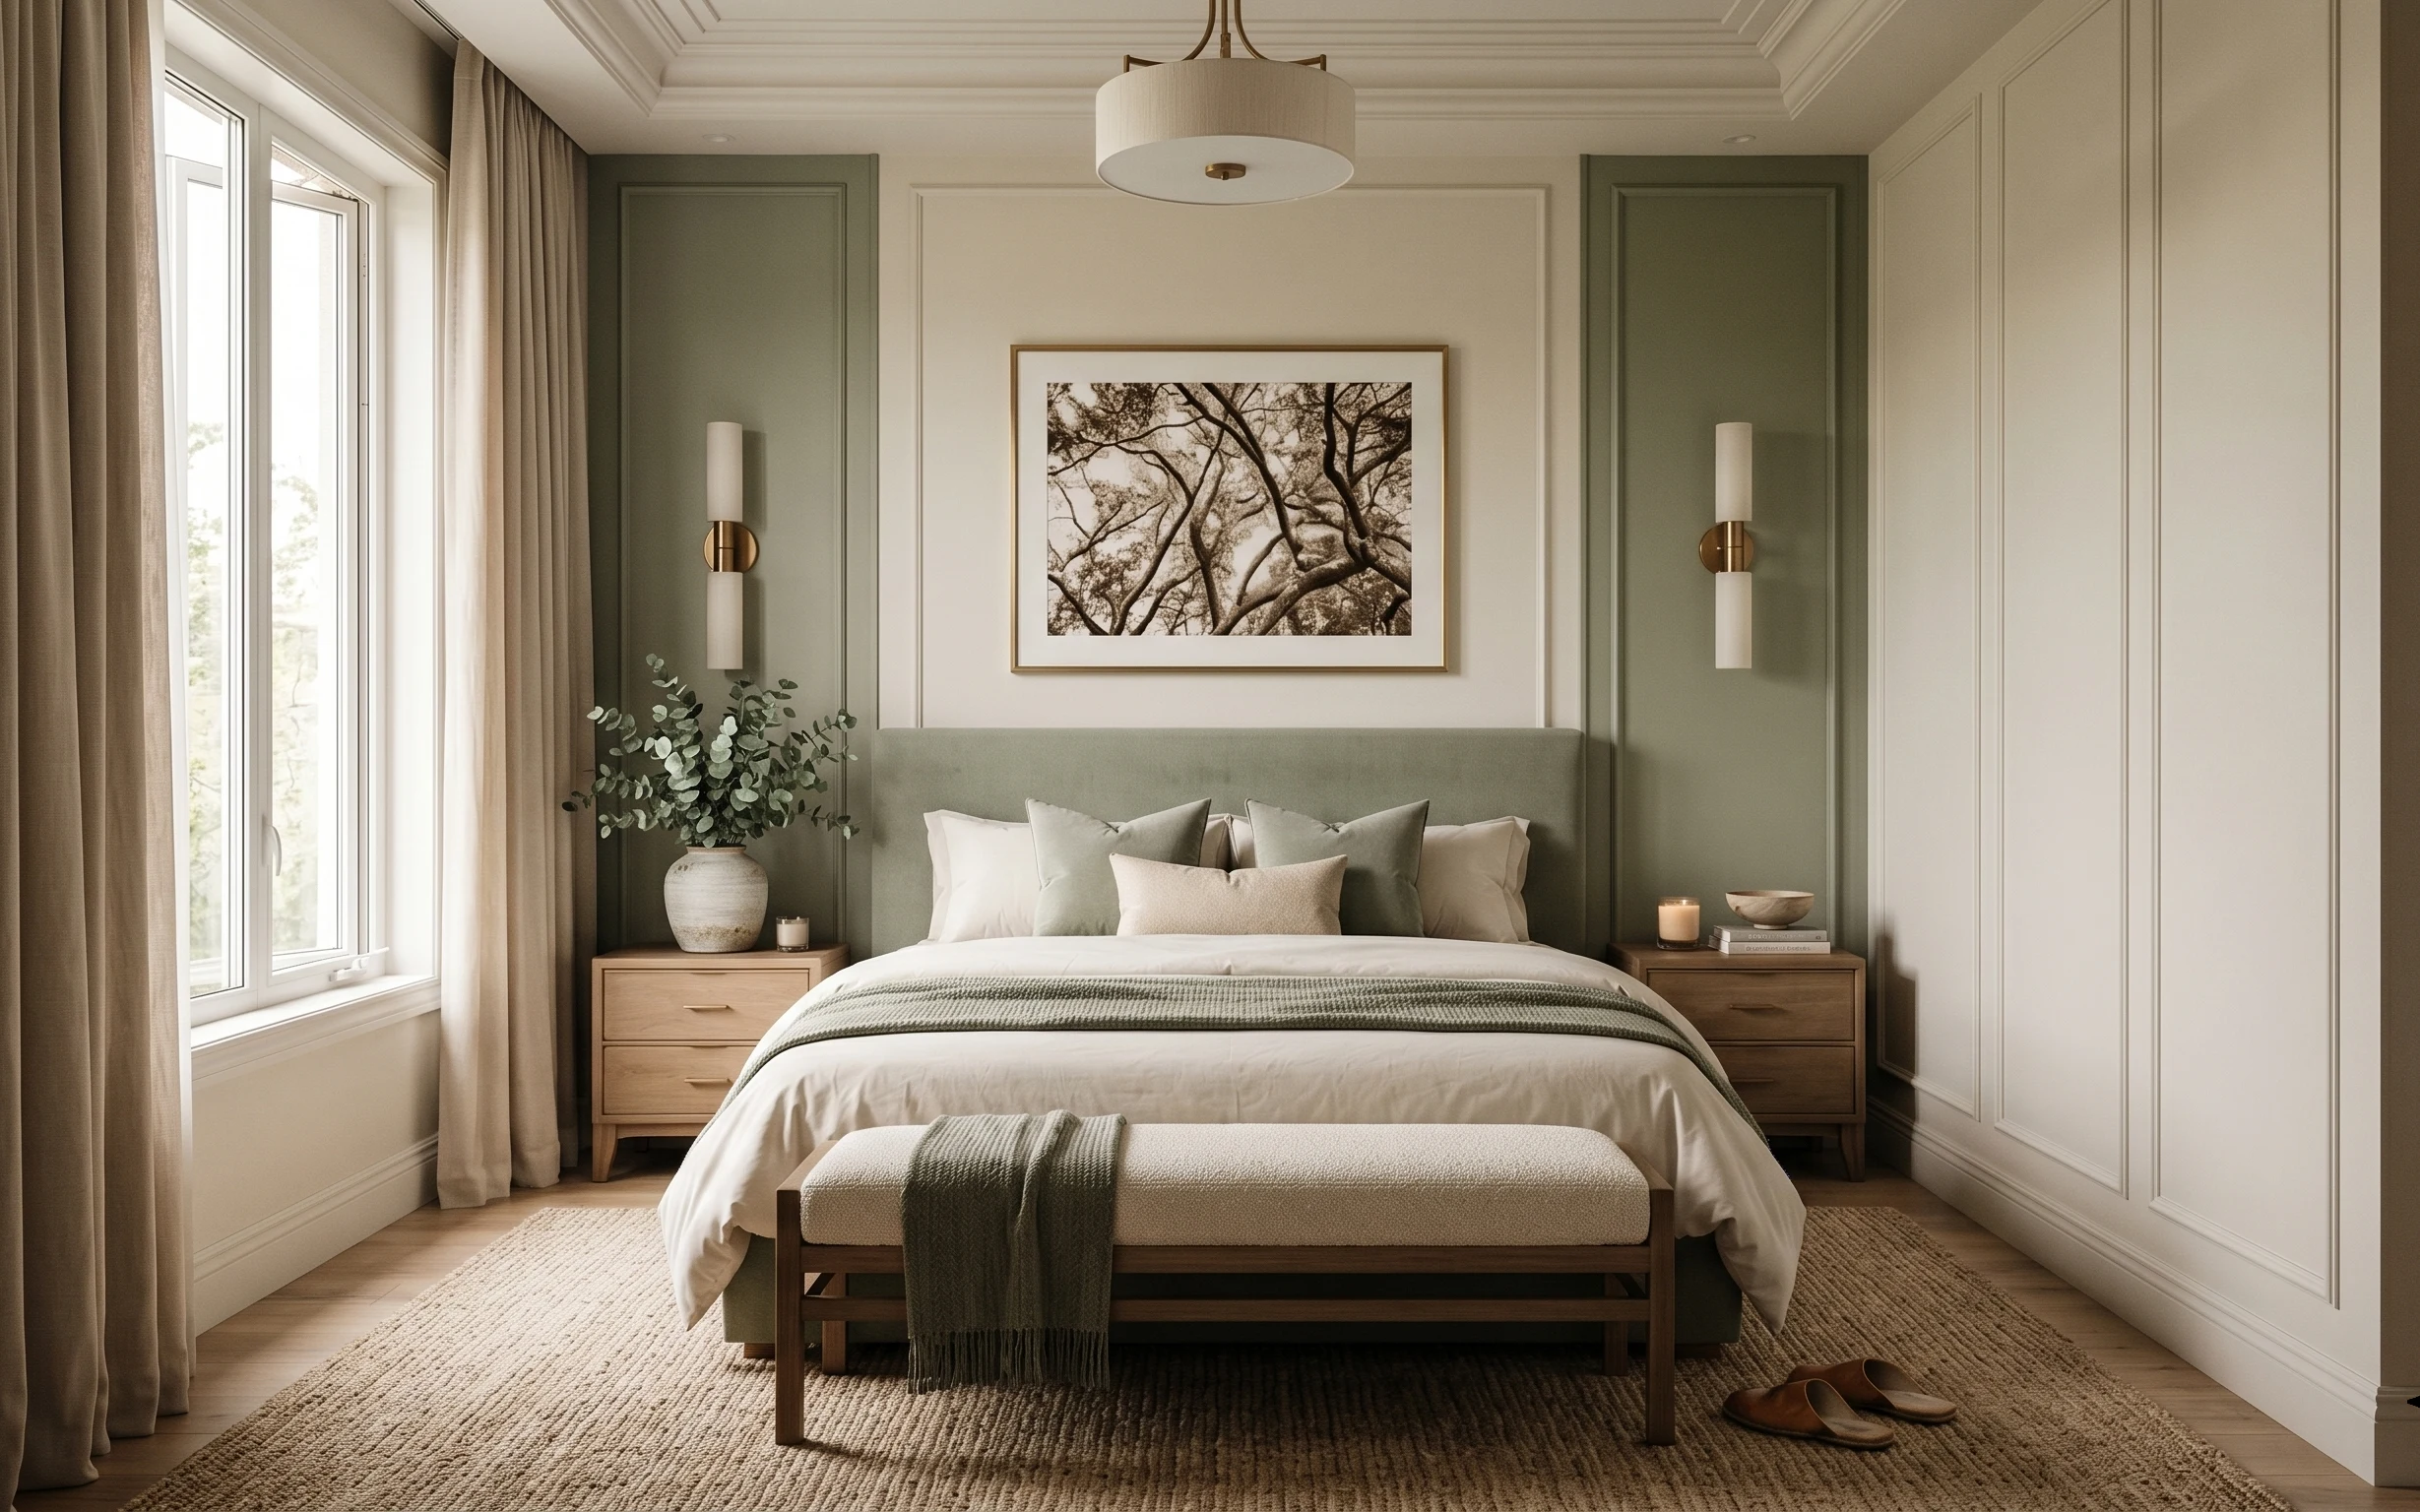
Why taupe-and-olive calm is the primary bedroom of 2026
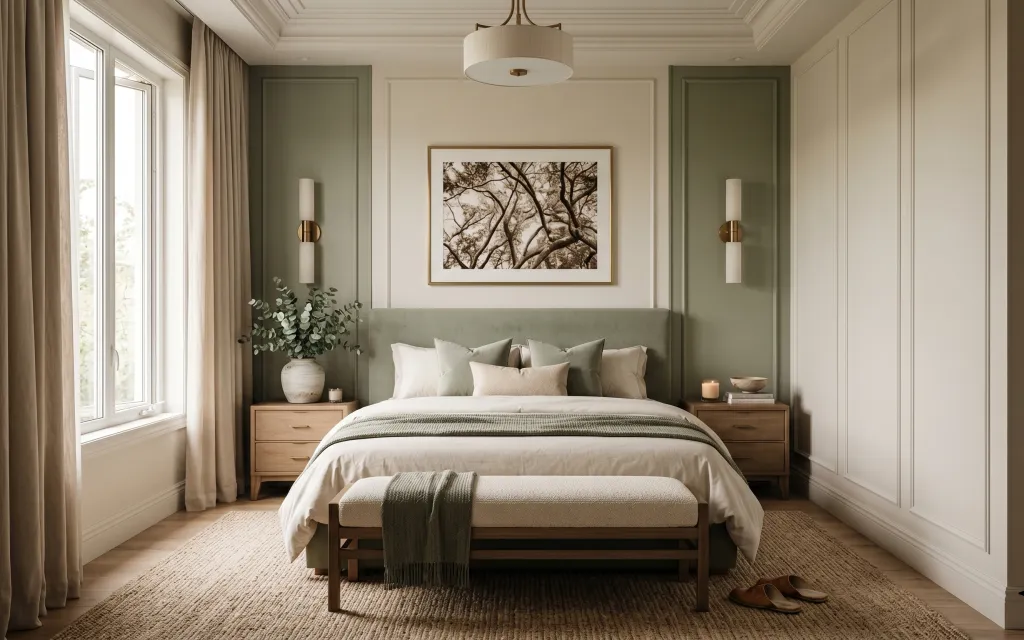
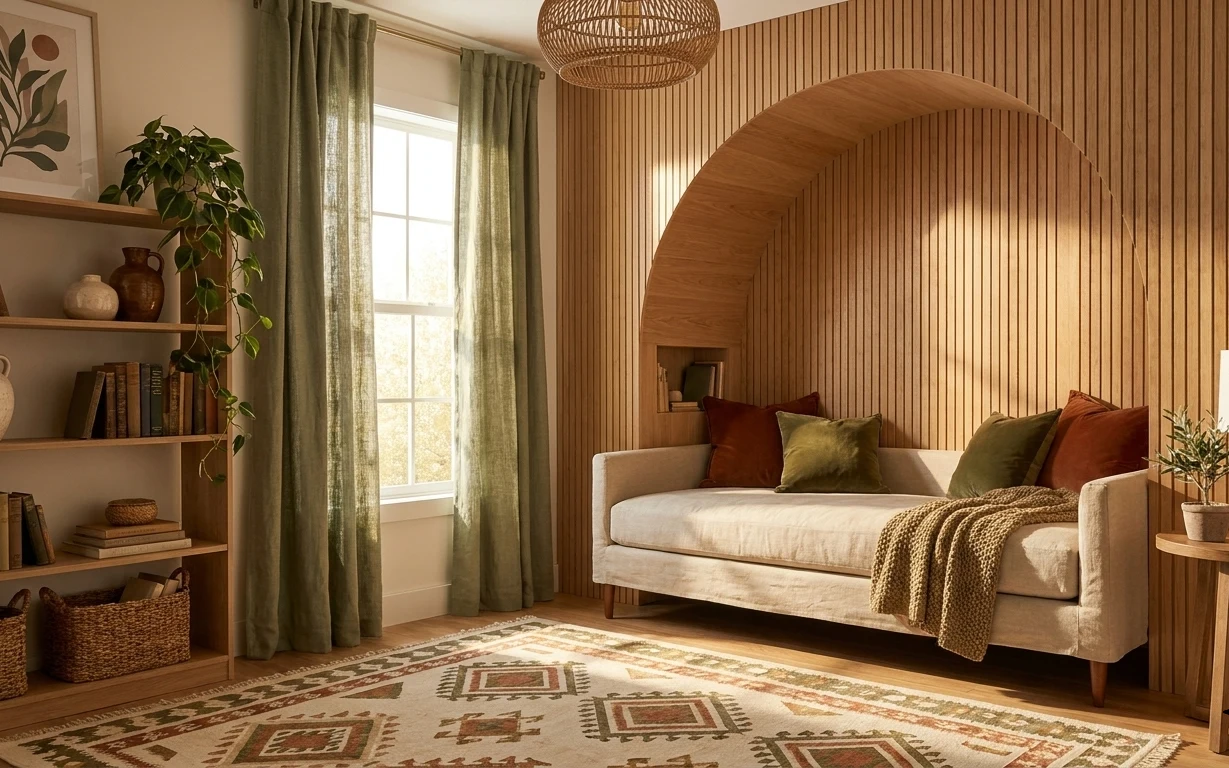
Start with the paneling and the olive rectangle behind the bed—then build outward. In this photo, the cream walls, warm taupe curtains, and olive-toned throw blanket all share the same muted palette, so nothing fights. Texture matters here: a medium-pile area rug under the bed, soft curtain fabric on the windows, and the knit-like throw give the room depth without adding clutter. For homeowners working on a weekend, this is achievable because the “look” is mostly paint, textiles, and placement rather than demolition.
The mistake I almost made the first time I chased this vibe: I matched everything too closely and the room went flat. The fix was to leave the big surfaces quiet (cream walls, natural rug) and let one decision—like the olive accent—do the talking. Once I followed that rule, even inexpensive accessories (candles and a simple framed print) stopped looking like leftovers and started reading as intentional styling.
Layer 1 — curtain panels ($80) Hang for height, not just privacy
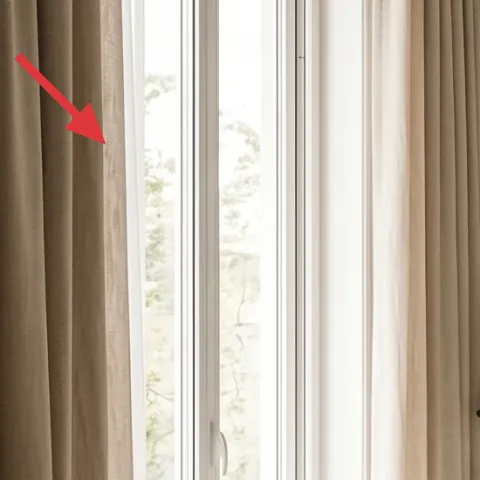
These warm taupe curtain panels frame the left window and visually stretch the room upward, which is why they’re worth buying in a pair instead of trying to patch with random lengths. In the photo, they fall in steady vertical folds and create a soft edge against the crisp trim and paneling. The trade-off is cost: curtains can add up, but they do more than block light—they also hide a lot of window awkwardness and soften the whole bed-zone. If you’re tempted to go sheer everywhere, consider keeping some opacity so the olive wall doesn’t feel too heavy.
Hang high to lift the bed wall
Mount as close to the ceiling/upper trim as you can, so the panels read tall and intentional.
Layer 2 — throw blanket ($60) One olive layer on the bed changes everything
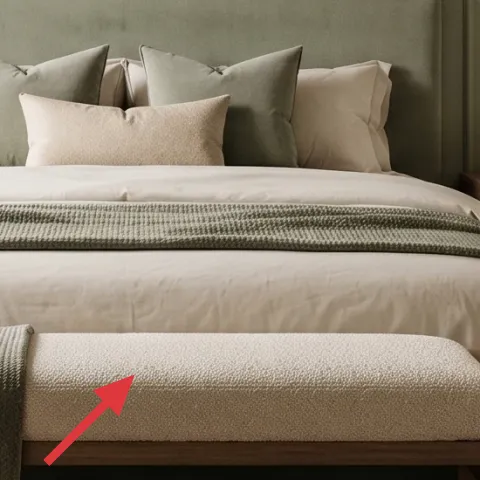
The olive-green throw blanket draped across the front of the bed is the quickest way to bring color into the room without repainting everything. Because it’s placed where your eye naturally lands—right at the bed’s “landing strip”—it connects the darker accent wall to the softer pillows and duvet. I like this over swapping the whole duvet color: changing a single textile is easier, reversible, and lets you keep the calm base. The trade-off is that throws show lint and pilling faster, so a lint roller and gentle laundering matter.
Keep the weave visible
A textured knit reads richer than a smooth throw, especially when the walls are traditional paneling.
Layer 3 — wooden bedside table ($80) Give the nightstands the same finish as the floor
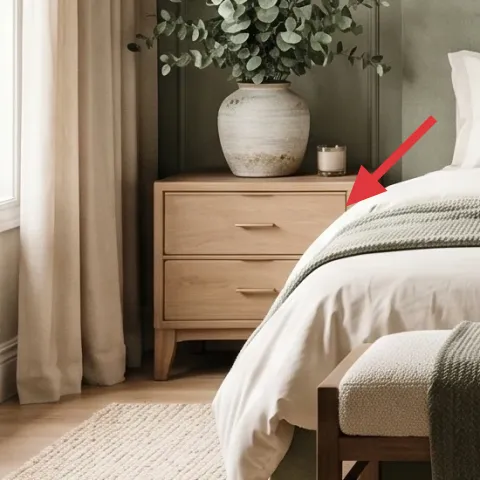
The wooden bedside table on the left adds warmth and brings the wood tones closer to the floor, so the bed doesn’t float. Its simple drawer front keeps the look tidy, while the top surface holds a plant and small candle without looking staged. Buying a matching set is tempting, but here the better move is consistency: match the finish and drawer style, then vary the styling. The trade-off is storage—if your nightstand is shallow, be selective about what sits on top so the room stays airy. That’s how you keep the olive wall from feeling crowded.
Use the top shelf like a vignette
One plant + one small object beats a crowded tray every time.
Layer 4 — framed art print ($80) Center it so the bed feels anchored
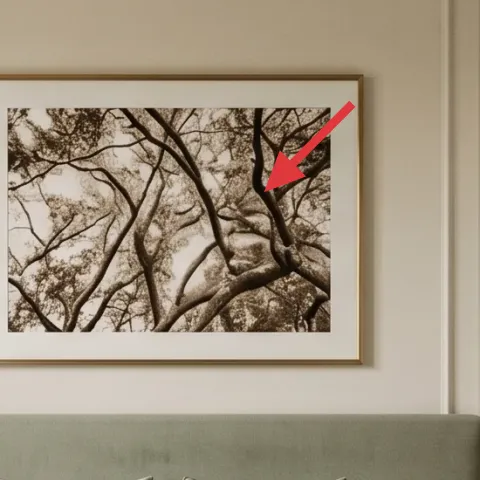
The framed art print above the bed gives the eye a focal point at eye level, which is especially important in a room with a strong accent wall. In the photo, the frame sits centered over the bed line, so the whole composition reads “designed” instead of accidental. This is a better use of budget than adding more small decor pieces: one larger print adds scale, and scale is what makes bedrooms feel expensive. The trade-off is measurement—if the art is too high or too low, the wall paneling will look off-balance. A tape measure makes this step painless.
Don’t hang it by habit height
If it’s above your natural sightline from the bed, the room loses its calm symmetry.
Layer 5 — area rug ($200) The right size makes the bed zone feel grounded
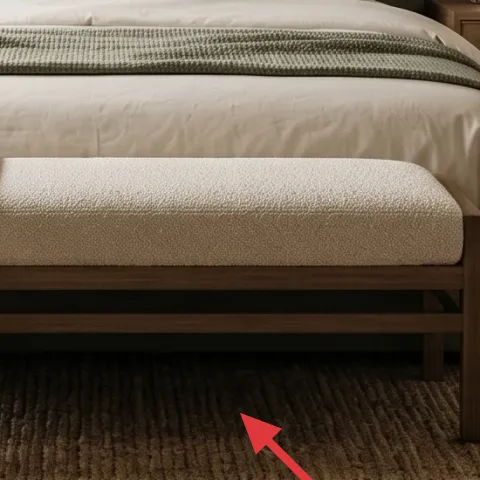
This area rug anchors the bed and bridges the wood floor to the soft textiles above it. The pile has a gentle, natural tone that matches the neutral palette, and the rug’s scale is what keeps the bed from looking like it’s floating on hard flooring. A smaller rug would save money, but you’d lose that unified “zone” effect—your feet would land on bare floor at the edges, which always looks unfinished. The trade-off is that bigger rugs are heavier and harder to move, so double-check the fit before ordering. If you’re in doubt, size up rather than down.
Let the rug do the work
Aim for front legs of the bed on the rug so the composition stays stable.
Layer 6 — wall sconces ($60) Keep the bedside glow off the nightstand
The wall sconces on either side of the accent wall bring soft, warm light without stealing countertop space. They also echo the pendant’s warm shade, so the room feels lit from multiple heights instead of only from above the bed. I prefer sconces here over bedside lamps because the nightstands can stay visually clean; a lamp base can start looking like “extra furniture” once you add a plant and candle. The trade-off: placement matters. If the sconces sit too low, you’ll get glare; too high and the bed looks underlit.
Match the bulb temperature
Warm bulbs keep the olive wall from reading gray at night.
Layer 7 — painted accent wall ($70) DIY paint the olive panel behind the bed

The olive-green painted accent wall is what makes the whole bedroom look intentional. It frames the bed like a headboard zone without covering the room in furniture, and it adds depth against the cream trim and paneling. For this look, you’re aiming for a muted, slightly warm green—not a neon or a very blue green—so it still works with taupe curtains and warm wood. The trade-off is prep: if you skip sanding/patching and edge-taping, you’ll see it forever on this smooth, traditional wall paneling. A solid paint job is the biggest “weekend confidence” upgrade you can do.
Make it instead of buying it
DIY this olive-green painted accent wall so the bed has a defined backdrop without buying a headboard or wall installation.
Materials
- Paint (1 gallon) — 1 — Home improvement store — $40
- Primer/patching product — 1 quart — Home improvement store — $8
- 2-inch angled brush — 1 — hardware store — $10
- Painter’s tape — 1 roll — hardware store — $6
- Roller covers + tray liners — set — hardware store — $6
Steps
- Patch and sand the wall paneling edges, then wipe clean with a damp cloth.
- Roll a thin primer coat on any patched spots and let it dry fully.
- Tape along the top and sides of the accent area to keep the lines crisp.
- Cut in the edges with the angled brush, then roll the field in small sections.
- Apply a second coat if the first looks uneven, then let dry.
- Remove tape while the last coat is slightly dry to prevent peeling.
- Re-check corners after fully cured drying, and do a tiny touch-up where needed.
The cost, layer by layer
| Layer | Item | Cost |
|---|---|---|
| 1 | Curtain panels (taupe pair) | $80 |
| 2 | Throw blanket (olive) | $60 |
| 3 | Wooden bedside table | $80 |
| 4 | Framed art print (16×20) | $80 |
| 5 | Area rug (5×7) | $200 |
| 6 | Wall sconces | $60 |
| 7 | Painted accent wall | $70 |
| Total | $630 | |
If you want a cheaper route, keep the olive paint and skip upgrades that compete for attention—choose one set of curtains instead of multiple layers, and prioritize the rug size. You can also shop for a framed print sale, then put the saved money into higher-quality paint for smoother panel coverage.
What worked, what didn't (across the whole room)
The overall win is that color is controlled: cream walls, warm taupe fabric, and olive accents repeat across the room in different textures. Lighting also works because it’s not only overhead—the wall sconces and the small candle create softness around the bed zone. The one downside is that this style depends on restraint; too many small objects on the nightstands would make it feel staged rather than lived-in.
What worked
- Olive paint behind the bed gives a clear focal point without adding extra furniture.
- Taupe curtain panels soften the hard lines of the trim and paneling.
- The framed art print is centered, so the bed reads anchored even in a long wall stretch.
- Warm wall sconces keep the bedside glow off the nightstand surface.
- The rug size grounds the bed and prevents the wood floor from looking too stark.
- The olive throw adds color continuity where your eye naturally lands.
What didn't
- If curtains are hung too low, the room loses its vertical lift and feels shorter.
- Skipping painter’s tape makes the olive edge look wobbly against cream trim.
- If wall sconces are aimed incorrectly, you’ll get glare rather than flattering warmth.
- A smaller rug makes the bed zone float, especially with wall paneling and trim.
What we'd skip if we did it again
Skip buying a headboard or building a decorative wall install. This look already gets its structure from the painted olive zone and centered framed art, so extra “stuff” would fight the clean paneling.
Skip mismatched curtain lengths. If you don’t have time to tailor, pick the closest ready-made height and hang high—accuracy matters more than fabric thickness.
Skip overstyling the nightstands. One plant, one small candle, and a tray or bowl keeps the room airy; stacking three accessories turns the soft palette into visual noise.
Frequently asked
How long does this kind of bedroom refresh take?
Plan on one full weekend if you’re buying the textiles and art right away. Day one is for ordering/placing the rug, art, and nightstand styling; day two is for paint prep and hanging curtains (plus any adjustments after stepping back). If you’re only doing the paint and swaps you can do in-place, expect 6–8 hours total.
What if I rent and can’t paint the accent wall?
If the olive wall isn’t an option, you can still get a similar focal point by swapping in richer textiles: an olive throw plus deeper-toned curtain panels, and centering a large framed print at the same wall “anchor” height. Add a warm bulb temperature and keep the bed styling restrained so the room stays calm even without wall color.
My room is smaller—how do I scale this look?
Start by downsizing the rug selection carefully: keep the rug large enough that the bed’s front legs land on it. Choose a framed print that’s proportionate to the bed width (still centered), then reduce nightstand styling to a single plant and one candle. Curtains should still be hung high; that’s what preserves the long, airy feel.
Where should I shop differently to hit this budget?
Use sales strategically: buy the rug and curtains when prices dip, then prioritize quality on the framed art because scale matters. Lighting can be thrifted as long as the finish matches the warm wood tones. For paint, don’t chase “cheap” batches—good coverage prevents patchy panel lines.
What’s the biggest mistake in bedrooms like this?
The biggest miss is choosing accents that don’t share undertones. If the olive leans blue-green while the curtains read warm taupe, the palette starts to look off. Test your paint sample next to the curtain fabric and the framed print before committing.
More in Bedroom
7 weekend wins for an olive-and-cream primary bedroom, $700
A soft-olive accent wall, taupe curtains, and a warm wood-and-cream bedding setup make this primary bedroom feel finished. This weekend pla…
Under $600: A Warm Olive Arched Bed Alcove Renter Refresh
I styled this arched bed alcove around warm wood, olive curtains, and layered fabrics, and nothing here needs a drill. Under $600 buys a pa…