
- Best for
- Evening-ready outdoor lounge lighting
- Cost
- $550 total, under $600 refresh
- Difficulty
- Easy (mostly placing + one DIY candle pour)
- Time
- About 2–3 hours for setup + styling
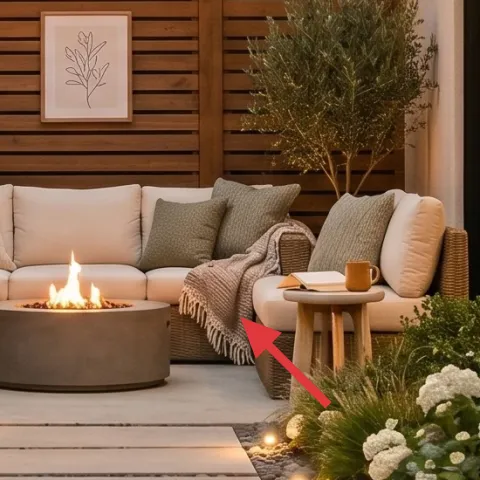
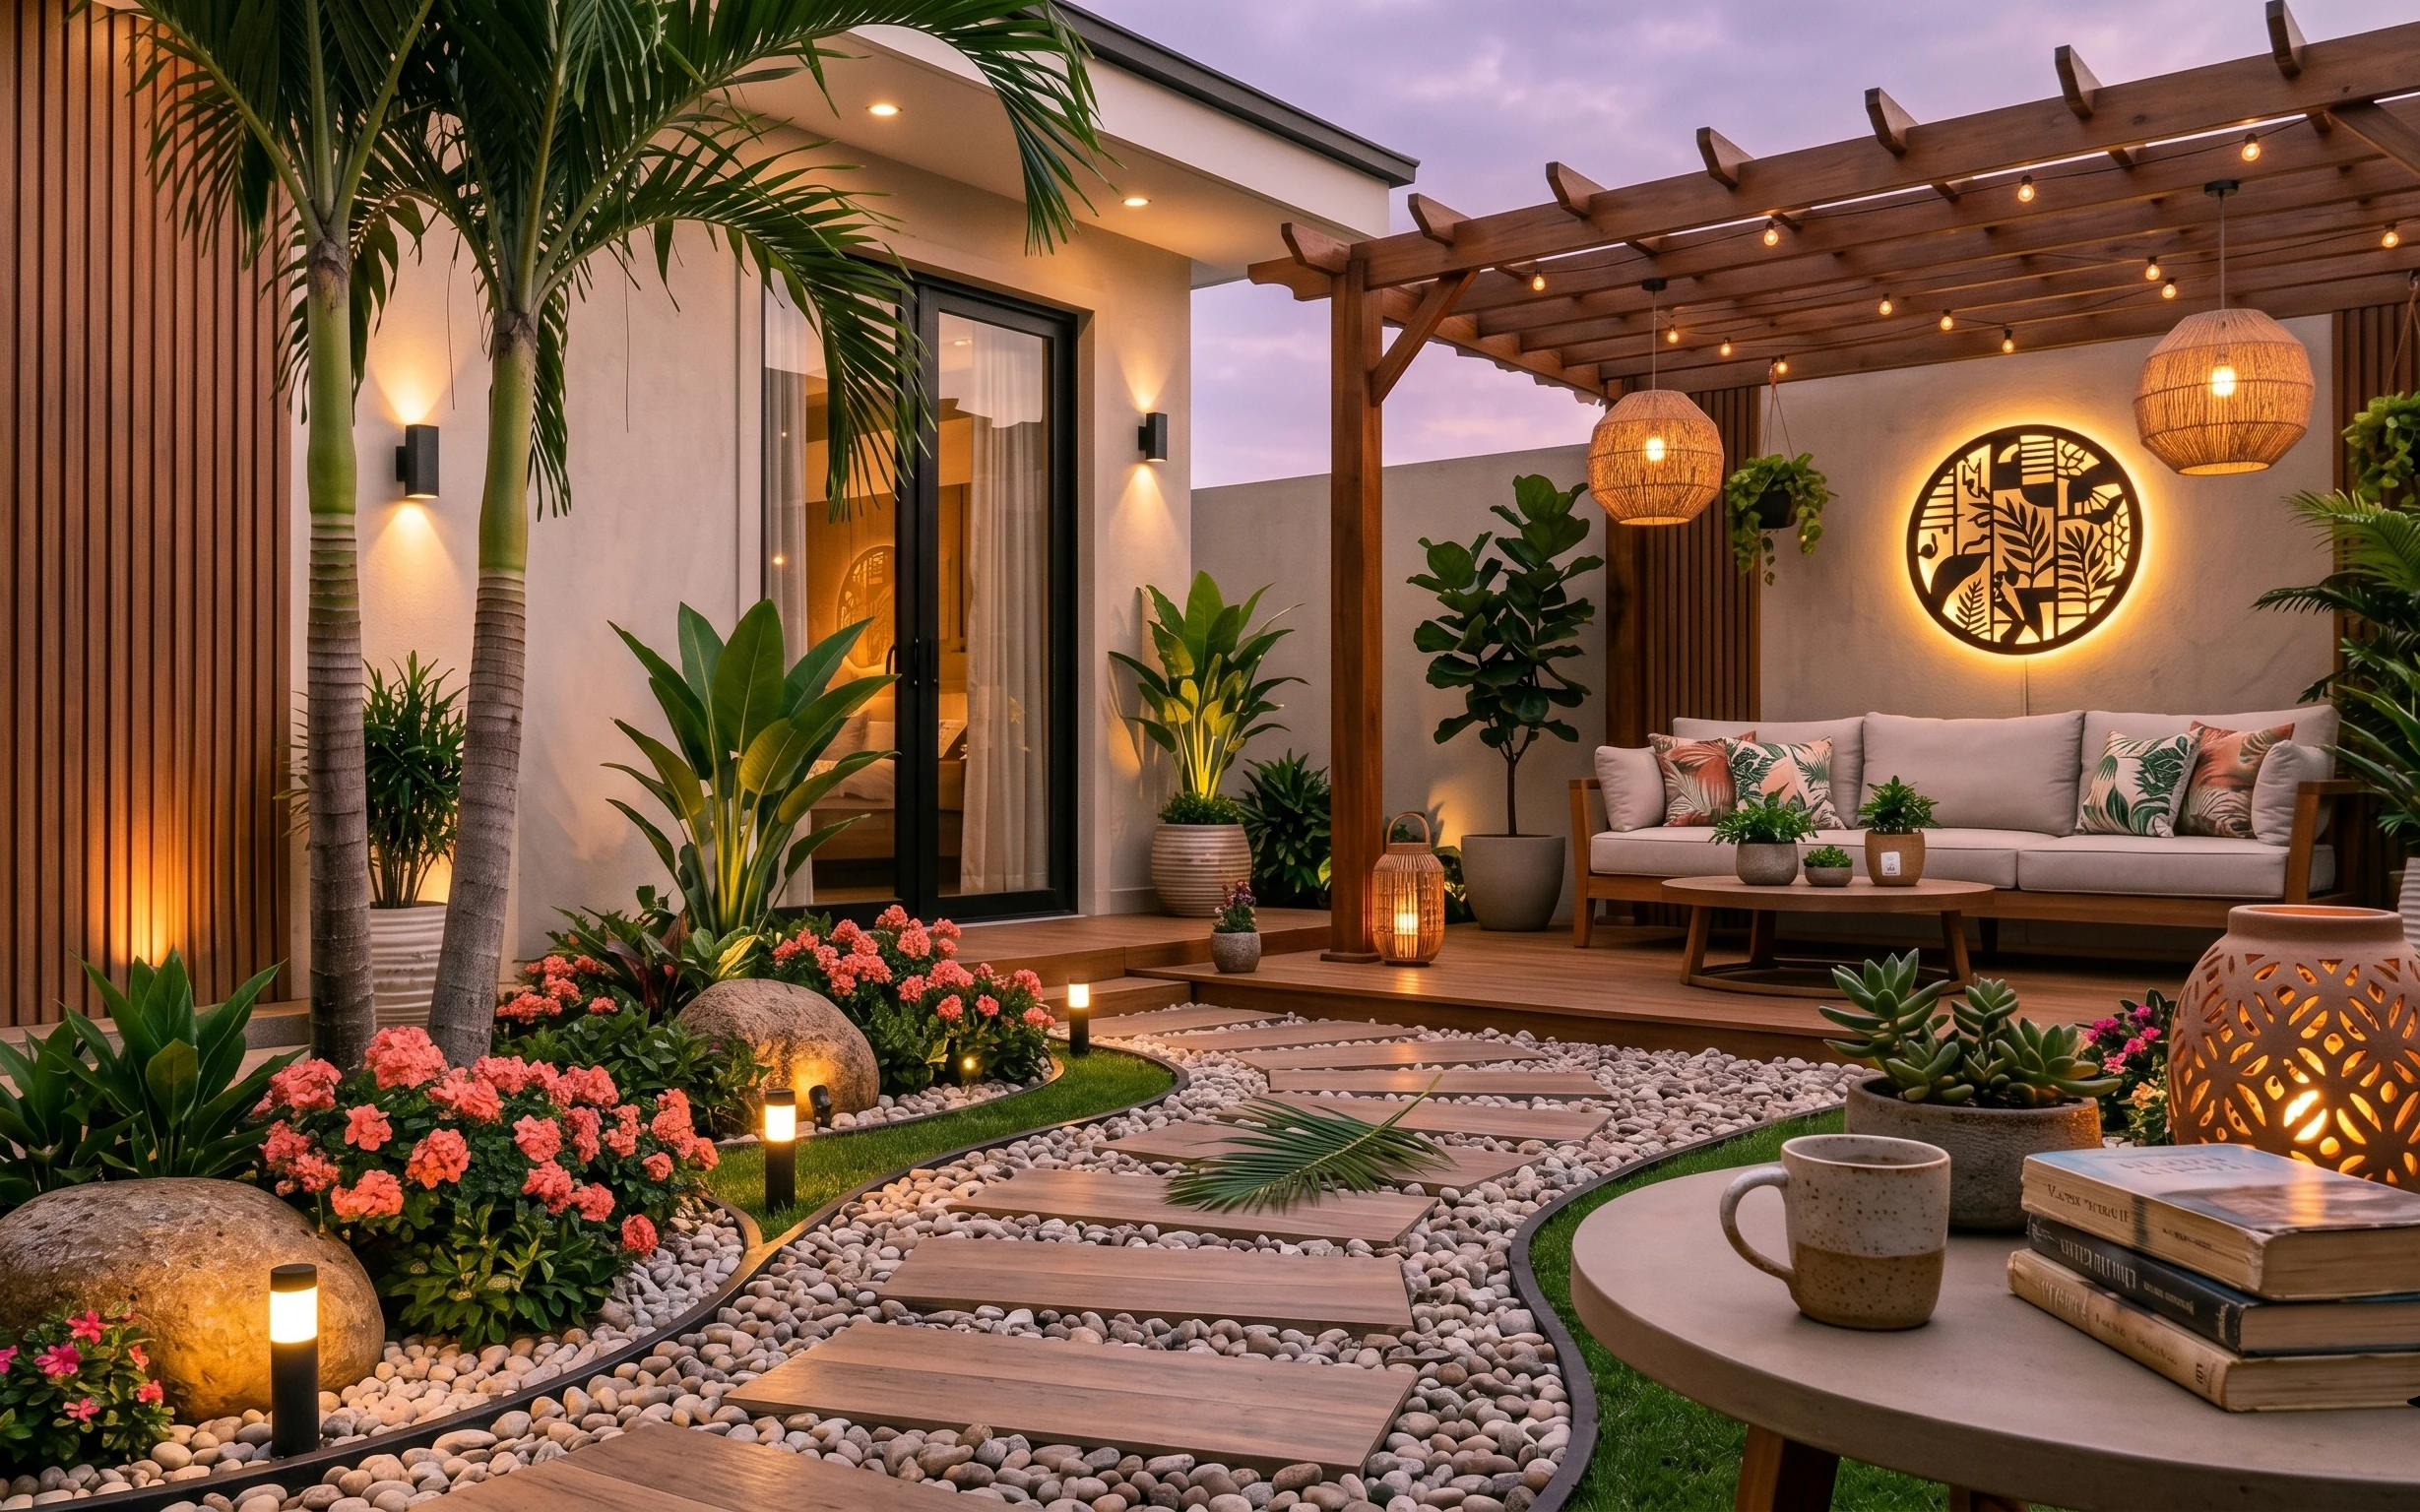
Why warm-wood slat backdrop is the garden lounge patio of 2026
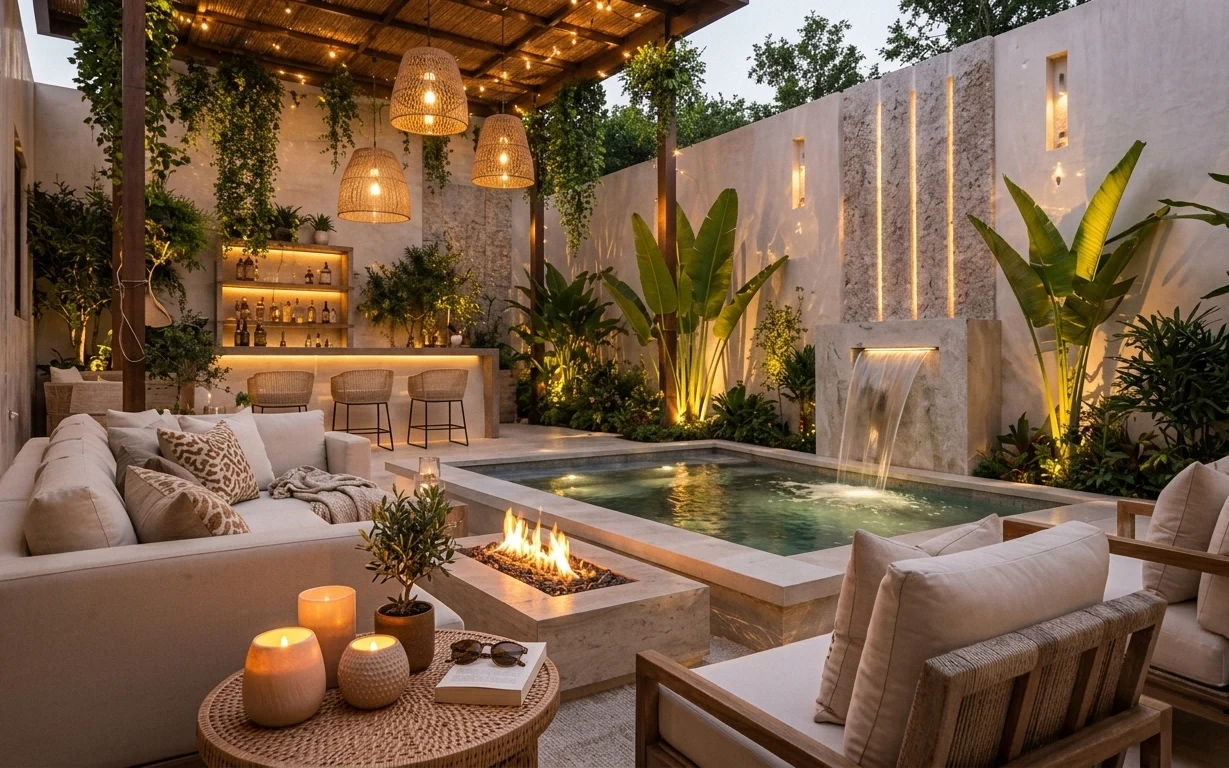
The look starts with a wood slat wall, then adds softness in layers: a cream outdoor loveseat with throw pillows, a draped throw blanket, and a framed botanical print centered on the back. The pathway carries the magic—stepping-stone tiles and pebble texture make the glow feel intentional. I’ve been chasing this “evening outside” feel for years, and this setup is one I’d recreate from the start with plug-in string lights and jar candles. It’s also rental-friendly because every piece is either freestanding or simply placed.
I used to overthink outdoor lighting and ended up with one harsh overhead source. What finally clicked was copying the way restaurants light a courtyard: low points (candle jars), a soft line overhead (string lights), and then warm fabric to make the seating read inviting. When I saw this cream-and-sage palette against wood slats, I stopped chasing “more” and focused on “placed.” That’s the move here—balance height, texture, and glow.
Layer 1 — candle jar walkway lights ($35) Low glow along the pebble path
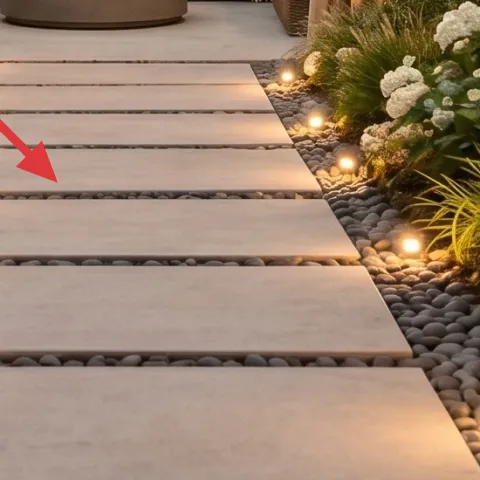
These candle jars placed near the stepping stones do more than look pretty—they soften the whole pathway so the garden feels styled, not just lit. The trick is scale: jars that sit low create a horizon of warm points, which pairs well with the pebble texture and keeps your eyes from jumping around. Buying a ready-made jar candle bundle is one option, but the overall look is easy to replicate at home because the “placement” matters more than perfect labels. The trade-off is safety: candles need stable surfaces and a clear distance from plants and any low furniture.
Make it instead of buying it
This candle pour uses simple wax, wicks, and jars so you can match the warm amber glow along the stepping-stone path.
Materials
- Candle wax — ~1 lb — craft store — $12
- Wick set — 2–4 wicks — craft store — $4
- Jars (reuse small glass jars) — 2–3 jars — thrift store — $6
- Wick anchors — 2–4 — craft store — $4
- Packing tape or clips — small set — hardware store — $2
Steps
- Set jars on a level work surface and center each wick.
- Attach wick anchors so each wick stays straight while you pour.
- Secure the wick at the top using clips or tape.
- Measure the wax amount for your jars and prep your pour area.
- Warm wax carefully until fully melted.
- Pour slowly into each jar, keeping the wick centered.
- Let candles cool undisturbed until fully set.
- Trim wicks to the recommended height for a steady flame.
- Test-burn one candle briefly to confirm the wick size.
- Place jars along the pebble pathway, clustering them in pairs.
Total DIY cost: $28 — saves about $7 over buying.
Cluster, don’t line
Place jars in small groups near the stepping stones so the glow reads like a planned “sequence,” not scattered extras.
Layer 2 — throw pillows ($30) Creamy texture on the outdoor loveseat
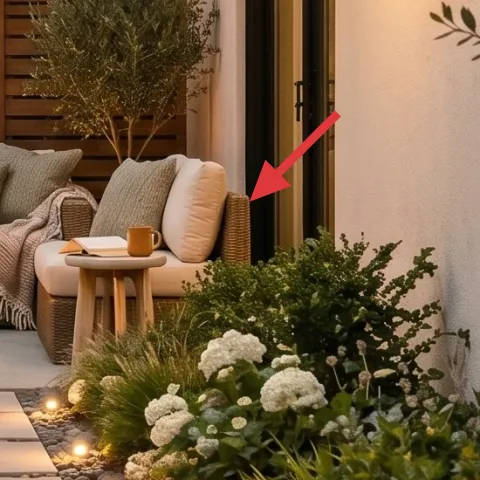
Throw pillows in cream tones are what make the outdoor loveseat feel cushioned instead of formal. In the photo, the pillows sit across the seat and back, creating a soft rectangle that reflects the warm wood wall. The reason this works is visual: pillows are the only piece of “wall-adjacent softness” you can change without any installation. The trade-off is that you’ll want a quick reset after weather—pillows can look flat if they’re damp, and replacing covers is cheaper than replacing the whole setup.
Match the undertone
Choose cream or oatmeal with a warm undertone so it doesn’t clash with the wood slats or the sage plants.
Layer 3 — throw blanket ($35) A drape that makes the seating feel lived-in
The throw blanket folded over the right side gives the whole lounge a casual rhythm—soft fabric at arm height is a big deal outside, because it visually anchors the seat against the open air. You can see how it balances the structured cushions: blanket texture adds contrast without introducing another pattern. If the outdoor space feels a little too “clean,” this layer is how you fix it fast. The trade-off is maintenance: outdoors, a blanket needs a dry spot and a quick shake so it doesn’t pick up grit from the stones.
Drape one corner
Let the blanket fall from one side rather than wrapping it tightly, so the fabric looks intentional, not bundled.
Layer 4 — outdoor loveseat sofa ($300) The centerpiece with room for glow
A simple outdoor loveseat with light cushions is the foundation here, and it’s what makes the lighting feel like it’s “for” people, not just for ambiance. The scale matters: this sofa sits far enough back that the candle glow on the path can support it, while string lights create a warm canopy above. Choosing a neutral, cushion-forward sofa over a more ornate frame keeps the palette consistent with the wood slats and botanical art. The trade-off is comfort vs. portability—you may not find the exact same outdoor sofa used by a designer, but you can hunt for a sturdy frame and then build softness with covers.
Watch fabric fade
If you buy light cushions, protect them when possible—sun and reflected heat can fade cream textiles faster than you expect.
Layer 5 — string lights ($35) Overhead warmth that doesn’t require hardwiring
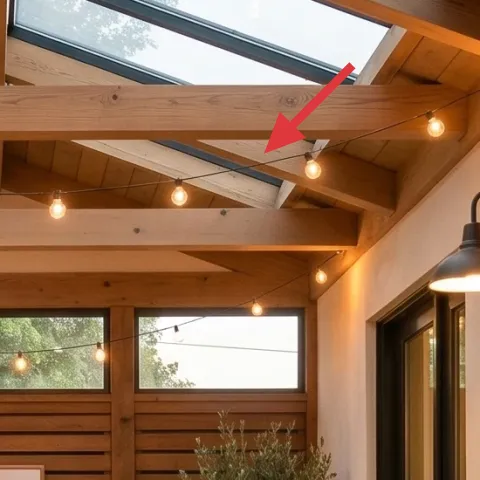
String lights make the whole garden lounge read as evening-ready without any permanent work. Hanging them along the open beams gives that dotted-line effect you can see in the photo—small light nodes that soften shadows across the wood wall, the framed botanical art, and the seating. The reason to choose this over a single spotlight is simple: multiple low-intensity points look more like “courtyard design” and less like “temporary extension cord.” The trade-off is planning the outlet path—choose a plug location early so the wires don’t sag across walkways.
Pick a warm bulb color
Warm white keeps the wood tone honeyed and flatters the sage greens in the planters.
Layer 6 — framed botanical wall art ($55) A quiet focal point between wood slats
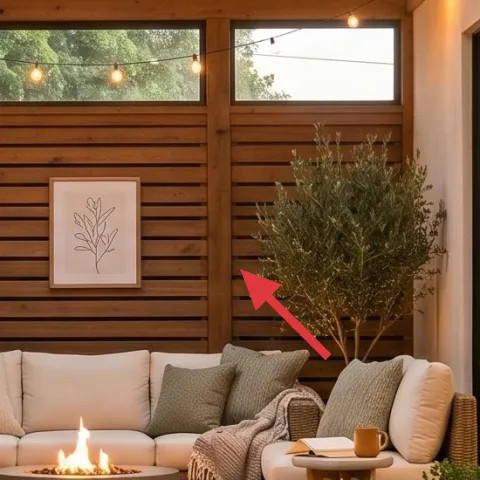
That framed botanical wall art sits dead center on the wood slat wall, acting like a pause button for the eye. When everything else is textured—plants, pebble path, textiles—the print brings line and negative space so the whole lounge doesn’t feel busy. This is the “why” of choosing art instead of more decor: the frame sets symmetry and gives you a visual anchor behind the seating. The trade-off is that prints look best when centered and level, so take a minute to eyeball alignment before placing the frame where it will be most visible from the seating.
Center from the sofa
Decide where you sit, then place the frame where it naturally lands at eye level—don’t mount by instinct.
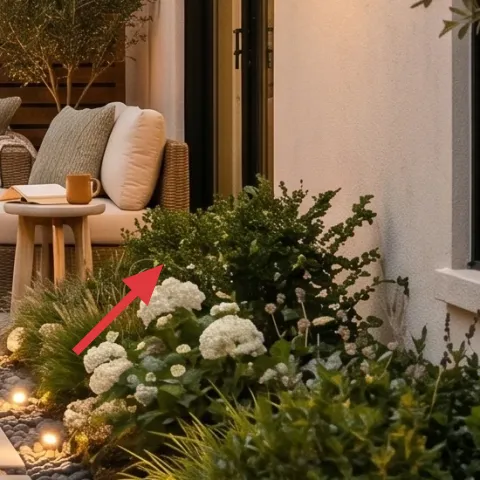
Layer 7 — potted tree ($60) Vertical greenery that frames the lounge
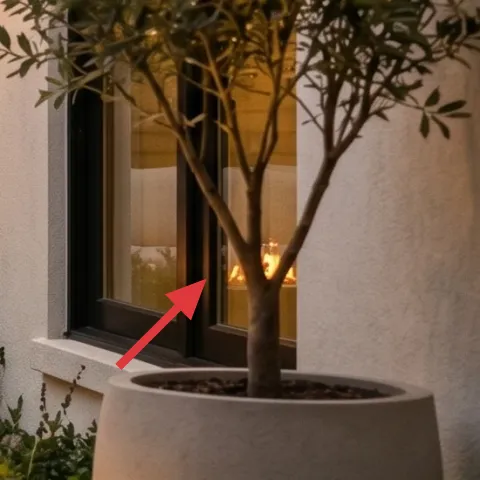
A potted tree (or tall shrub) on the perimeter gives you that garden “room” feeling, because it adds height next to the sofa and balances the ceiling line from the string lights. In the photo, the foliage on the right side creates a soft screen that makes the lounge feel more private, while the lower plants keep the pebble path lush. The reason this is better than only low planters is perspective: tall leaves catch the warm glow and make everything feel more intentional. The trade-off is upkeep—tall pots need periodic watering and an occasional trim so they keep their shape.
Repeat the green tones
Mix a slightly different green in the tall pot so the garden reads layered, not monochrome.
The cost, layer by layer
| Layer | Item | Cost |
|---|---|---|
| 1 | Candle jar walkway lights (DIY at retail-equivalent) | $35 |
| 2 | Throw pillows | $30 |
| 3 | Throw blanket | $35 |
| 4 | Outdoor loveseat sofa | $300 |
| 5 | String lights (set) | $35 |
| 6 | Framed botanical wall art | $55 |
| 7 | Potted tree | $60 |
| Total | $550 | |
If you’re trying to spend less, keep the sofa and sofa textiles, but swap the potted tree for a smaller pot (or borrow one tall plant from a friend for a season). You can also buy fewer candle jars and add more string lights for a similar glow.
What worked, what didn't (across the whole room)
This layout works because the lighting is layered at different heights—warm points near the path, a soft canopy above, then textiles that make the seating read comfortable. The palette stays consistent (wood warmth, cream softness, sage greens), so nothing fights the plants or the botanical art.
What worked
- String lights create a warm canopy that flatters both the wood slats and the cream seating cushions.
- Candle jars along the stepping stones soften shadows and make the pebble pathway feel styled.
- Cream throw pillows add visual comfort without needing any installation or furniture rebuilding.
- The centered framed botanical art gives symmetry behind the loveseat, reducing visual clutter.
- Vertical foliage on the perimeter makes the lounge feel like its own outdoor “room.”
- The blanket drape at arm height adds texture contrast against structured cushions.
What didn't
- If candle jars are spaced too evenly, the path reads like a runway instead of an inviting garden sequence.
- Cool-toned cream pillows can look gray outdoors next to warm wood slats.
- Using only overhead light makes the seating area feel harsh and flattens the plant textures.
- Overstuffing the framed wall art with extra pieces makes the botanical print lose its anchoring role.
- Tall plants without occasional trims can start to droop and look less intentional over time.
What we'd skip if we did it again
Skip a single bright overhead outdoor light. Courtyard-style glow comes from layering (path candles + string lights + textiles), and one harsh source makes the whole lounge feel temporary.
Skip extra wall clutter behind the loveseat. The framed botanical wall art already provides a quiet focal point against the wood slat wall—adding more often makes the garden look busy instead of calm.
Skip mismatched undertones in cream textiles. Warm cream reads cohesive with warm wood slats and sage greens; cooler whites can create a noticeable disconnect outdoors.
Frequently asked
How long does this patio refresh take?
If you’re buying everything ready-to-place, plan on about 1–2 hours for arranging plants, setting the pillows and blanket, and hanging the string lights. The DIY candle pour adds most of the work—roughly 30–60 minutes of active time plus cooling. Realistically, it’s a half-day project you can finish in one weekend.
Will this work in a rental where I can’t drill or hardwire?
Yes. The string lights can be hung around existing beams or structures using removable methods, and every other layer is either freestanding (sofa, potted tree) or placed (candle jars, textiles, framed art). Nothing in this look depends on changing walls or swapping fixed fixtures.
My patio is smaller—what should I change?
Keep the candle jars and string lights, but scale down the tall pot. Choose one statement potted tree instead of multiple large containers, and reduce the number of candles to a few clustered spots near the stepping stones. The key is maintaining the same height layering, just with fewer objects.
What if my lounge doesn’t have a wood slat wall?
The centerpiece concept still holds: centered botanical art plus warm textiles behind seating. You can replicate the “warm backdrop” feeling through color and material choices—cream pillows and throw blanket against a warm-toned surface. If you don’t have the exact wall, focus on symmetry and warm light placement.
Where should I shop differently if I want the look on a tighter budget?
Look for outdoor loveseat sofas and framed botanical wall art at thrift stores, resale sites, and discount retailers, then spend a little more on string lights and candles for the glow effect. Plants can be the wildcard: choose smaller potted options and group them for the same layered look.
What’s the biggest mistake people make with outdoor lighting?
Using only one light source. Outdoor spaces need height variety: low candle glow to soften the path, string lights overhead to create a warm canopy, and textiles to keep seating from looking flat. If the light feels harsh, it’s usually missing one of those layers.
More in Outdoor & Patio

How to light a garden lounge patio for under $600
A garden lounge patio, built for renters: soft string lights, warm candle jars, and a cream throw over an outdoor loveseat. This move-frien…
How-to: a tropical outdoor lounge patio for $500
A tropical outdoor lounge patio refresh built for move-friendly living: warm string lights, hanging paper lanterns, and pillow color that r…
12 poolside lounge swaps that fit a $500 weekend budget
A warm poolside lounge refresh with 7 focused swaps that make outdoor seating feel styled after dusk. The look leans rattan lighting, cream…