
- Best for
- A rented bathroom that needs an easy spa upgrade
- Cost
- $228 total (about $250 ceiling)
- Difficulty
- Beginner-friendly, mostly styling
- Renter-safe
- Yes—no-drill textiles, framed art, removable decor
Why warm beige-and-green bathroom spa corner is the bathroom spa corner of 2026
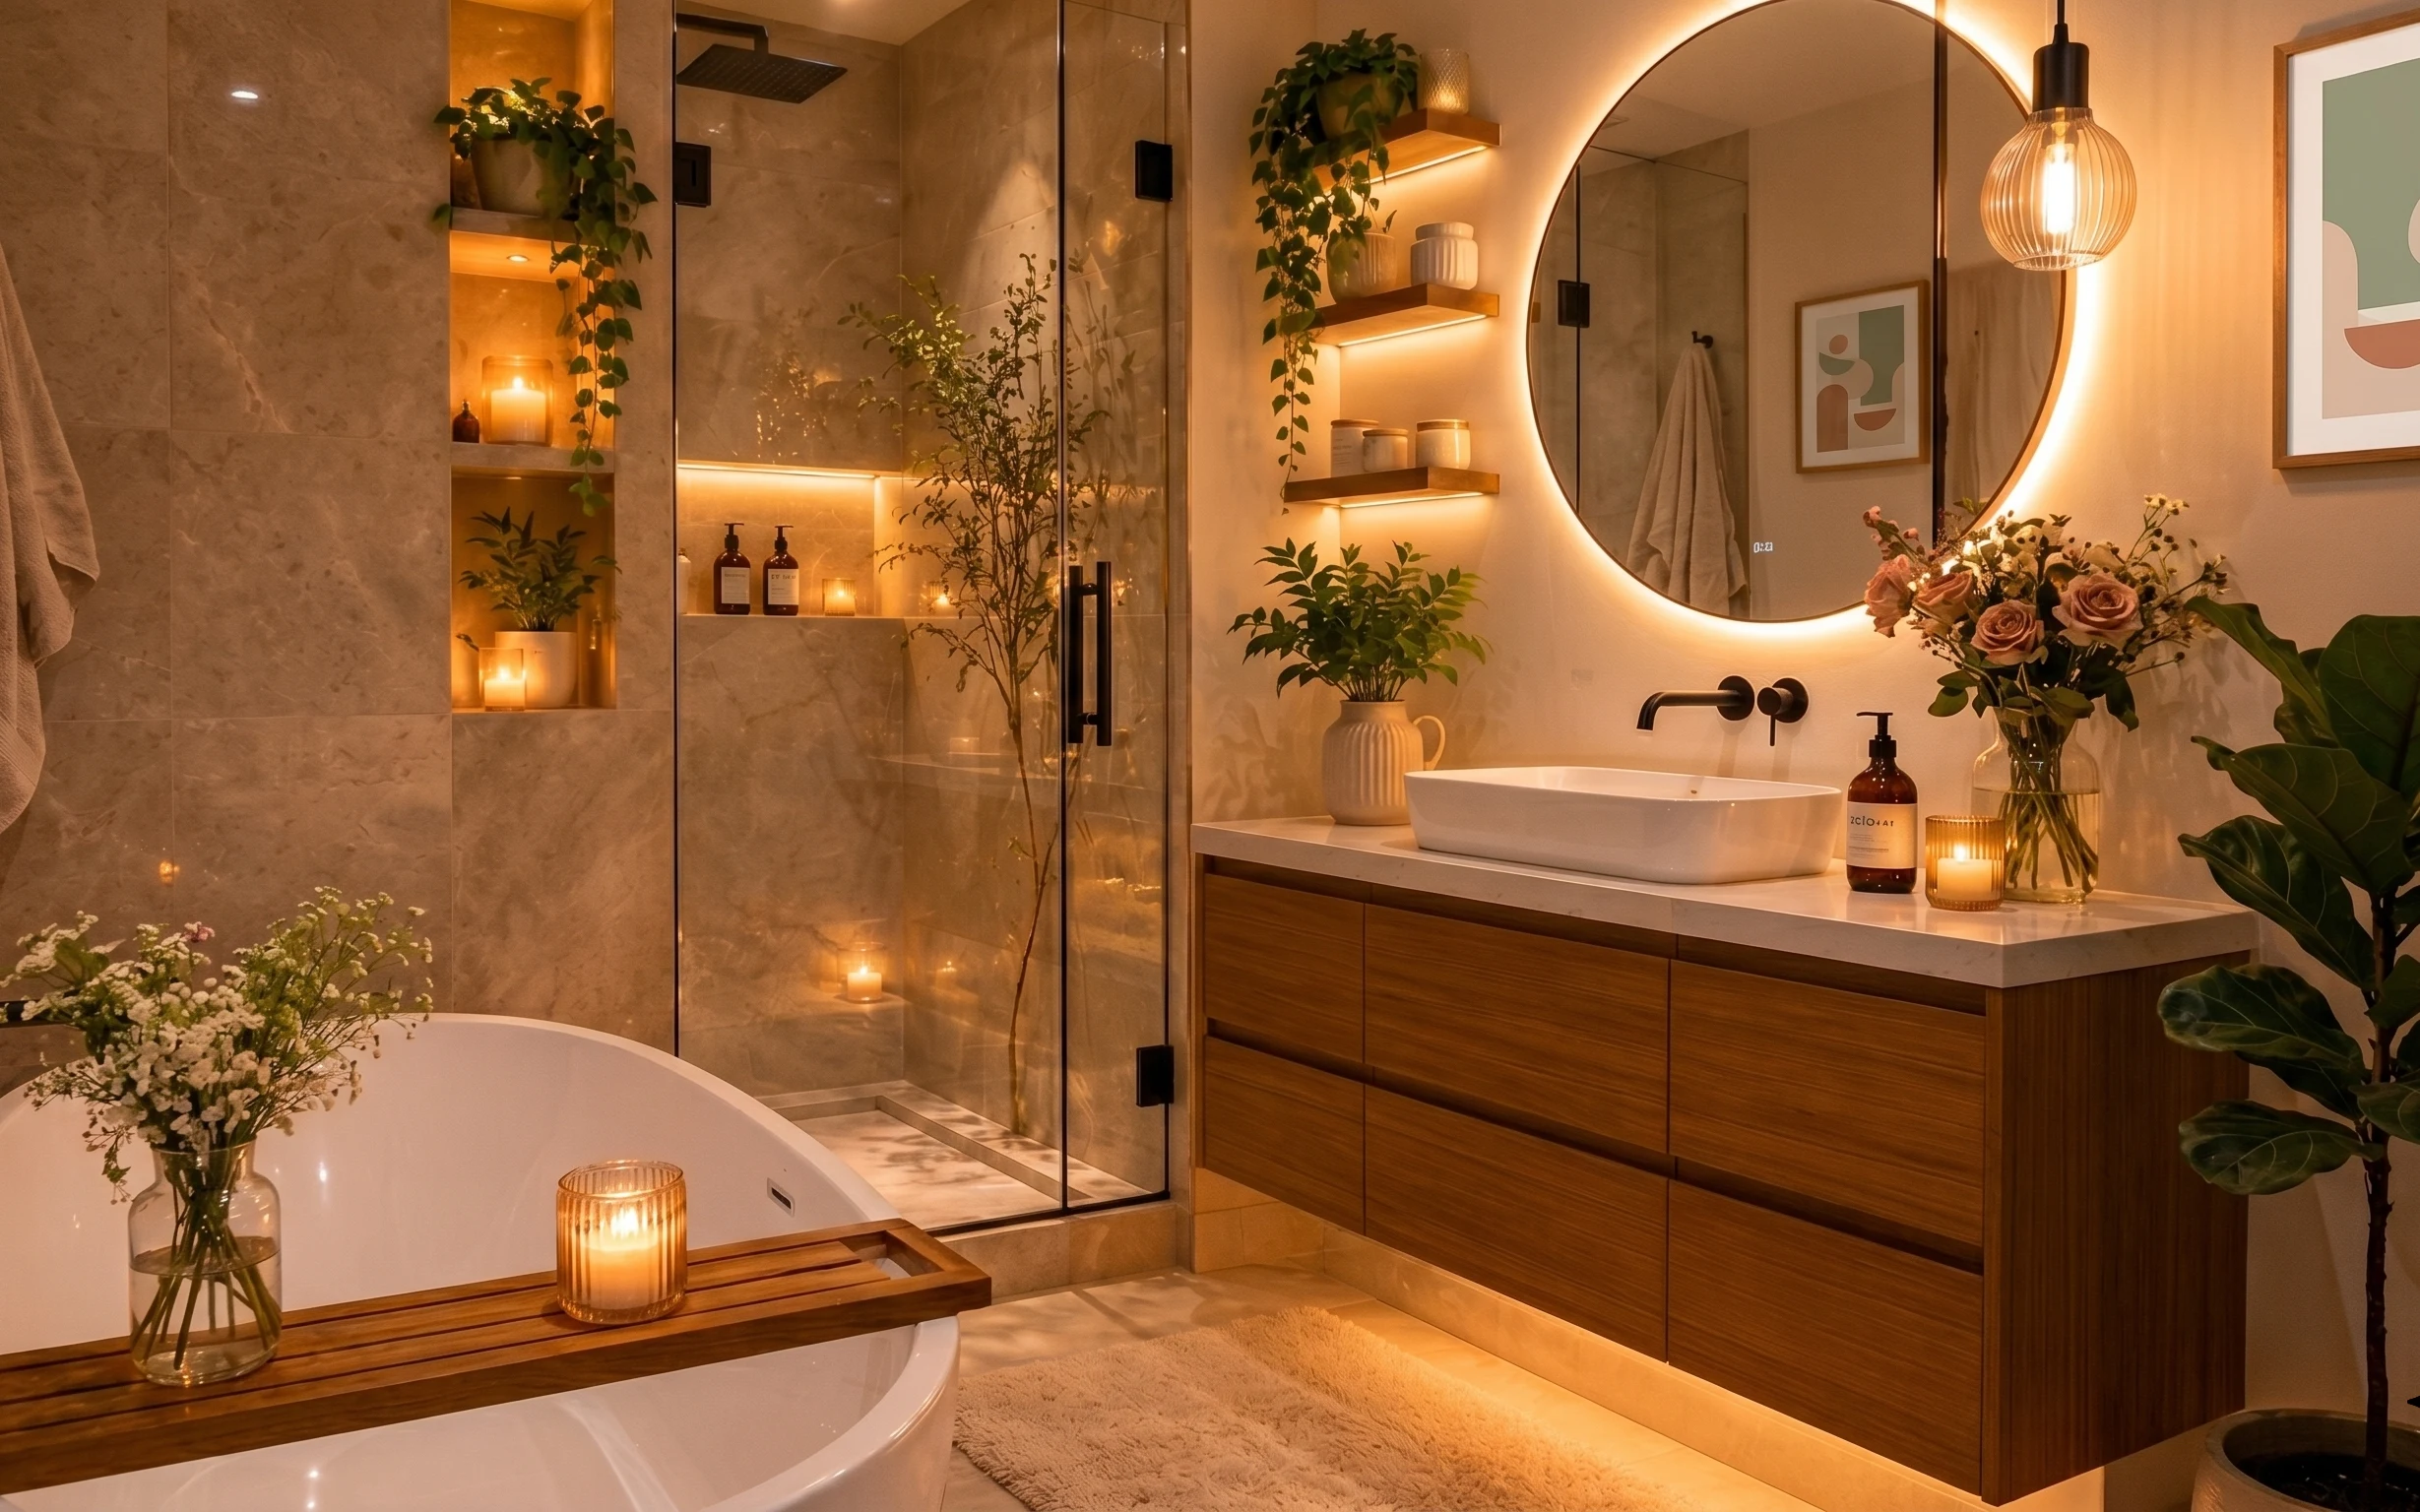
The whole look is really about temperature: warm beige stone, deep green plant leaves, and small pools of candlelight. In the photo you can spot three textures doing most of the work—the plush bath mat underfoot, the soft folded towel, and the clear glass vase catching highlights. The framed wall art adds a clean graphic note so the room doesn’t feel like one long “neutral blob.” This version is renter-friendly because every change is either textile or simple styling you can remove with zero landlord drama.
I kept trying to recreate this vibe by adding more stuff to the counter. The mistake I made in my own place was stacking decor vertically until it started looking cluttered instead of calm. What finally clicked was limiting hard elements to one framed print and repeating the color story (warm beige + green) through textiles, plants, and glass. Once the bath mat and towel were in the mix, the candle labels felt like the final punctuation—small, but noticeable.
Layer 1 — beige bath mat ($80) Soft underfoot, helps the room feel “finished”

A beige bath mat anchors the whole scene at the bottom of the frame, where your eye lands when you step in. In the photo, it sits directly on the floor in front of the vanity and visually “grounds” the warm wood cabinetry. This is the swap that makes the bathroom feel lived-in without requiring any wall changes or hardware. The trade-off: pick a mat you can shake or wash, because bathroom moisture will humble any delicate fibers. If your landlord won’t allow changes, a removable mat is one of the easiest ways to keep the look consistent room after room.
Choose a low-shed pile
Look for a mat that doesn’t shed like crazy—bathrooms don’t hide fibers, and you’ll thank yourself at clean-up time.
Layer 2 — framed wall art print ($25) One calm focal point on the right wall
The framed wall art print brings contrast to the warm beige tile and the darker mirror shape, especially near the right side of the photo. It’s also the one piece here that reads “intentional design,” because it gives your eyes a graphic resting place instead of a sea of warm neutrals. The trade-off you accept: you can’t rely on art size alone—choose one that’s visually balanced with the mirror and vanity height so it doesn’t crowd the reflection. For a rental, a frame you can hang with removable hooks is the practical move; it’s also easier to swap later when your taste changes.
Keep it centered near eye level
Even if you’re using removable hooks, aim for the middle of the print to land around the same height as your mirror’s visual center.
Layer 3 — folded towel on a rack ($30) Adds softness where the tile is otherwise hard

That folded towel on the rack is small, but it’s doing a lot: it adds a cloth texture next to the glossy stone and keeps the spa feeling from turning sterile. It also creates a color whisper—beige/neutral fabric—that matches the bath mat and doesn’t fight the warm mirror glow. The trade-off is practical: don’t fold towels too tightly if you’ll use them daily, or you’ll end up re-folding constantly. A towel is also a “move-friendly” decor choice—swap towels seasonally and the room updates without changing any permanent elements.
Skip overly bright towel patterns
High-contrast stripes or loud prints will compete with the framed art and the plant greens, and the whole palette starts wobbling.
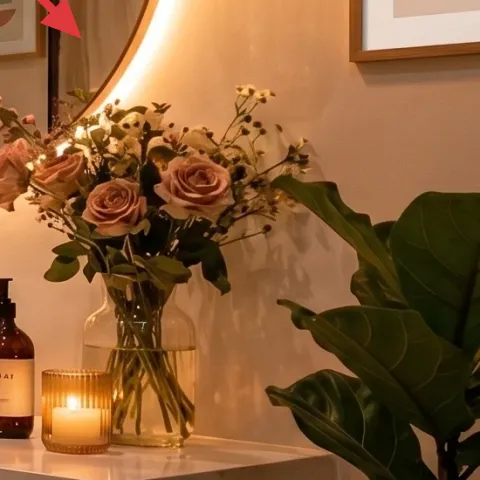
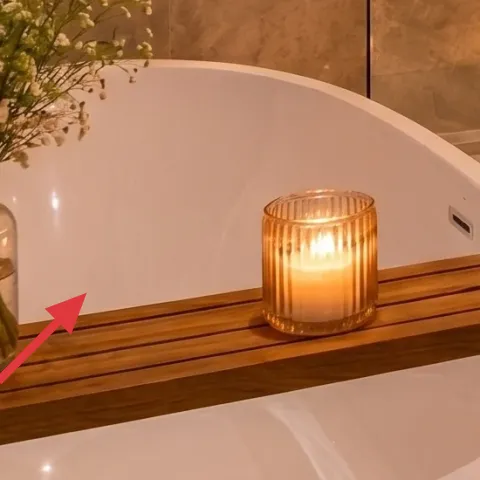
Layer 4 — candle in a glass jar ($20) Labeled glass makes the glow look curated

Make it instead of buying it
DIY apothecary jar labels for your candle glass so the jar looks “designed” even if you’re reusing the same candle base.
Materials
- Printable label paper — 1 sheet — craft store — $4
- Clear label/contact film — 1 small roll/sheet — stationery/craft store — $6
- Thin twine — ~3–5 yards — craft store — $2
Steps
- Cut label paper into the jar label sizes you want and test-fit on the jar.
- Design the text in a simple template (name + small “notes” line) and print.
- Trim the printed label edges for a clean border.
- Apply clear film on top (or wrap a small strip) to protect the ink from moisture.
- Wrap the label around the candle jar and align it so the text reads straight.
- Tie a short piece of twine around the jar for a classic apothecary tie-down.
Total DIY cost: $12 — saves about $8 over buying.
This jar candle (seen lit on the vanity) is all about that warm, soft atmosphere, but the real “styling” move is turning the jar itself into a small design element. In the photo, the glass catches the light, and the glow bounces off the nearby warm wood tones. The trade-off: candles are one of those decor items you can’t ignore—if you leave them too long, the scent can get overpowering. Use this label trick so the jar looks intentional even when it’s unlit. Then you can swap candles without starting over.
Label only the glass, not the wax
Apply labels to the jar so you’re not dealing with residue on the candle itself during replacements.
Layer 5 — decorative tray on the vanity ($20) Keeps bottles and candles from scattering
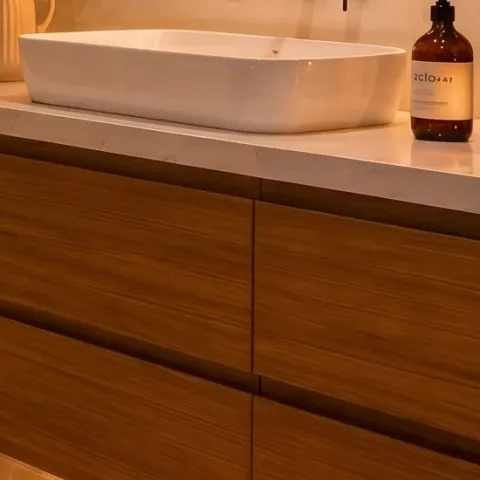
A decorative tray is the easiest way to make a countertop arrangement read “designed” instead of accidental. In the hero, the tray gathers the candle and the smaller bottles so everything has a shared boundary and spacing rhythm. This matters in bathrooms because the surface gets visually busy fast—soap, bottles, and random small items all want to spill out. The trade-off: measure your vanity top before buying, because trays that are slightly too wide can squeeze the sink zone. A simple tray also improves daily function—you can lift the whole setup as one piece for quick cleaning.
Use the tray to control height
Mix one tall element (like greenery) with one low element (like candle + label) so the arrangement doesn’t look stacked.
Layer 6 — large glass vase with pink and white flowers ($18) Adds brightness without loud color
The large glass vase with pink and white flowers brings softness to the corner and echoes the warm glow of the candles. Even in a room dominated by beige stone, flowers add a gentle contrast—light petals against clear glass—so the whole bathroom looks brighter without needing any paint changes. The trade-off: fresh arrangements need care, so this works best if you swap every week or two. If you want the same effect on a budget, use a small handful of stems you can refresh. Glass also amplifies sparkle from candlelight, which is exactly what’s happening in the photo.
Pick one flower tone to repeat
In a warm neutral bathroom, repeating pink or white across florals helps the scene stay cohesive.
Layer 7 — tall leafy plant in a pot ($35) Brings the green “spa garden” feeling
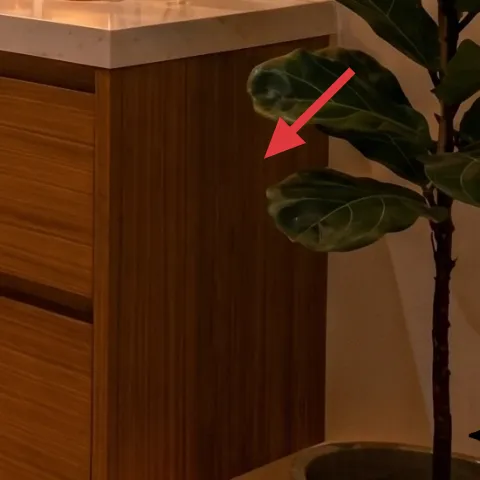
The tall leafy plant in a pot is what turns this from “nice bathroom decor” into a true spa corner. Its deep green tones balance the warm wood and the pale stone, and the leaf shapes add movement near the right side of the frame. The trade-off is light: leafy plants want enough brightness, so place it where it can actually thrive. In a rental, this is also an easy swap at move-out—plants pack well if you wrap the pot and keep the leaves protected. Choose a pot that looks finished on its own, since you can’t rely on the landlord’s shelving to style your plant.
Avoid placing it in constant standing-water zones
Bathrooms are humid, but puddles are still a fast track to unhappy roots.
The cost, layer by layer
| Layer | Item | Cost |
|---|---|---|
| 1 | Beige bath mat | $80 |
| 2 | Framed wall art print | $25 |
| 3 | Folded towel on a rack | $30 |
| 4 | Candle in a glass jar (DIY-labeled) | $20 |
| 5 | Decorative tray on the vanity | $20 |
| 6 | Large glass vase with pink and white flowers | $18 |
| 7 | Tall leafy plant in a pot | $35 |
| Total | $228 | |
A cheaper variant keeps the same layout: choose a lower-cost mat, use a smaller framed print, and swap the tall plant for a tabletop plant. You can also buy one bouquet at a florist and split it into smaller stems for the vase and candle area.
What worked, what didn't (across the whole room)
This bathroom spa corner works because it layers texture (mat + towel), glass (vase + candle), and green (plants) without adding clutter. The framed print gives the warm tile a visual “pause,” so the scene stays calm instead of busy.
What worked
- The beige bath mat makes the tile-and-wood palette feel softer and more intentional.
- Framed wall art adds a clean focal point near the mirror, preventing the look from feeling flat.
- Folding a towel brings textile texture right where hard surfaces dominate.
- Candlelight through the glass jar makes the countertop feel curated when everything else is neutral.
- A decorative tray keeps bottles and candles contained for an uncluttered, styled look.
- A tall leafy plant repeats the deep green tone and keeps the spa mood from reading “sterile.”
What didn't
- More decor on the countertop quickly turns the arrangement into visual noise.
- Using a plant in the wrong light level leads to limp leaves and an instantly tired look.
- Too many different floral colors fight the warm beige stone instead of harmonizing.
- If the towel is always rumpled, it shows up more than the art or candles.
- Choosing a very high-shed bath mat creates extra cleanup in a humid bathroom.
What we'd skip if we did it again
Skip swapping out anything landlord-installed in the bathroom—focus instead on textiles, countertop styling, and framed art that can come with you. You get the same visual payoff without risking the security deposit.
Skip buying a big “matching set” of bathroom accessories. In this layout, the tray + candle + vase arrangement already gives you cohesion; adding a second matching set makes the space look themed rather than lived-in.
Skip overdoing florals and repeating too many heights. The hero works because it has one tall plant moment, one framed wall moment, and mostly low objects on the vanity, letting candlelight do the atmospheric work.
Frequently asked
How long does this bathroom spa corner take to set up?
Plan on 1–2 hours the first time. The framed art placement and towel styling are quick, and the countertop look is basically “place + edit” (tray first, then candle, then vase). The DIY jar labels add about 20–40 minutes if you already have a printer-ready template and you’re comfortable aligning labels on glass.
If I’m renting, what’s the safest way to hang the framed wall art?
Use removable picture-hanging hardware made for renters, like Command Strips designed for picture frames, and follow the weight limit for the frame. Keep the art at eye level so it looks intentional, not crooked in the mirror. If your landlord has strict rules, you can also choose a frame that sits on a shelf or vanity surface instead.
What if my bathroom is smaller than the photo?
Scale down the “hard” visuals first. Use a smaller framed print (or a narrower frame) and choose a bath mat that fits just in front of the vanity area. Keep the tray compact so it doesn’t crowd the sink zone. You can still keep the mood by prioritizing candlelight (one jar) and one plant, rather than multiple items at once.
What if my bathroom is bigger—how do I keep it balanced?
In a bigger room, add spacing between items instead of adding more items. Give the plant a little breathing room and let the vase sit slightly farther from the sink. If the wall feels empty, consider pairing one framed print with a single additional small framed piece—just stay in the same color palette.
Where should I shop for these pieces without overpaying?
For the fastest wins, browse home essentials sections for candles in glass jars, bath mats, and trays, then check discount home stores for framed art. For the plant, local nurseries often have healthier stock than big-box clearance shelves. Florist bouquets can be more affordable than you expect—then you can use the glass vase repeatedly.
What’s the biggest mistake people make with bathroom decor like this?
The biggest mistake is stacking too many decorative items on the vanity. When everything is “pretty,” nothing reads intentional. This layout succeeds because it repeats a limited palette (warm beige + green) and uses one organizing surface (the tray) to keep the countertop calm.
More in Bathroom
What $250 buys: a renter-friendly bathroom spa corner
A renter-friendly bathroom spa corner built from 7 no-drill upgrades—warm lighting cues, soft textiles, and styled countertop moments. With…
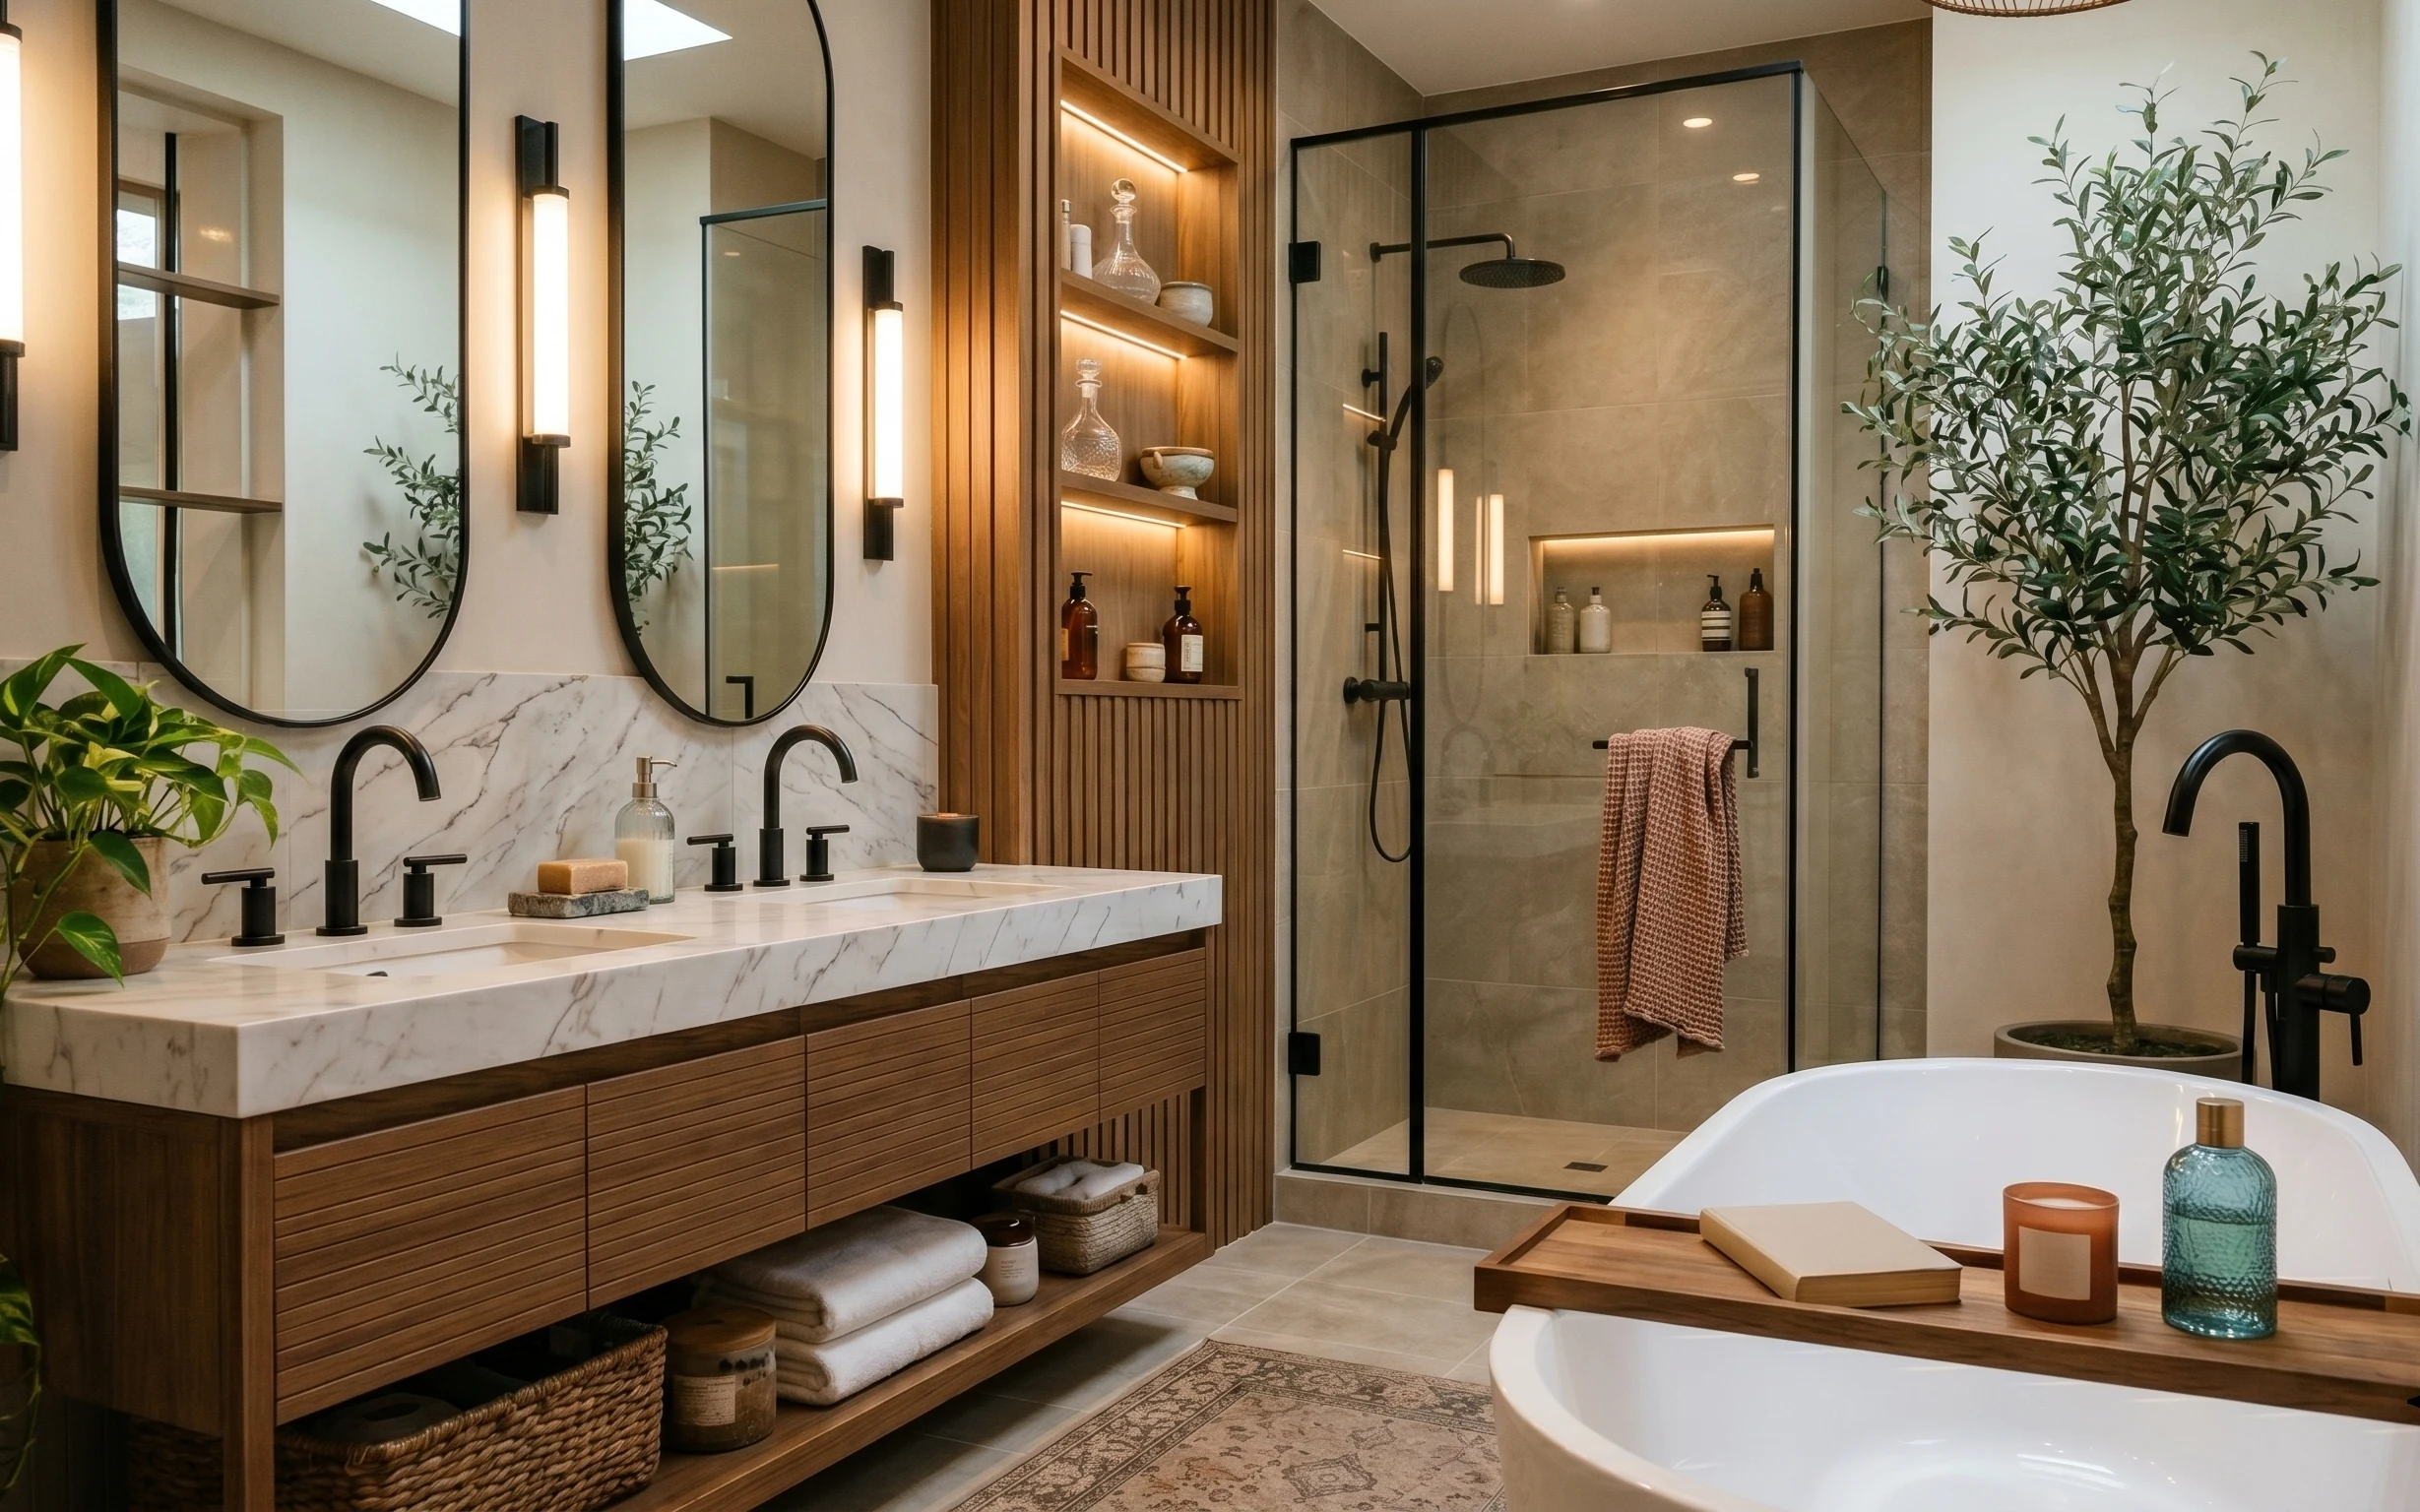
Bathroom spa-style nook refresh for $400: 7 budget swaps
A spa-style bathroom nook can look designed without a gut job. This $400 refresh leans on one grounding patterned rug, warm lighting, and e…

7 no-drill ways to style a bathroom vanity wall, $400
A warm, move-friendly bathroom vanity wall refresh under $400: swap in a patterned rug, add a checkered towel, style one oval mirror, and b…