- Best for
- Spa-like staging in a weekend
- Cost
- $565 total (under $600 cap)
- Difficulty
- Confident DIY
- Time
- 1 weekend
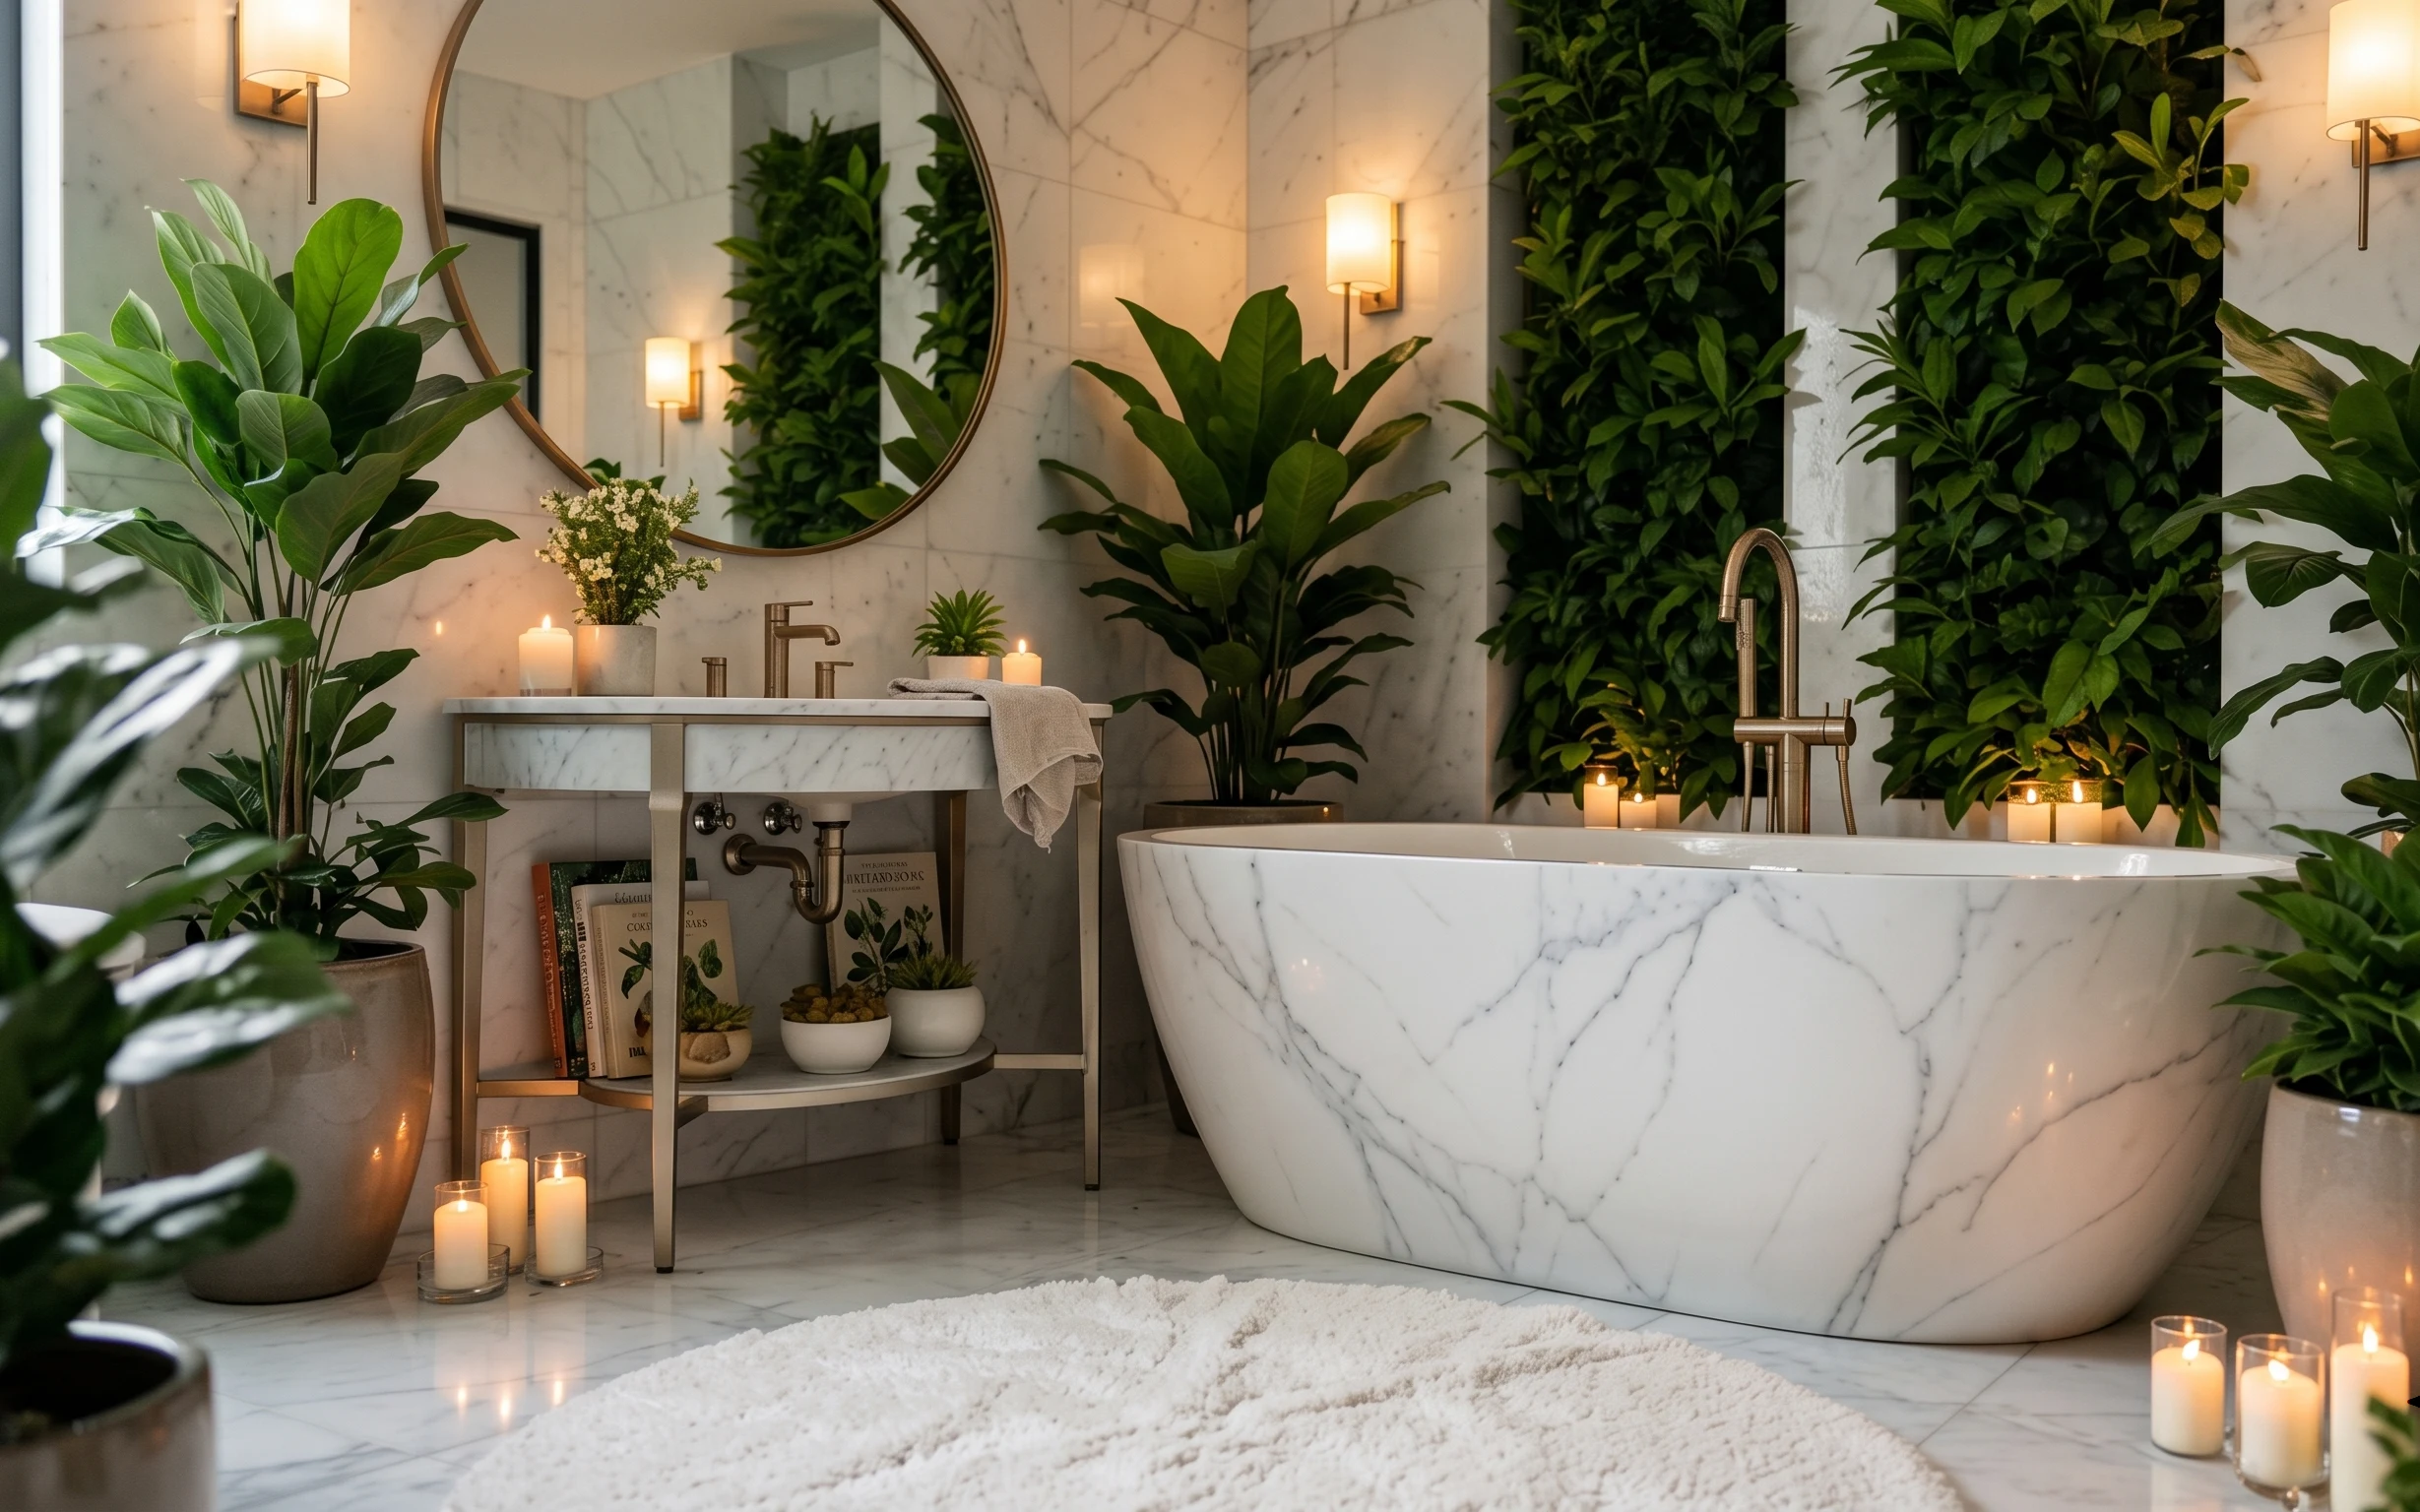
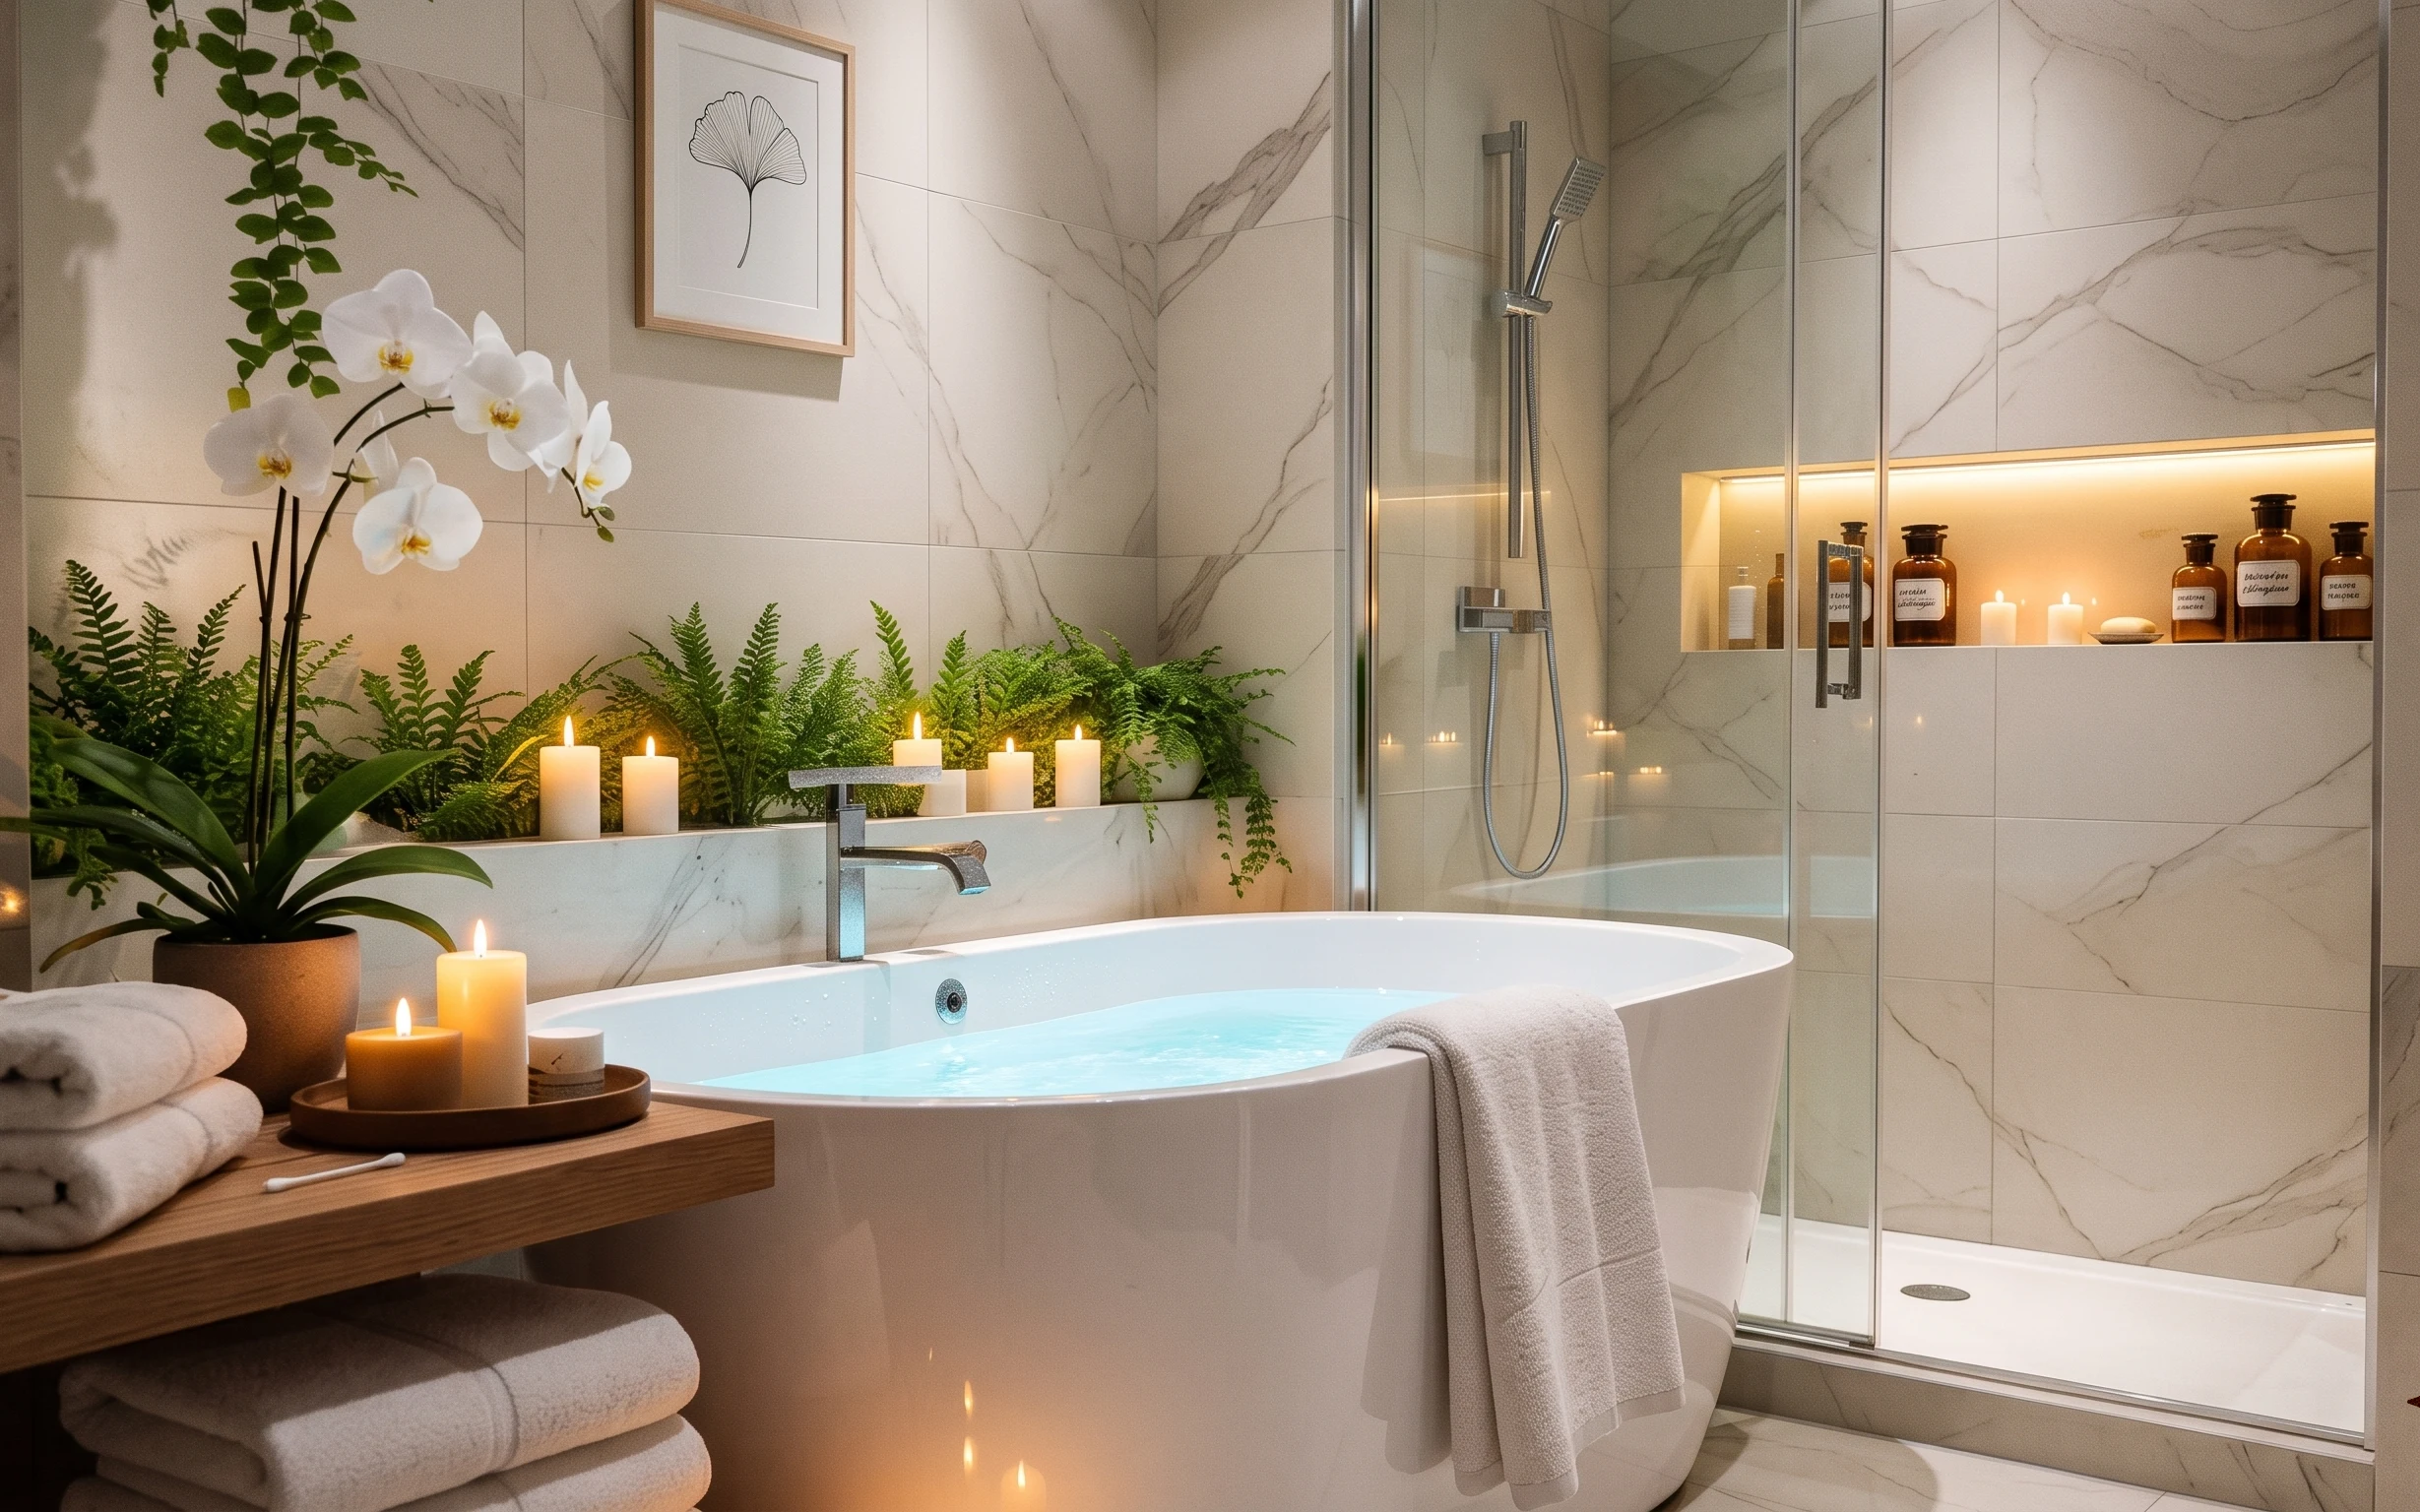
Why gold-and-marble accents are the freestanding bathtub corner of 2026
That round gold framed mirror and the marble vanity countertop set the whole tempo: warm, reflective, and clean. In this space, you can feel how the folded white towels, the brass shelving unit, and the orchid plant make the room look cared-for instead of just “decorated.” If you’ve ever tried to copy this vibe with random white items, you already know the problem—everything looks a little off. The fix is choosing a consistent metal tone (brass gold) and repeating it across mirror, fixtures, and shelving.
The first time I went after this look, I over-bought “pretty” bottles before I nailed the practical stuff: the towels and where the eye lands in the mirror. After that, I stopped treating the counter like a dumping ground. I anchored it with one soap tray, then built outward with a shelving unit for vertical height. Once you style for sightlines (mirror first, shelf second), the whole corner settles into place.
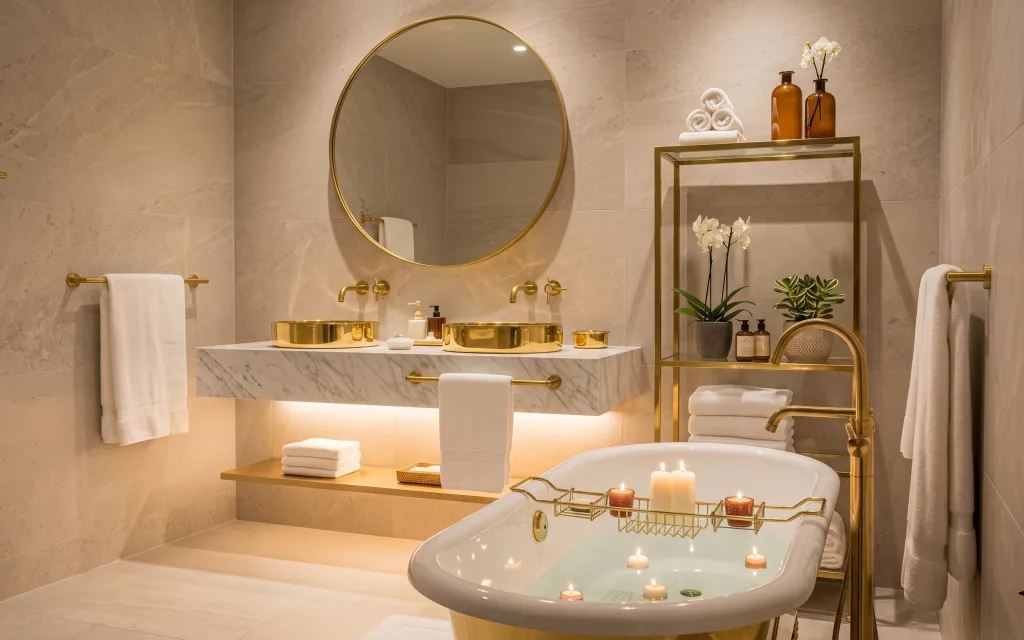
Layer 1 — Folded white towels ($35) Stack towels so they read like a set
The folded white towels sit on the lower ledge in the bathtub corner, giving the room a crisp landing zone right before the eye moves to the mirror. They also bring back the spa logic: fewer items, more intention. Choose towels with a consistent thickness (a plush fold reads richer than thin terry), and keep the stack height similar on each side. A common alternative is hanging more towels, but that usually looks busier against tile. Folding is faster and it photographs better under warm light, too.
Keep the stack height consistent
If one fold is taller, the corner looks accidental instead of curated—match the heights, then stop.
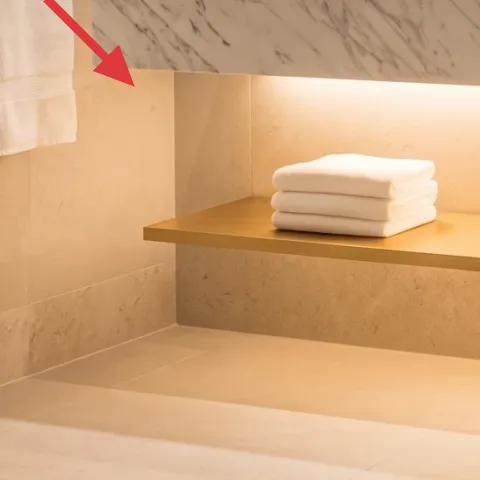
Layer 2 — Round gold framed mirror ($120) Make brass the focal point
The round gold framed mirror is centered high enough to stretch the room upward, while the brass finish keeps everything cohesive with the gold accents on the faucet and shelving. This is the layer that makes the whole bathroom feel designed, not staged. If you go “cheaper mirror,” you usually end up with a thin frame that doesn’t hold the light—so you want a frame that looks substantial. I’d rather spend here than on extra wall decor, because the mirror also doubles as a styling surface for your candle glow.
Position matters more than size here
Keep the mirror high enough to reflect the vanity light and the shelf, so the gold reads in multiple angles.
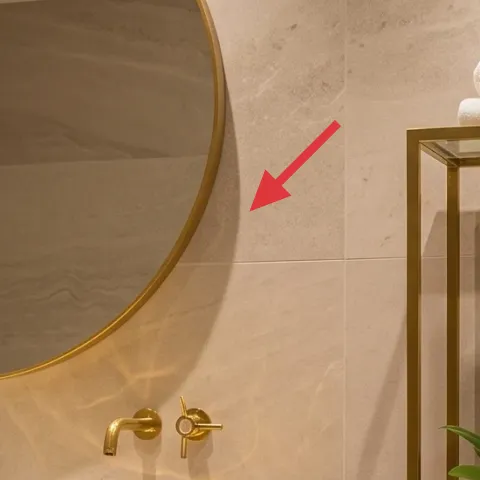
Layer 3 — Gold bathroom faucet ($120) Match the metal, not just the color
The gold faucet is doing quiet heavy lifting: it connects the marble vanity countertop to the brass shelving unit and towel hardware in the corner. Because your fixtures are close to the mirror, any mismatch in finish shows immediately—warm brass gold against cooler chrome is the classic “why does this look off?” moment. When you’re refreshing as an owner, the best trade-off is choosing one finish family and sticking to it. That’s also why I’m steering you away from mixing metals with other fixtures in the same bathroom.
Don’t pick a bright gold if the room is warm
If your tile reads beige and the lighting is warm, an icy, yellow-lacquered finish can look too stark.
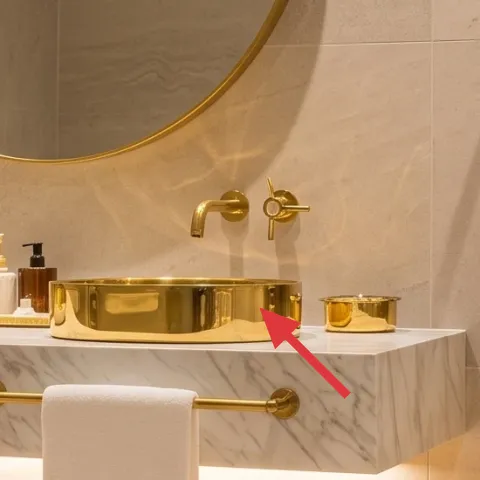
Layer 4 — Soap tray on vanity ($35) Contain the counter clutter
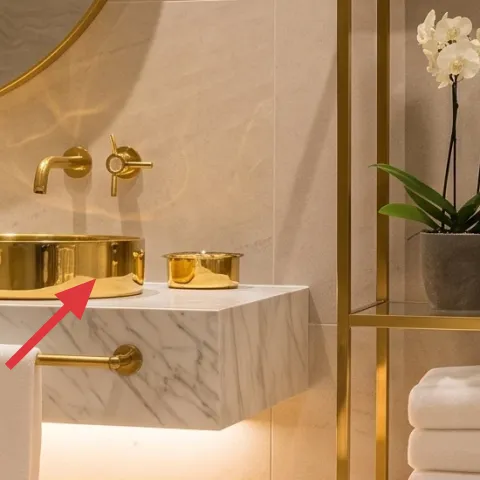
The soap tray on the marble vanity countertop is what turns a few small bottles into a composed vignette. On a marble surface, scattered items can look messy fast because the stone has enough pattern to “compete.” A tray also gives you edges—everything sits inside a boundary, which makes the whole counter feel styled instead of stocked. The obvious alternative is skipping the tray and placing bottles directly on the surface, but that rarely looks intentional. Keep the tray finish in the same warm family as the faucet so the eye doesn’t have to recalibrate.
Use a tray like a visual border
Place the soap dispenser and one extra bottle inside the tray, then leave the rest of the countertop breathing room.
Layer 5 — Brass shelving unit ($180) Add vertical storage and display

The brass shelving unit adds height on the right side of the corner, which makes the space feel less flat than a vanity-only layout. It’s also practical: you can stage the orchid plant and the bottles there instead of crowding the countertop. Choosing this kind of open shelving is a trade-off—you’ll dust it more than a closed cabinet—but you gain that airy, boutique look. If you tried to get the same effect by adding framed art or a cluttered shelf, it would compete with the mirror and tile. This unit keeps the focus on the mirror while still giving you a “moment” to style.
Repeat the brass tone near the mirror
When brass shows in both the mirror area and the shelving area, the corner reads as one scene.
Layer 6 — Decorative ceramic plant pot ($40) DIY a color pop without repainting the room
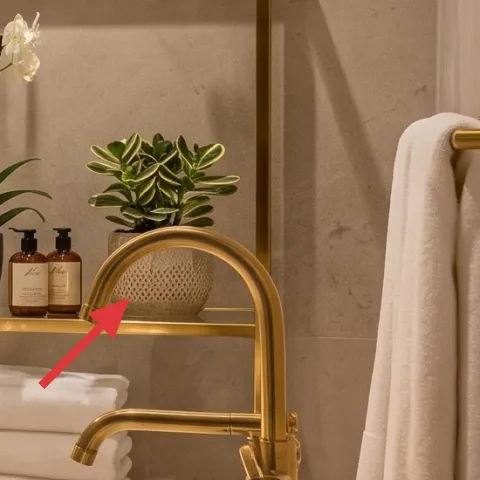
Make it instead of buying it
Paint the decorative ceramic plant pot so it picks up the room’s warm tones while staying easy to switch later.
Materials
- Paint for ceramic (small can) — 1 — craft store — $10
- Primer for slick surfaces — 1 small can — hardware store — $7
- Foam brushes — 2 pack — craft store — $6
- Clear topcoat (water-resistant) — 1 small can — hardware store — $5
Steps
- Wash the pot with dish soap, then dry completely.
- Lightly scuff the surface with fine sandpaper.
- Wipe dust away with a dry cloth.
- Apply primer in thin coats, letting each coat dry fully.
- Let the primer cure, then inspect for rough spots.
- Apply the ceramic paint in thin, even layers.
- Let the paint dry, then add a second color layer if needed.
- Dry time fully before handling so the finish doesn’t smear.
- Brush on a clear water-resistant topcoat.
- Let the topcoat cure without moving the pot.
- Re-pot the orchid plant once the finish is fully set.
- Style back into the shelving unit and keep it away from direct splashes.
Total DIY cost: $28 — saves about $12 over buying.
Layer 7 — Candles ($35) Bring the glow down to the tub line
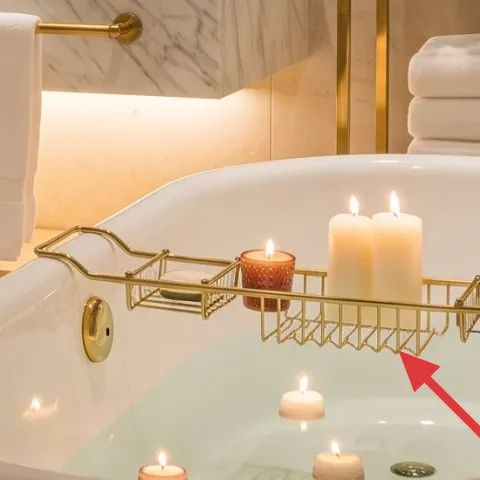
The candles along the edge of the freestanding bathtub are the finishing touch that makes the whole corner feel intentional, not just pretty. They mirror the warm light mood already in the room, and because they’re placed low, they soften the hard tile lines. The key is restraint: you want a tight cluster of candles that reads as a single styling decision, not a scattered collection. If you swap to a taller centerpiece, the glow can start competing with the mirror and the shelf. Keep wick-safe placement and keep an eye on distance from anything splash-prone.
Cluster candles in a “curve”
Line them up to follow the tub rim so the reflections look calm in the mirror.
The cost, layer by layer
| Layer | Item | Cost |
|---|---|---|
| 1 | Folded white towels | $35 |
| 2 | Round gold framed mirror | $120 |
| 3 | Gold bathroom faucet | $120 |
| 4 | Soap tray on vanity | $35 |
| 5 | Brass shelving unit | $180 |
| 6 | Decorative ceramic plant pot (DIY) | $40 |
| 7 | Candles | $35 |
| Total | $565 | |
If you want a cheaper variant, swap the brass shelving unit for a smaller gold-finish tiered stand and keep the mirror and faucet as the metal “anchor” points.
What worked, what didn't (across the whole room)
This corner reads spa-ready because the brass tone repeats and the styling is disciplined: towels stacked, countertop contained, and candles added at tub level. The only parts that can derail the look are metal mismatch and leaving too many small items loose on marble.
What worked
- The round gold framed mirror pulls focus and makes the vanity and shelf feel like one scene.
- Folded white towels add softness against tile while staying practical for daily use.
- The gold faucet makes the metal palette consistent near both the mirror and countertop.
- A soap tray creates boundaries on marble so bottles don’t look randomly placed.
- The brass shelving unit adds vertical structure and a clear display zone for the orchid plant.
- Candles at tub height soften the room and echo the warm light mood.
What didn't
- Mixing finishes (warm brass next to cooler chrome) makes the corner feel unfinished.
- Skipping a tray on marble turns the counter into “storage,” even when items are pretty.
- Over-styling the shelf with too many small bottles crowds the orchid plant.
- Using too-tall candleholders competes with the mirror instead of rounding the glow.
What we'd skip if we did it again
Skip adding more framed decor behind the mirror. With a round gold framed mirror already doing the work, extra wall art can compete with reflections and tile texture.
Skip placing bottles directly on the marble countertop. A soap tray is the small upgrade that keeps the surface readable; without it, the look turns cluttered fast.
Skip mismatched gold tones across fixtures and shelving. If the faucet and shelving aren’t in the same warm family, the corner loses the cohesive spa effect.
Frequently asked
How long does this kind of bathroom refresh take?
Plan for about a weekend. Styling the towels, countertop items, and candles can be done in an afternoon. Swapping a mirror or faucet can take longer depending on how prepared you are with measurements. The slow part is the DIY pot: drying and curing time for primer, paint, and topcoat adds up, even if the hands-on steps are quick.
Is this renter-friendly, or does it need owner-only changes?
The styling layers (towel stacks, tray placement, candle cluster, plant pot paint) are renter-safe. The round mirror and faucet layers are usually owner choices—if you’re renting, you can still copy the visual hierarchy by keeping your current fixtures and updating only towels, the soap tray, and shelf styling. For the brass shelving unit, look for a freestanding option if you can’t drill.
What if my freestanding bathtub corner is smaller?
Keep the mirror but scale down the shelf footprint. The rule of thumb is to preserve the same sightline: mirror first, then shelf, then countertop. Use fewer candles (a tighter cluster) and one towel stack instead of multiple folds. If the counter looks busy, prioritize the soap tray and remove extra bottles until it reads as one vignette.
What if the ceiling is higher and the mirror feels low?
Raise the mirror slightly so it reflects both the vanity and the shelf area without pushing your eye upward too much. The visual goal is that you can style the shelf and still see it in the mirror. If you can’t reposition the mirror, adjust by moving the plant pot and bottles closer to the mirror side so they show more clearly.
Where should I shop for the key brass look?
For the brass mirror frame and shelving unit, home design stores and lighting/home accessories retailers usually have the closest finishes to what you see here. For towels and tray accessories, focus on texture and size consistency more than brand. For the DIY ceramic pot, any craft store with ceramic paint and a water-resistant topcoat works—just read the label for intended surface use.
What’s the biggest mistake people make in this type of bathroom?
The most common miss is mixing too many finishes and then compensating with more decor. In this corner, brass gold needs to repeat across the mirror, fixtures, and shelving so the space feels intentional. The second mistake is leaving bottles loose on marble—use a tray to create boundaries and keep the counter from looking like storage.
More in Bathroom

7 weekend swaps for a $600 freestanding bathtub corner refresh
Turn a freestanding bathtub corner into a spa-ready bathroom for $600. This weekend refresh leans on warm brass accents: a round gold mirro…
How to get a spa bathroom look for under $700
A plant-forward, marble-and-brass spa bathroom setup that reads expensive—built from 7 swaps you can shop this weekend. With a $700 target,…
7-swap bathtub nook refresh for a $500 weekend
A warm botanical bathtub nook refresh with candle glow, green fern texture, and a framed print—built on a $500 weekend budget. This photo s…