
- Best for
- Layering a sofa seating area with no-drill decor
- Cost
- $196 total (about $250 ceiling)
- Difficulty
- Easy—mostly textiles, styling, and plants
- Time
- 1–2 hours for shopping + styling
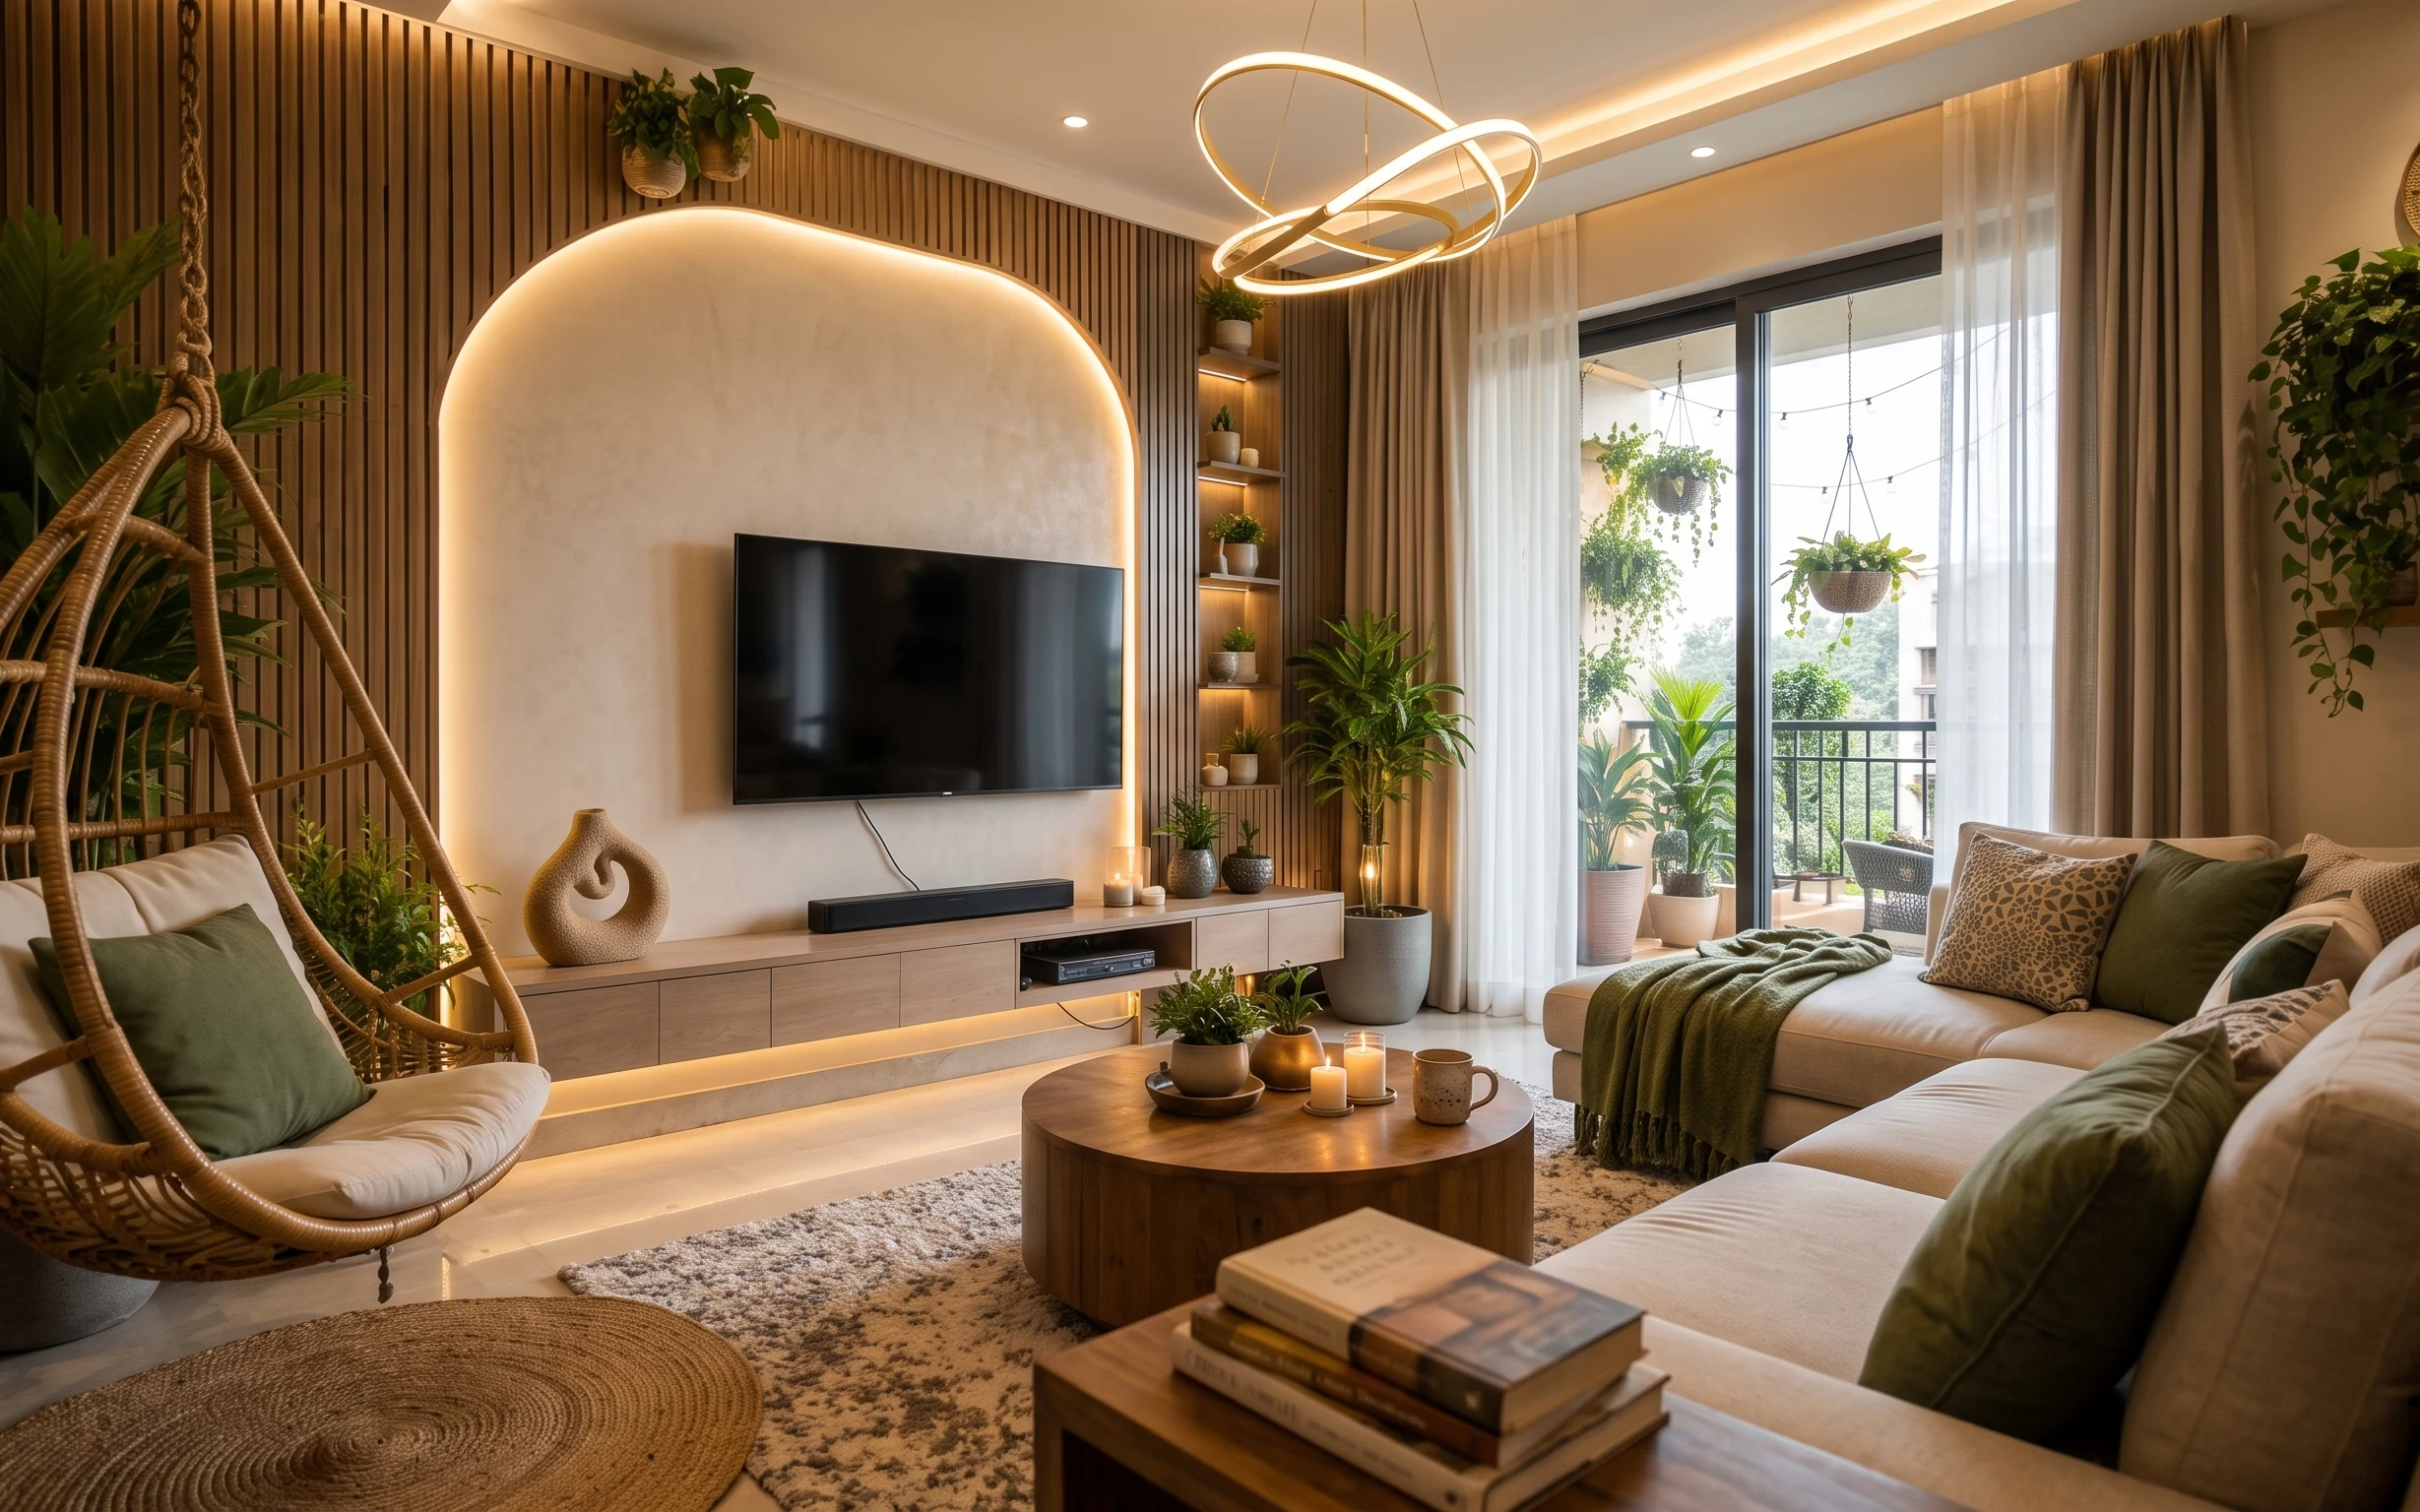
Why warm wood-and-olive accents are the sofa seating area of 2026
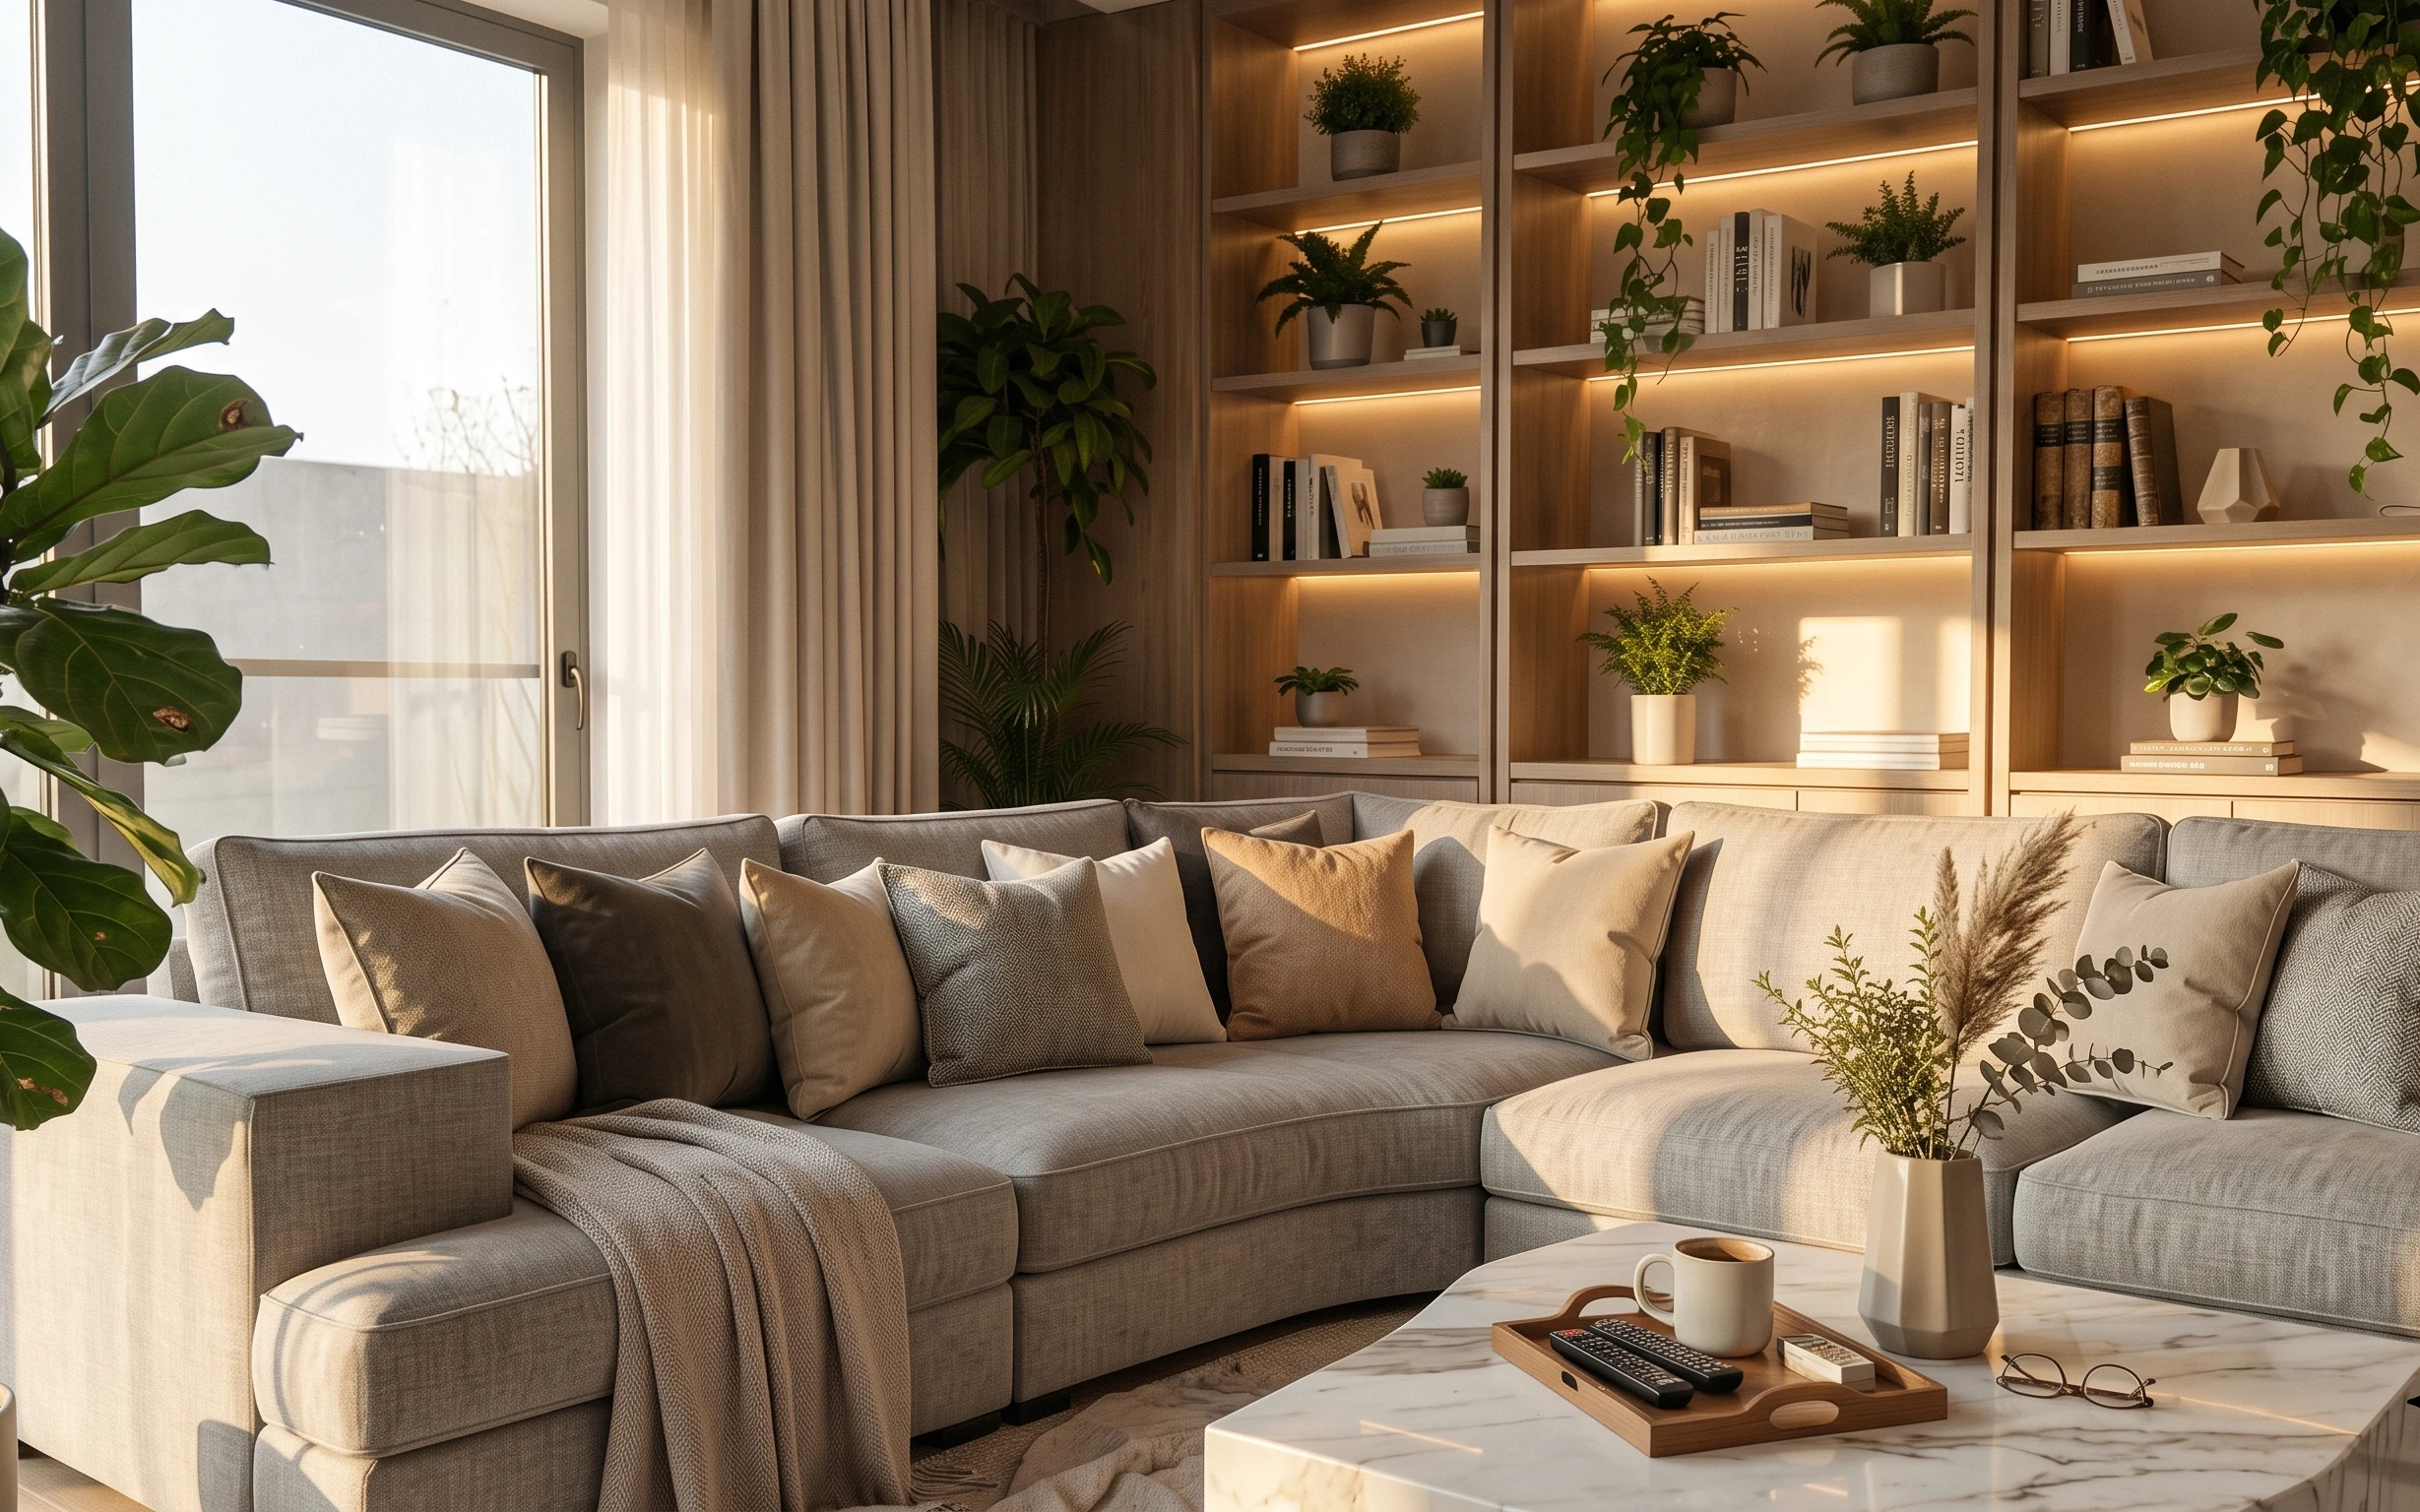
The built-in shelving with warm LED strips already gives the scene its glow, so the quickest wins are the soft, touchable pieces. In the photo, a gray knit throw blanket sits over the chaise, while cream and stone-toned pillows repeat the same calm palette. A marble coffee table adds contrast, and the wood tray makes everyday clutter feel intentional. This is achievable on a renter budget because everything here is either washable textiles or removable styling you can pack away when your lease ends.
My own mistake the first time I tried this vibe: I kept the pillows too “matchy,” so the sofa looked flat instead of layered. Swapping just one pillow with a stitched texture changed the whole read, especially in warm evening light. The other thing that surprised me was how much plants do—two well-placed pots add height and softness without needing to touch walls or fixtures.
Layer 1 — gray knit throw blanket draped over chaise ($30) texture you can spot at a glance

A gray knit throw blanket draped over the chaise gives the seating area its lived-in, tactile texture. Choose a knit that looks slightly open-weave or softly nubby, not smooth jersey—its texture shows even when the light is warm. This works better than adding another pillow only, because blankets cover more surface area and anchor the whole “layered” story. The trade-off: a throw like this is more visible in photos, so go for a neutral you actually like seeing every day, not a trendy color that will tire you out.
Keep the blanket weight believable
A medium knit drapes without standing straight up. Too thick looks bulky on a sofa like this; too thin can slip off.
Layer 2 — cream throw pillow with stitched texture ($18) contrast against the soft gray
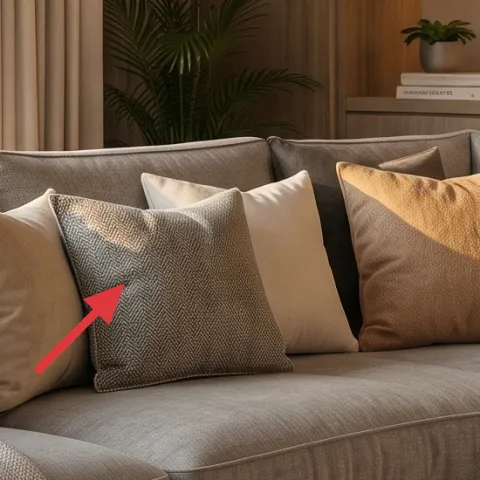
The cream throw pillow with stitched texture adds contrast to the sofa’s softer gray upholstery. Look for stitching that reads as subtle patterning—something you can feel, not just see—so it holds up from across the room and in close-up shots. I’d skip a glossy, satin-like pillow here; on this palette it catches the LED light and can look shiny instead of calm. Instead, pair it with at least one darker pillow so the cream doesn’t become the only bright spot. The trade-off is it’s less “decorative-only” and more of a daily-use piece.
Texture beats color variance
Stitched or woven texture gives you depth without forcing a bold hue change in a renter-friendly palette.
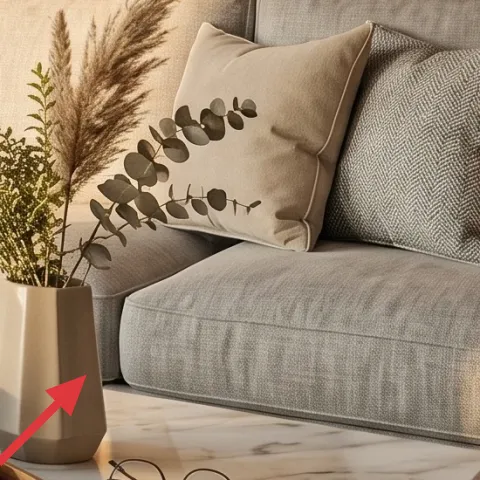
Layer 3 — wood tray on marble coffee table ($35) a place for the small stuff
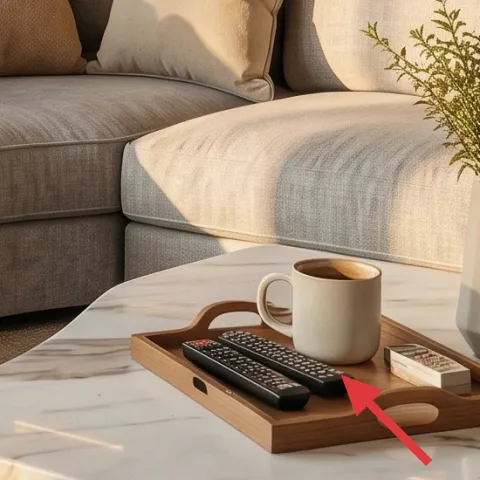
A wood tray on the marble coffee table turns everyday items—remote, glasses, a mug—into a curated vignette. Pick a tray with warm wood tones that echo the built-in shelving, then use it to group objects into one “zone” instead of scattering them across the tabletop. This choice is more practical than a decorative basket because a tray has clean edges and reads like intentional styling. The trade-off is that you’ll need to reset it occasionally, but that’s a small price for a surface that always photographs tidy.
Style with one tray rule
Keep objects clustered within the tray perimeter so the marble stays visually calm.
Layer 4 — white ceramic vase on coffee table ($18) the clean backdrop for stems
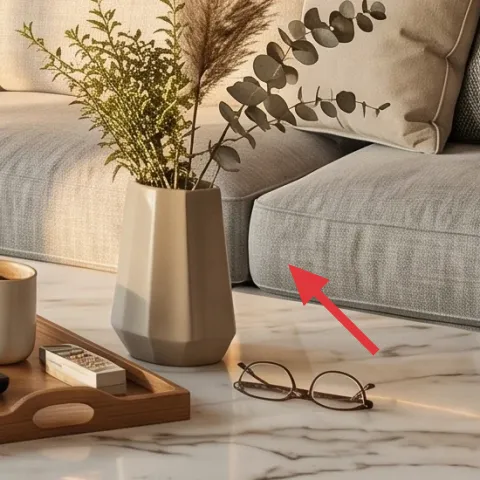
The white ceramic vase works like a high-contrast “breathing space” on the marble table. Its matte look keeps the scene from getting too reflective, which matters next to the glossy stone and warm LED lighting. If the vase were clear glass, it could compete with the plants and books in the shelving; the white color lets the stems be the star. Place it so it sits slightly off-center within the tray styling zone—close enough to feel connected, far enough to avoid crowding the coffee table. Trade-off: you’ll want to wipe it down so the white stays crisp.
Don’t choose a too-small vase
If the opening is narrow, stems bend oddly and the arrangement looks top-heavy.
Layer 5 — foraged dried floral stems in the vase ($25) height without fuss
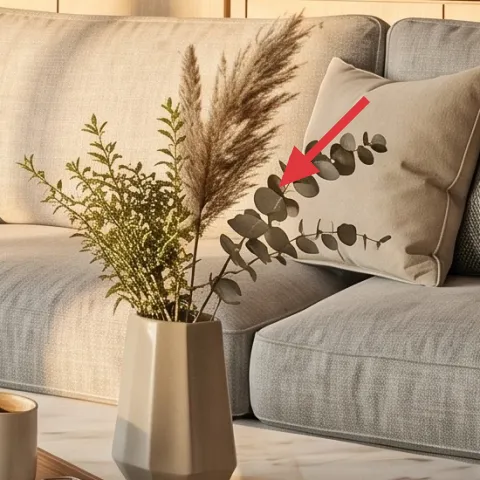
Make it instead of buying it
DIY foraged dried floral stems so the vase gets that airy height, without paying for a pre-made dried bouquet.
Materials
- Dried stems mix (foraged or already-dried) — small bundle — free (budget $6)
- Floral tape — 1 roll — craft store — $5
- Twine or jute string — 1 small spool — craft store — $4
Steps
- Gather stems with different shapes (thin + feathery + a few thicker stems) for natural variation.
- Trim each stem so you can build a “tall” layer and a “low” layer without gaps.
- Wrap the thick stems first using floral tape to create a sturdy core.
- Add thinner stems around the core, tightening tape as needed to keep the structure.
- Tie a loose twine loop around the base to keep everything together while you carry it.
- Test the arrangement inside the vase, adjusting stem lengths until the height looks balanced.
- Remove the bundle from the vase and tape/tie any loose ends so they don’t shed as quickly.
- Place the bundle back into the vase and fluff the stems outward with your hands.
Total DIY cost: $15 — saves about $10 over buying.
Foraged dried floral stems give you the airy, natural look without needing frequent watering. In the photo, the stems rise above the white vase and spread outward just enough to soften the sharp lines of marble and the tidy wood tray. This is the renter-friendly version of “statement decor”: no drilling, no permanent fixtures—just a vase moment that you can swap out when it fades. The trade-off is that dried stems shed a little, so keep the bundle loosely contained until it’s placed, and wipe the vase rim after styling.
Go for movement, not symmetry
One side slightly taller than the other reads more natural and looks good from multiple angles.
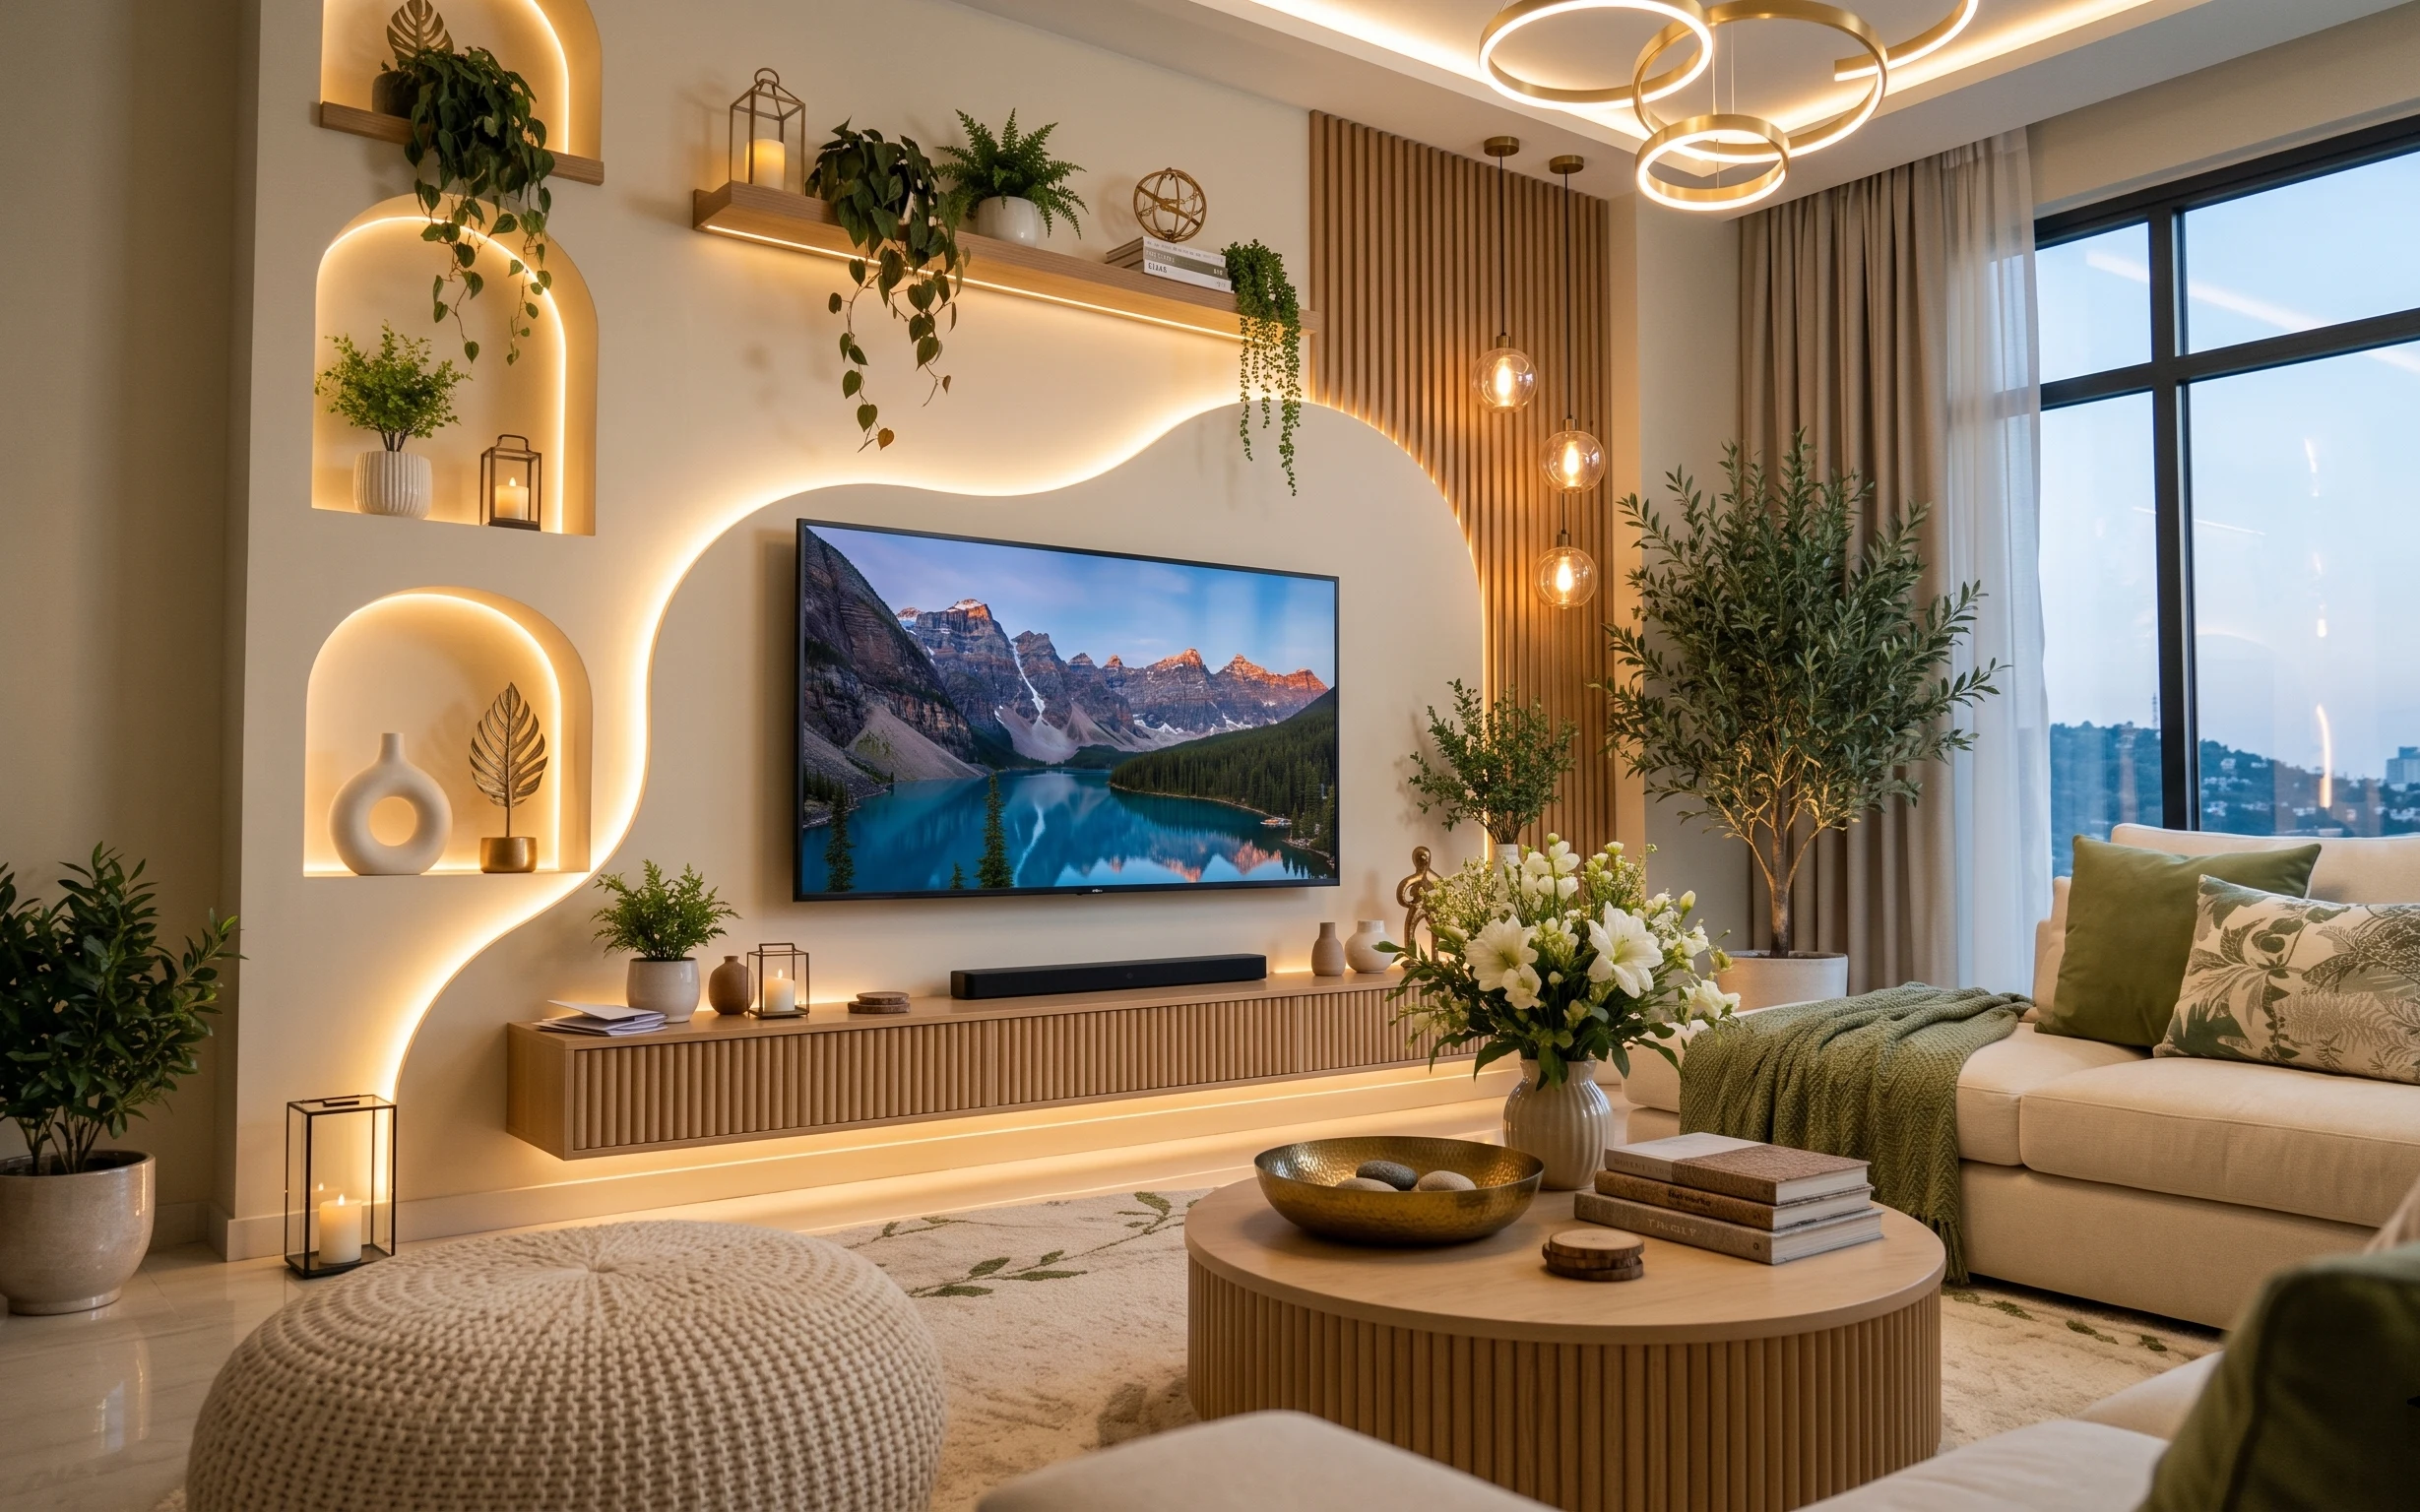
Layer 6 — floor potted plant in white pot ($40) a soft vertical counterweight
A floor potted plant in a white pot adds vertical softness and makes the seating area feel intentional rather than “just furniture.” The plant’s airy silhouette balances the sofa’s low, horizontal mass, especially when the shelving lighting creates warm highlights around it. This works better than another tabletop vase because it gives depth in the third dimension—you feel it even when you’re not looking at the coffee table directly. The trade-off is you’ll want a pot that’s stable and not too top-heavy, so it doesn’t tip when you walk by or carry things across the room.
Match pot color to your vase
Repeating white ties the coffee table and the corner plant into one palette.
Layer 7 — large broad-leaf potted plant on left ($40) instant greenery at window light scale
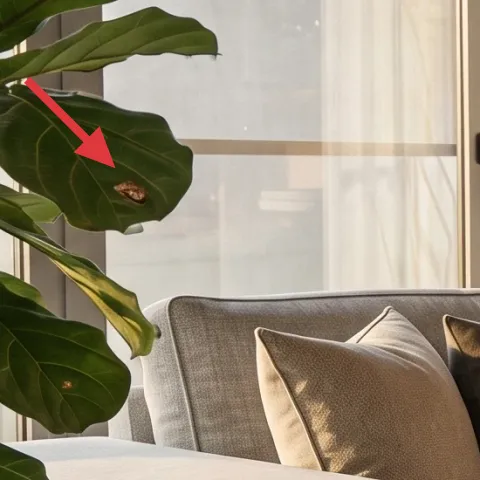
The large broad-leaf potted plant on the left brings an immediate “outdoor-in” feeling that fits the warm, modern styling. Because it’s near the window, it’s helped by daylight and looks lush without needing complicated maintenance. Choosing a big-leaf shape matters: it fills the negative space and gives your room a sculptural presence, instead of looking like a small accessory. The trade-off is scale—this kind of plant needs a little breathing room so the leaves aren’t constantly brushing curtains or blocking sightlines.
Let the plant do the color work
Green sits naturally with warm wood and soft gray, so you can keep textiles neutral.
The cost, layer by layer
| Layer | Item | Cost |
|---|---|---|
| 1 | Gray knit throw blanket | $30 |
| 2 | Cream throw pillow with stitched texture | $18 |
| 3 | Wood tray | $35 |
| 4 | White ceramic vase | $18 |
| 5 | Foraged dried floral stems (DIY) | $25 |
| 6 | Floor potted plant in white pot | $40 |
| 7 | Large broad-leaf potted plant | $40 |
| Total | $196 | |
If you want to spend less, scale back to one plant moment plus a smaller tray and fewer pillows. Keep the gray knit throw and a white vase, then use the built-in shelving light as the “glow” instead of adding more decorative items.
What worked, what didn't (across the whole room)
This seating area reads calm because the textures repeat: knit, stitched fabric, matte ceramic, and plant leaves. The warm LED shelving also does a lot of heavy lifting, so the rest of the styling stays simple.
What worked
- The gray knit throw blanket adds visible texture that keeps soft gray from looking flat.
- Mixing cream and darker pillows creates depth without introducing loud colors.
- A wood tray on marble makes everyday objects look intentional, not cluttered.
- The white ceramic vase gives a clean visual pause for dried stems and keeps the palette cohesive.
- Plants add height and softness, balancing the sofa’s low, horizontal lines.
- The warm shelf lighting keeps the whole room feeling cozy without extra lamps.
What didn't
- Trying to match every pillow exactly makes the sofa look “styled” instead of lived-in.
- A too-small vase crowds the stems and makes the arrangement look top-heavy.
- Leaving objects spread across the marble table turns the tray effect into visual clutter.
- Using a glossy pillow or ceramic piece can fight the warm LED light and feel less calm.
What we'd skip if we did it again
Skip buying a whole new coffee table set. The marble surface already looks expensive, so the better move is one removable staging tool: a wood tray plus a vase-and-stems moment.
Skip adding more decor items than you can group into one zone. Without a simple “tray perimeter” and “vase height” rule, the look drifts into scattered.
Skip tiny plants meant for shelves only. For this room scale, go for either one large broad-leaf pot near the window or one floor plant with visible volume.
Frequently asked
How long does this kind of living room refresh usually take?
Most of the work is just setting up textiles and styling objects: drape the throw, swap pillow covers, place the vase-and-stems, then build the tray grouping on the marble surface. Shopping and DIY dried stems typically add the most time. For a renter, plan about 1–2 hours for the full look, and less if you already have a vase and a tray.
If I’m renting, what’s the safest way to get this look without touching walls?
Keep the changes focused on removable items: throw blankets, pillow covers, a coffee table tray, and freestanding plant pots. If your shelving light is landlord-installed, let it do the glow work and don’t try to replace fixtures. The dried stems in a vase are also easy to pack away when you move.
What if my sofa is smaller or my room feels tight?
Use the same palette, but reduce scale: one large pillow swap instead of a bigger pillow mix, and one plant moment rather than two. You can also choose a smaller tray so it doesn’t visually crowd the coffee table. Keep the dried stems tall enough to create height, but trim the spread so the arrangement doesn’t block walking paths.
Where should I shop for the tray, vase, and neutral textiles?
For neutral textiles like a knit throw and stitched pillow covers, look at home stores with linen-and-knit basics or bedding sections online. Wood trays and white ceramics are usually easiest to find in home decor retailers and marketplaces. Plants are a trade-off: local nurseries for healthier leaves, or budget-friendly pots if you’re replacing only the plant container.
What’s the biggest mistake people make with this style?
The most common misstep is skipping texture. If everything is smooth—pillows, throw, and decor—the room reads flat, especially with warm LED lighting that makes shiny surfaces look louder. Aim for knit, stitched fabric, and matte ceramic, then let plants add the organic texture.
More in Living Room
Under $250: no-drill swaps for a warm gray sofa seating area
A warm, japandi-style sofa seating area refresh you can recreate for about $250 using renter-safe swaps. Focus on soft gray textiles, a sty…
5 no-drill living room updates for $600
A warm, plant-heavy living room refresh with $550 in move-ready swaps and one no-drill DIY. Focus: a dyed green pillow, layered textiles, a…
7 move-ready swaps for a $400 living room sofa corner
A warm walnut-and-olive sofa corner refresh built from 7 no-drill swaps, totaling $378 (under $400). This plan focuses on rug grounding, la…