
- Best for
- focal-point wall + calm bedding texture
- Time
- 3–5 hours (one day)
- Total cost
- $499
- Renter-safe
- Yes (no drilling; removable layers)
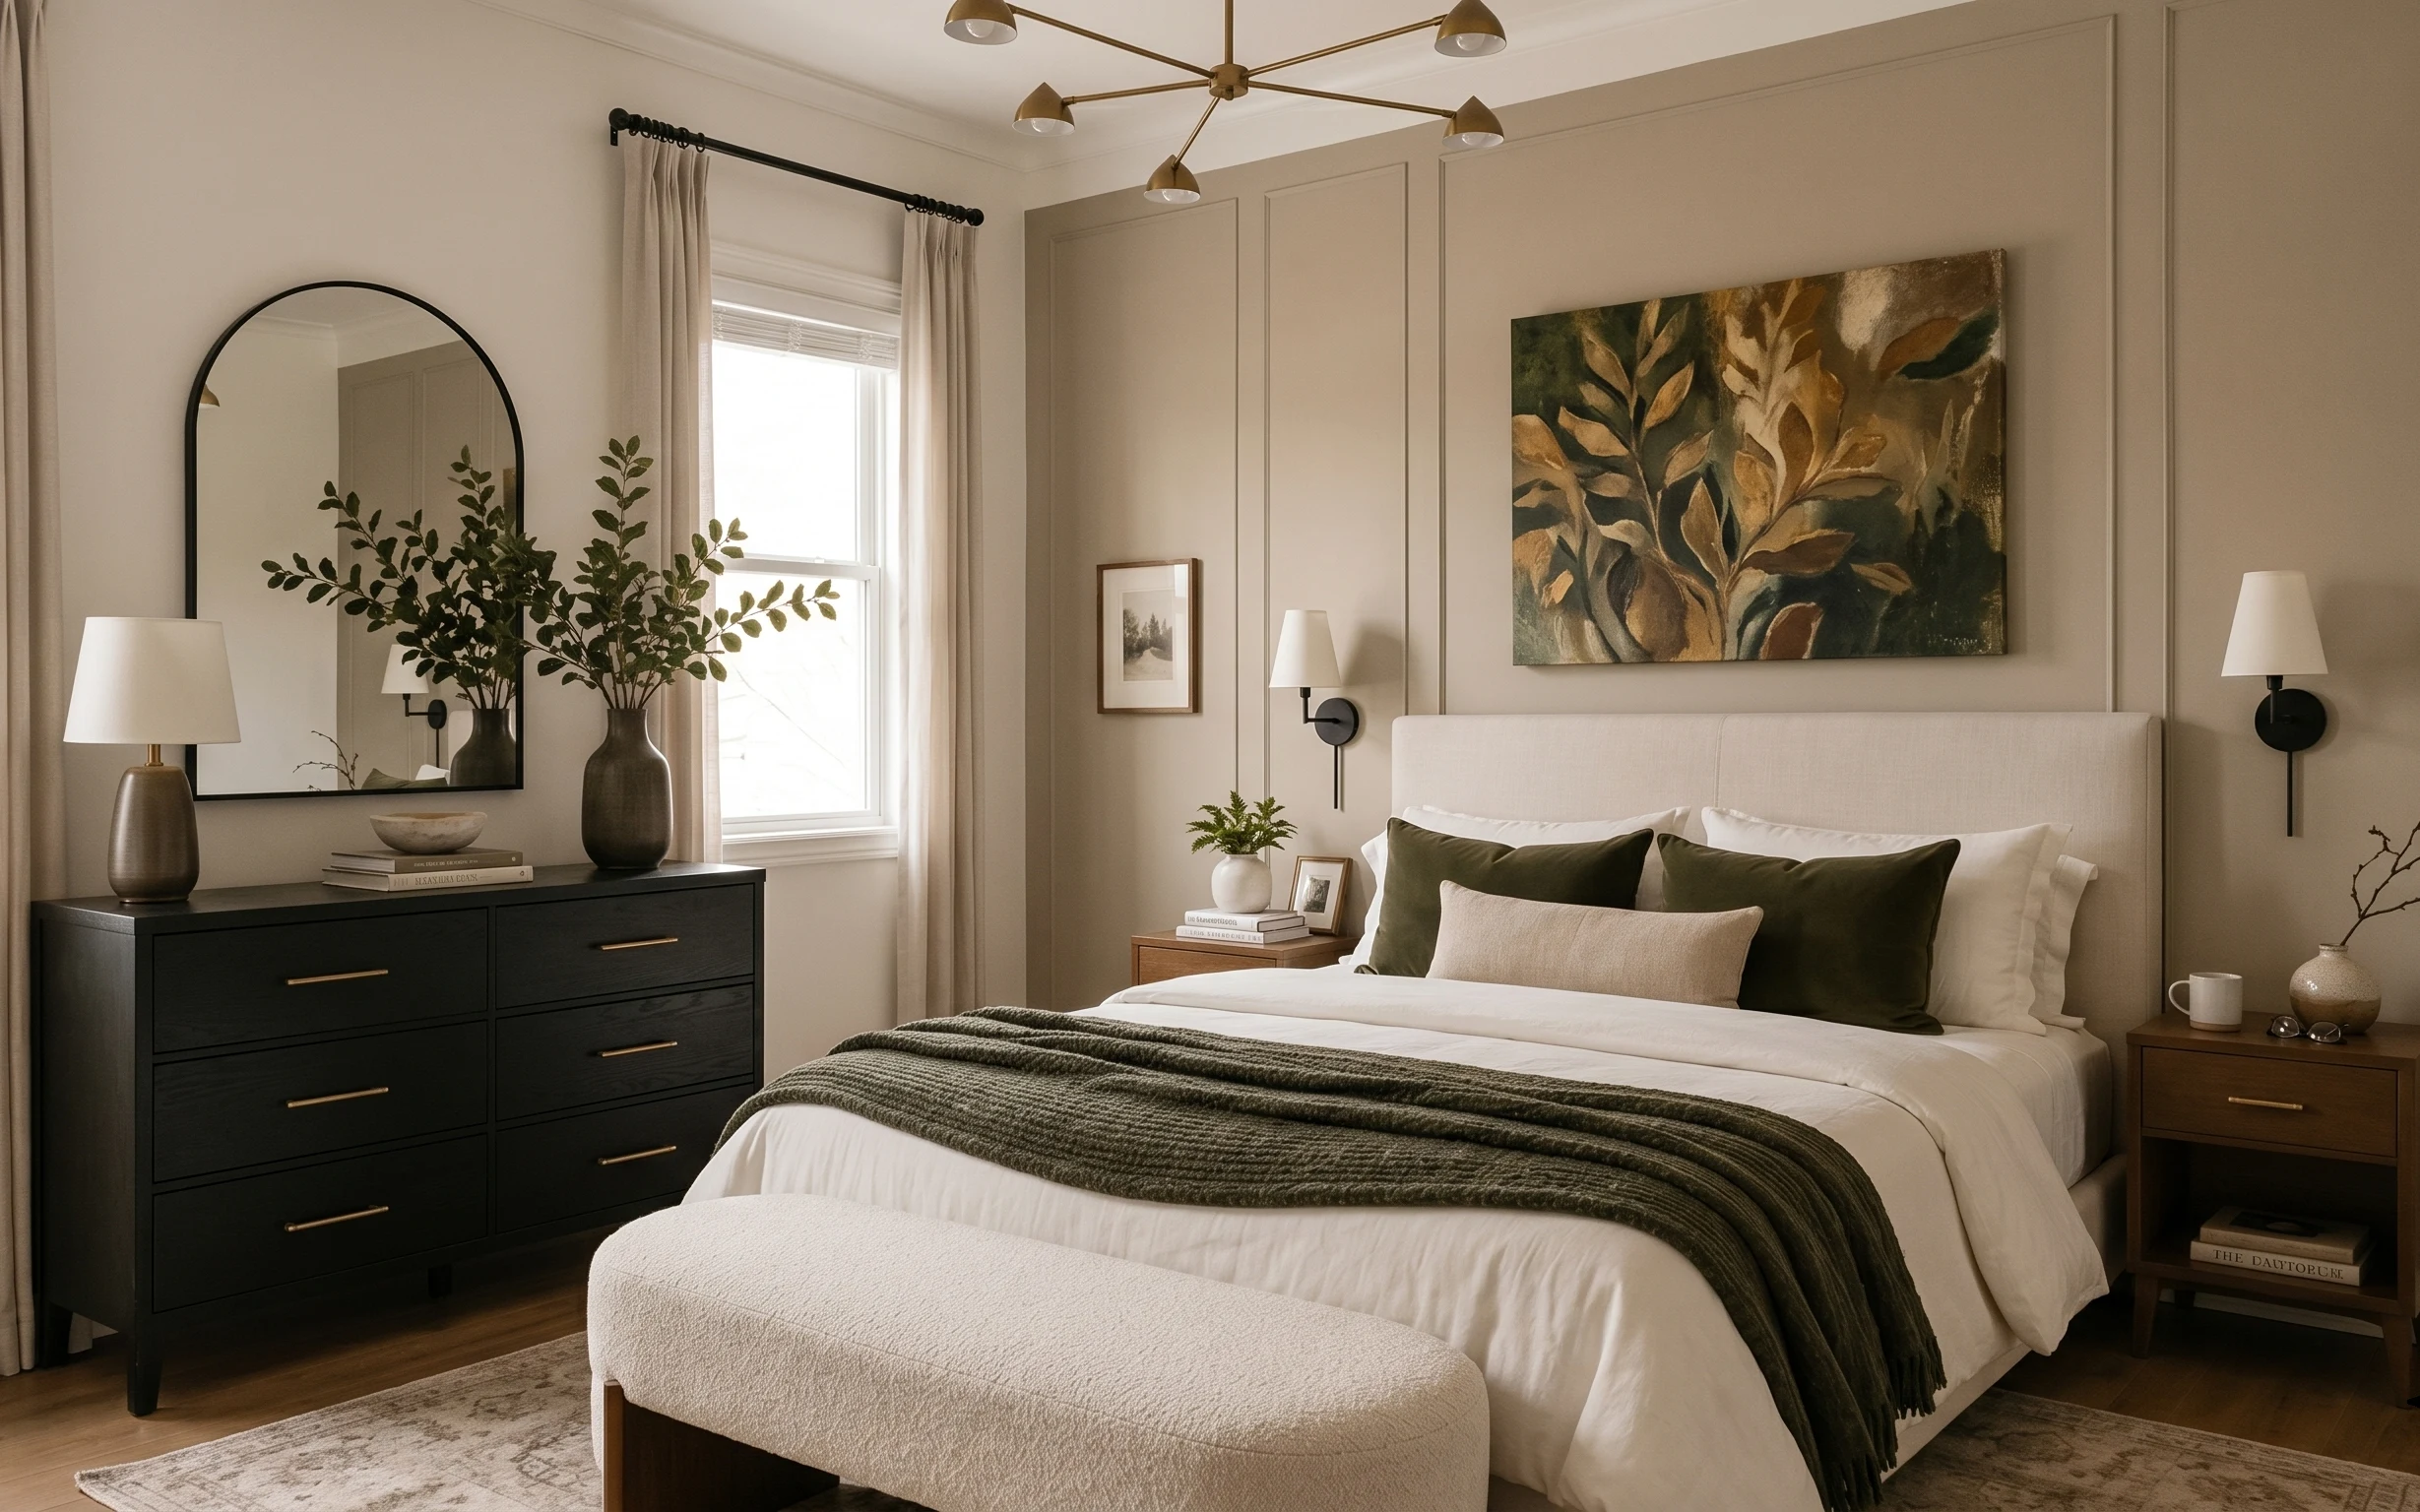
Why japandi linens are the bedroom of 2026
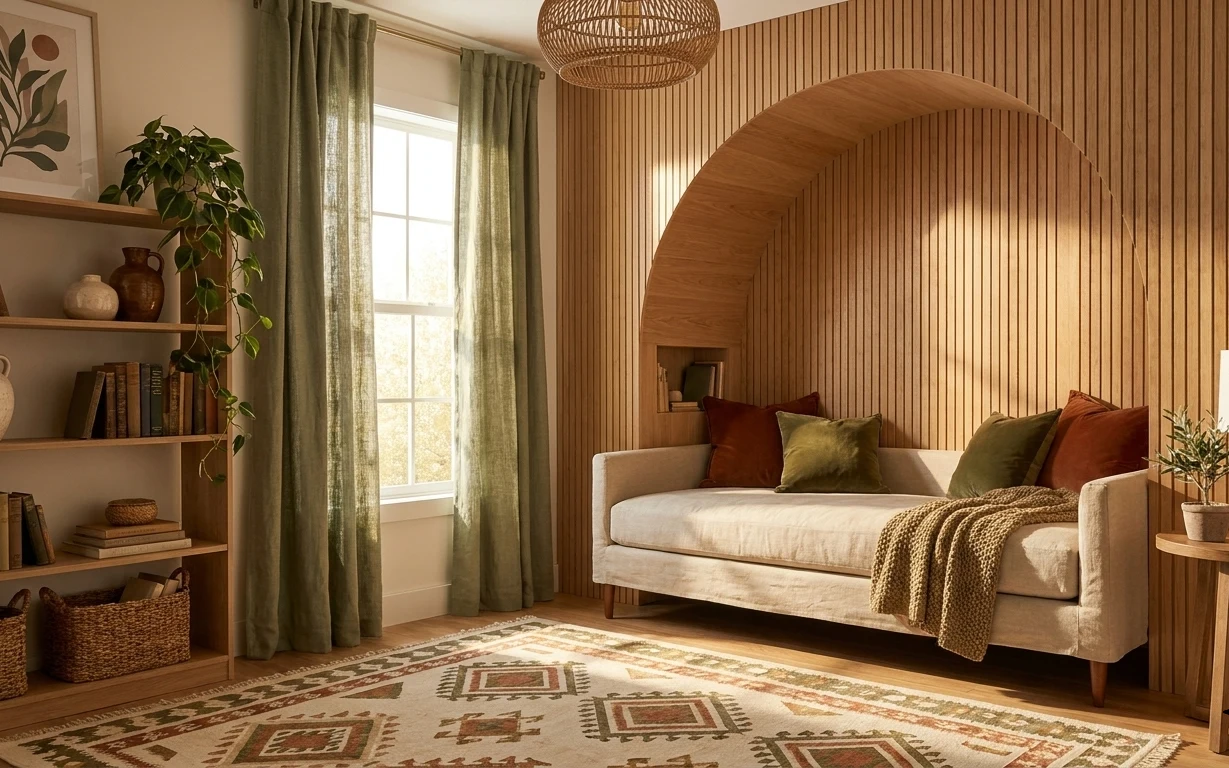
This photo nails the calm, “less but better” feeling that shows up in japandi spreads: straight lines, softened textiles, and warm neutrals that still feel alive. You can see the mix of textures—knit olive throw draped across the bed, crisp cream pillows, and a neutral patterned rug grounding everything. The beige curtain panels also do a lot of heavy lifting by softening the daylight and visually lowering the room. The best part for renters: every upgrade here is removable and designed for move-out packing.
I caught myself wanting to add one more big framed piece on day one, like I always do when a room feels too open. Then I remembered what I learned the hard way in my own places: too many frames make the space feel busy, not serene. Here, the large botanical art gives you one clear focal point, while the mirror and greenery keep the rest from feeling flat. That balance is what makes the look feel styled, not decorated.
Layer 1 — area rug 5×7, neutral pattern ($200) Underfoot comfort that makes the bed feel grounded
The rug is the anchor for the whole bedroom, and the pattern stays subtle enough that the olive throw and green pillows can be the “color moment.” In the hero, the neutral ground plus gentle texture helps the bed read as intentional, especially where you see hardwood near the edges. The trade-off: a true 5×7 footprint won’t cover every inch, so aim for rug placement that reaches far enough under the bed to hide the transition lines. Compared with a plain solid rug, the soft pattern is also more forgiving—spills and vacuum trails show up less.
Anchor the bed with rug overlap
Let the rug tuck under at least the front third of the bed so the room doesn’t feel like the bedding is floating above the floor.
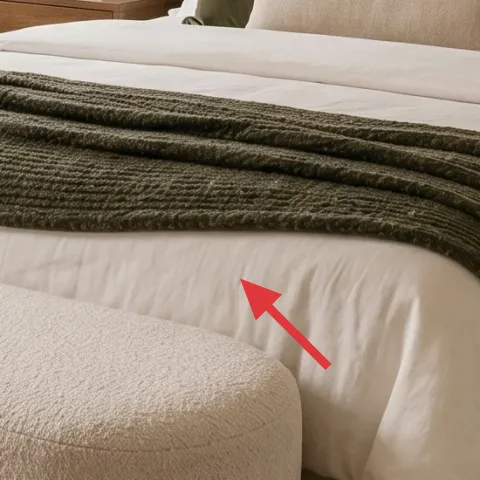
Layer 2 — olive knit throw blanket ($45) A visible fold that adds height without bulk

That olive knit throw is doing double duty: it adds warmth in a color that echoes the greenery, and it creates a laid-back drape you can see from the doorway. The chunky-yet-soft weave reads cozy without making the whole bed look heavy, especially against the white upholstered base and cream pillows. If you go with a sleeker fabric instead, it can look “too smooth” for this style and the color can feel harsher. The trade-off with knit: it can shed a little at first, so plan a quick shake-out before styling your final fold.
Choose olive, not straight gray
Olive sits between green and neutral, so it looks grounded next to beige curtains and still pairs well with black frames.
Layer 3 — green throw pillow set ($24) Color that stays calm in a limited palette
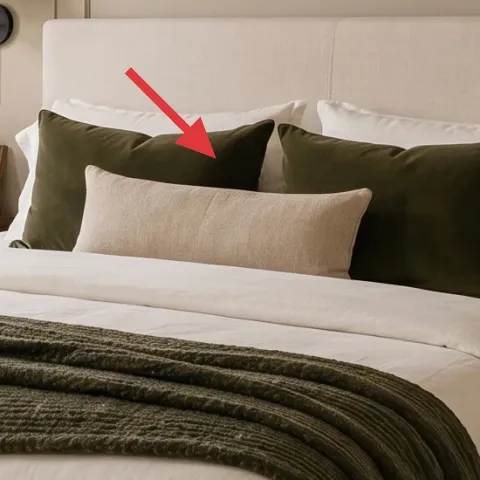
The green pillows give you the second anchor color besides the olive throw, but they’re muted enough to keep the room restful. In the photo, the green reads slightly dark—more sage than bright—and it flatters the warm neutrals in the bedding and curtains. You could try an all-cream pillow setup, but the bed would lose that organic, “collected over time” feel. The trade-off with pillow covers: if the fabric is too stiff, you’ll get sharp corners instead of that casual, lived-in look, so look for something with a soft hand.
Don’t match the green perfectly
If every green item is the same exact shade, the bed can look flat. A slight variation between pillows and throw keeps the palette natural.
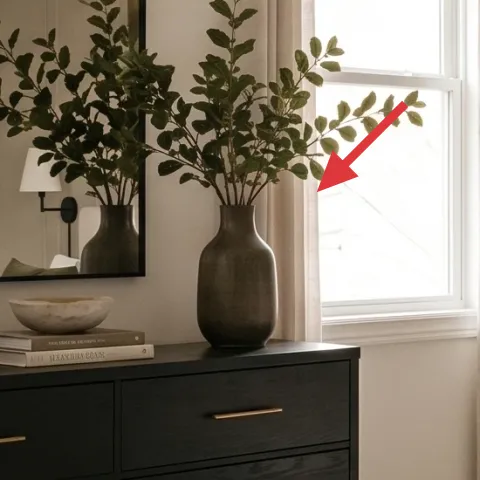
Layer 4 — beige curtain panel pair ($60) Light-diffusing softness that frames the windows
These beige curtains add the biggest “japandi calm” effect because they soften bright daylight and visually widen the window wall. In the hero, the curtains hang in gentle folds that complement the bed’s clean lines and keep the overall look from feeling stark. Swapping to sheer-only panels can feel too airy and under-dressed, while heavy blackout drapes can make the room feel smaller. The best renter-friendly middle is a pair of beige panels that hit near the same height as the window trim so the proportions stay intentional.
Hang high for the illusion of height
Mount with renter-safe methods you already have (or use existing tracks) so the top of the curtain sits closer to the ceiling line.
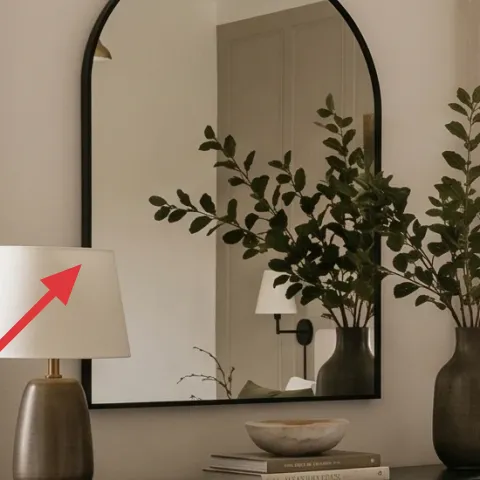
Layer 5 — large arched mirror, black frame ($80) A shape that bounces light and adds dimension
The arched mirror brings two things at once: vertical lift and a softer silhouette that breaks up the straight lines of the headboard back and dresser. Because it’s black-framed, it also connects to the rest of the room’s dark accents, like the lamp bases and the dresser hardware. If you swapped in a round mirror, the vibe would shift more playful; if you chose a rectangle, you’d lose that elegant “window within the room” effect. The trade-off is size—large mirrors are heavier, so secure them with renter-safe hanging hardware and plan where the studs (if any) are before you commit.
Use the mirror to double your “green moment”
Position plants and vase stems so the reflection gives you extra layers without buying more decor.
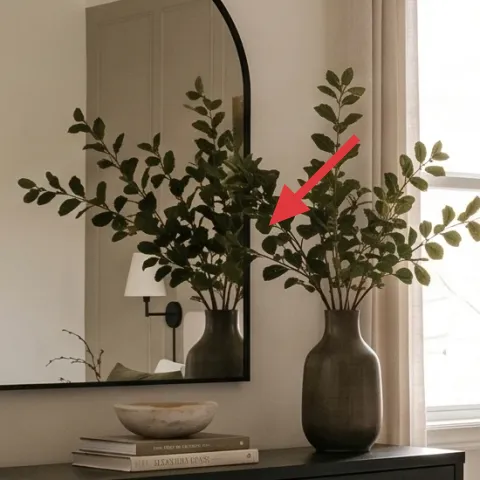
Layer 6 — potted plant on side table ($30) One living layer that keeps neutrals from feeling sterile
The potted plant on the side table adds a vertical line that balances the horizontal bedding and dresser. In a room where most colors are beige, cream, and olive, that green reads as the “breath” of the whole setup. You could add more framed art to fill space, but plants are easier to move and easier to style around as the seasons change. The trade-off: plants need a little care, so pick something hardy enough for your light level. A small leafy plant also photographs well—your photo will look styled even when the rest is unchanged.
Pick a plant with readable branches
Look for leaves that fan out or rise upward so it shows from bed height.
Layer 7 — large framed botanical wall art ($60) One focal print in warm greens and gold
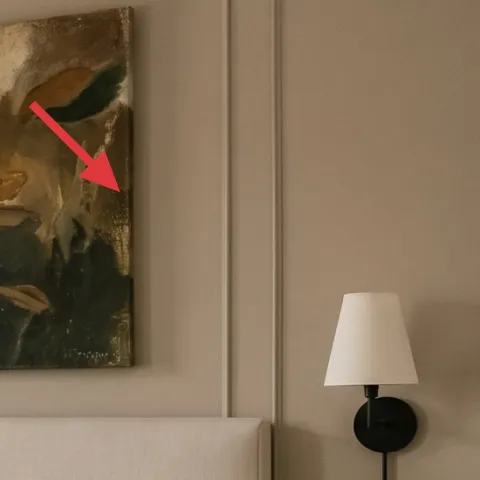
That framed botanical art is the room’s visual “why” in one rectangle: it brings warm greens, golden tones, and a natural texture that matches the olive blanket and greenery. It’s also a renter-friendly shortcut—swap this out for a print you love now, then pack the frame later without altering the walls. If you go with a gallery of smaller pieces, you’ll spend more time aligning frames and the wall can feel busy. The trade-off with one larger print is choosing scale: aim for something that fills the wall area above the bed back without leaving a huge empty strip of wall.
Make it instead of buying it
DIY a hand-painted abstract on cardstock, then tuck it into a removable frame so you get the same botanical color energy without committing to a specific print.
Materials
- Cardstock, 11×14 sheets — 2 — craft store — $6
- Acrylic paint set (greens + warm ochres) — 1 small set — craft store — $18
- Small flat brush + fine detail brush — 2 brushes — craft store — $8
- Picture frame (11×14) — 1 — thrift or discount store — $15
Steps
- Pick 3 paint colors: one leaf green, one olive, and one warm gold or ochre.
- Lightly pencil loose shapes on the cardstock (no need to be perfect).
- Paint the biggest “leaf” forms first using a flat brush for texture.
- Rinse the brush, then layer a darker green near edges to suggest depth.
- Add warm ochre strokes between leaves for that botanical glow.
- Use the small detail brush to dot or drag a few vein-like lines.
- Let the paint fully dry before handling the cardstock.
- Insert the finished artwork into the frame and check it from standing height.
- Hang with renter-safe hardware appropriate for the frame weight.
Total DIY cost: $47 — saves about $13 over buying.
The cost, layer by layer
| Layer | Item | Cost |
|---|---|---|
| 1 | Area rug 5×7, neutral pattern | $200 |
| 2 | Olive knit throw blanket | $45 |
| 3 | Green throw pillow set | $24 |
| 4 | Beige curtain panel pair | $60 |
| 5 | Large arched mirror, black frame | $80 |
| 6 | Potted plant on side table | $30 |
| 7 | Large framed botanical wall art (or DIY) | $60 |
| Total | $499 | |
A cheaper variant: swap the rug for a smaller 5×7 flatweave ($150–$200), choose a pre-matted print instead of a larger frame ($40–$60), and keep the olive blanket + curtain panels as the only color anchors.
What worked, what didn't (across the whole room)
This look succeeds because it limits color to warm neutrals plus olive greens, then adds texture through textiles and one main wall focal. The only place it can fall apart is if the wall decor becomes too busy or the curtains don’t create soft height framing.
What worked
- The neutral rug pattern hides everyday wear while still making the bed feel “set down on purpose.”
- Olive knit over the white base reads cozy without turning the room dark or heavy.
- Muted green pillow covers add depth while keeping the palette consistent with beige and cream.
- The arched mirror softens hard lines and makes the room feel brighter through reflection.
- Beige curtain panels soften daylight and visually extend the window wall upward.
- A single potted plant adds height and freshness without competing with framed art.
What didn't
- If the botanical print is too small, the bed area loses its main focal point.
- Using a bright, saturated green can clash with warm neutrals and feel less serene.
- Adding too many small frames on the wall turns the space from curated into crowded.
- Skipping a curtain layer makes the room feel sharper and less expensive, even with nice bedding.
What we'd skip if we did it again
Skip matching everything in the same olive tone. In photos like this, the calm comes from variation—olive throw, slightly different green pillow covers, and plant greenery that reads more “leaf” than “paint.”
Skip small, trendy wall art collections when the bed wall already wants one hero piece. A single framed botanical print gives you scale and makes styling faster, especially in rentals where you’ll take it down often.
Skip curtains that land too short. When beige panels end mid-window instead of near the trim line, the whole room looks cramped. Prioritize length and soft folds over higher-fashion fabric thickness.
Frequently asked
How long does this renter bedroom refresh take?
Most people can do it in one day. Rug and textile swaps are quick, then it’s mostly placement and styling: curtains, mirror location, pillow arrangement, and the plant moment. The DIY framed art (cardstock abstract) usually adds 1–2 hours including drying time. Total time commonly lands around 3–5 hours depending on how many small decisions you make.
Is this really move-out friendly for renters?
Yes—none of these steps require painting walls or changing landlord fixtures. The curtains, rug, pillows, throw, plant, mirror, and framed art are all removable. The only “careful” part is hanging the mirror and frame using renter-safe methods appropriate for the item weight. Pack the frame and hardware together in labeled bags so move-out is as simple as swapping back to basics.
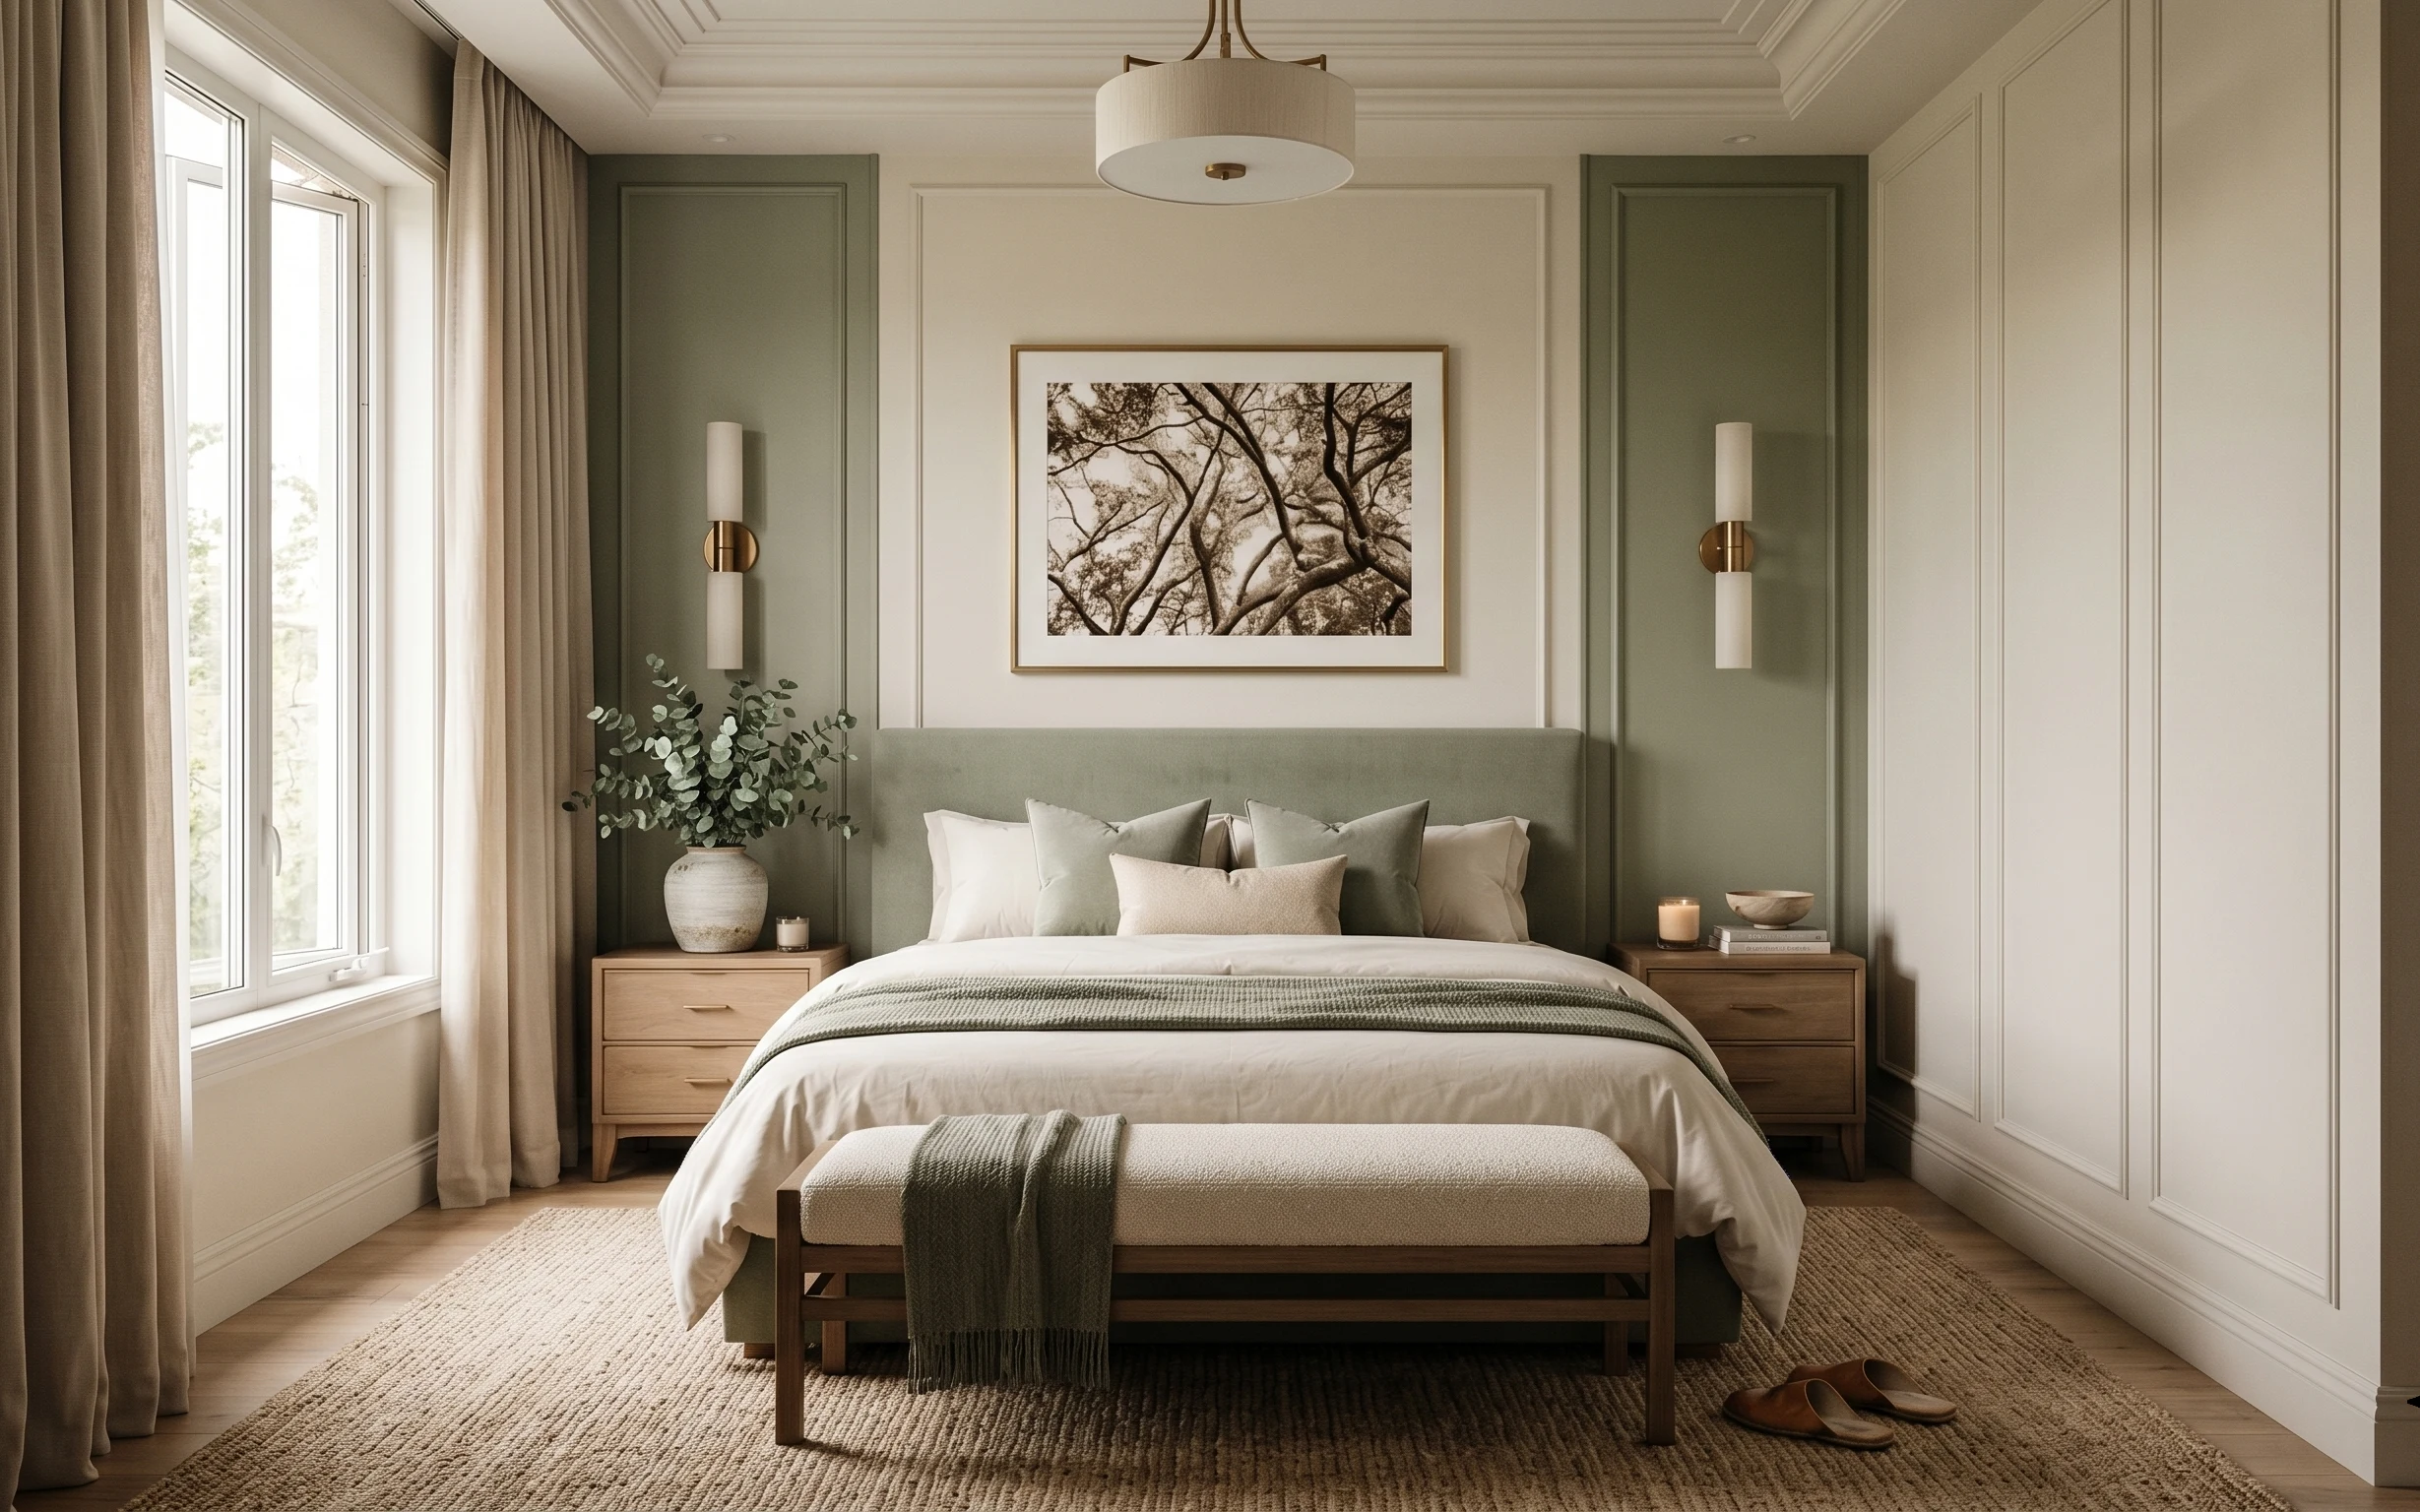
What if my bedroom is smaller than the photo?
If the wall behind the bed is narrower, keep the one focal print but scale down the frame size so it still fills most of the wall area above the bed back. For the rug, prioritize correct proportions: a too-small rug can visually shrink the room. Curtains should still aim for height—length matters more than panel width. Stick to fewer pillows, and rely on texture (knit throw + curtain folds) for interest.
What if my bedroom has higher ceilings or more wall space?
Go bigger with the botanical art, or extend the visual height by placing the mirror slightly higher and using longer curtain panels. You can also add one more greenery layer near the mirror reflection so the wall stays lively. Keep the color palette consistent: warm neutrals, olive tones, and one warm accent (ochre/gold) so it doesn’t drift into multicolor maximalism.
Where should I shop if I want this look on a budget?
For textiles and rugs, look for sales at home goods retailers and consider discount marketplaces for neutral patterns. The mirror is often cheaper at discount home stores or thrift if you’re okay with paintable condition—however, choose a frame that’s already ready for hanging. For wall art, prioritize frames you can reuse; prints are the easiest part to swap. Plants can be the best bargain when bought locally.
What’s the biggest mistake people make in a bedroom like this?
Overfilling the wall. This style depends on one clear focal point (the framed botanical art) plus a few supporting textures (rug, throw, curtain folds). If you add multiple competing pieces, the room loses the calm that makes japandi work. Aim for fewer, larger items: one main print, one mirror, and textile textures that soften everything.
More in Bedroom
Under $500: japandi bedroom refresh with 7 no-drill swaps
A calm japandi bedroom refresh for renters with a neutral rug, olive throw, and swap-in wall art—no painting, no drilling, and everything p…
7 weekend wins for an olive-and-cream primary bedroom, $700
A soft-olive accent wall, taupe curtains, and a warm wood-and-cream bedding setup make this primary bedroom feel finished. This weekend pla…
Under $600: A Warm Olive Arched Bed Alcove Renter Refresh
I styled this arched bed alcove around warm wood, olive curtains, and layered fabrics, and nothing here needs a drill. Under $600 buys a pa…