
- Best for
- Nighttime ambiance and texture
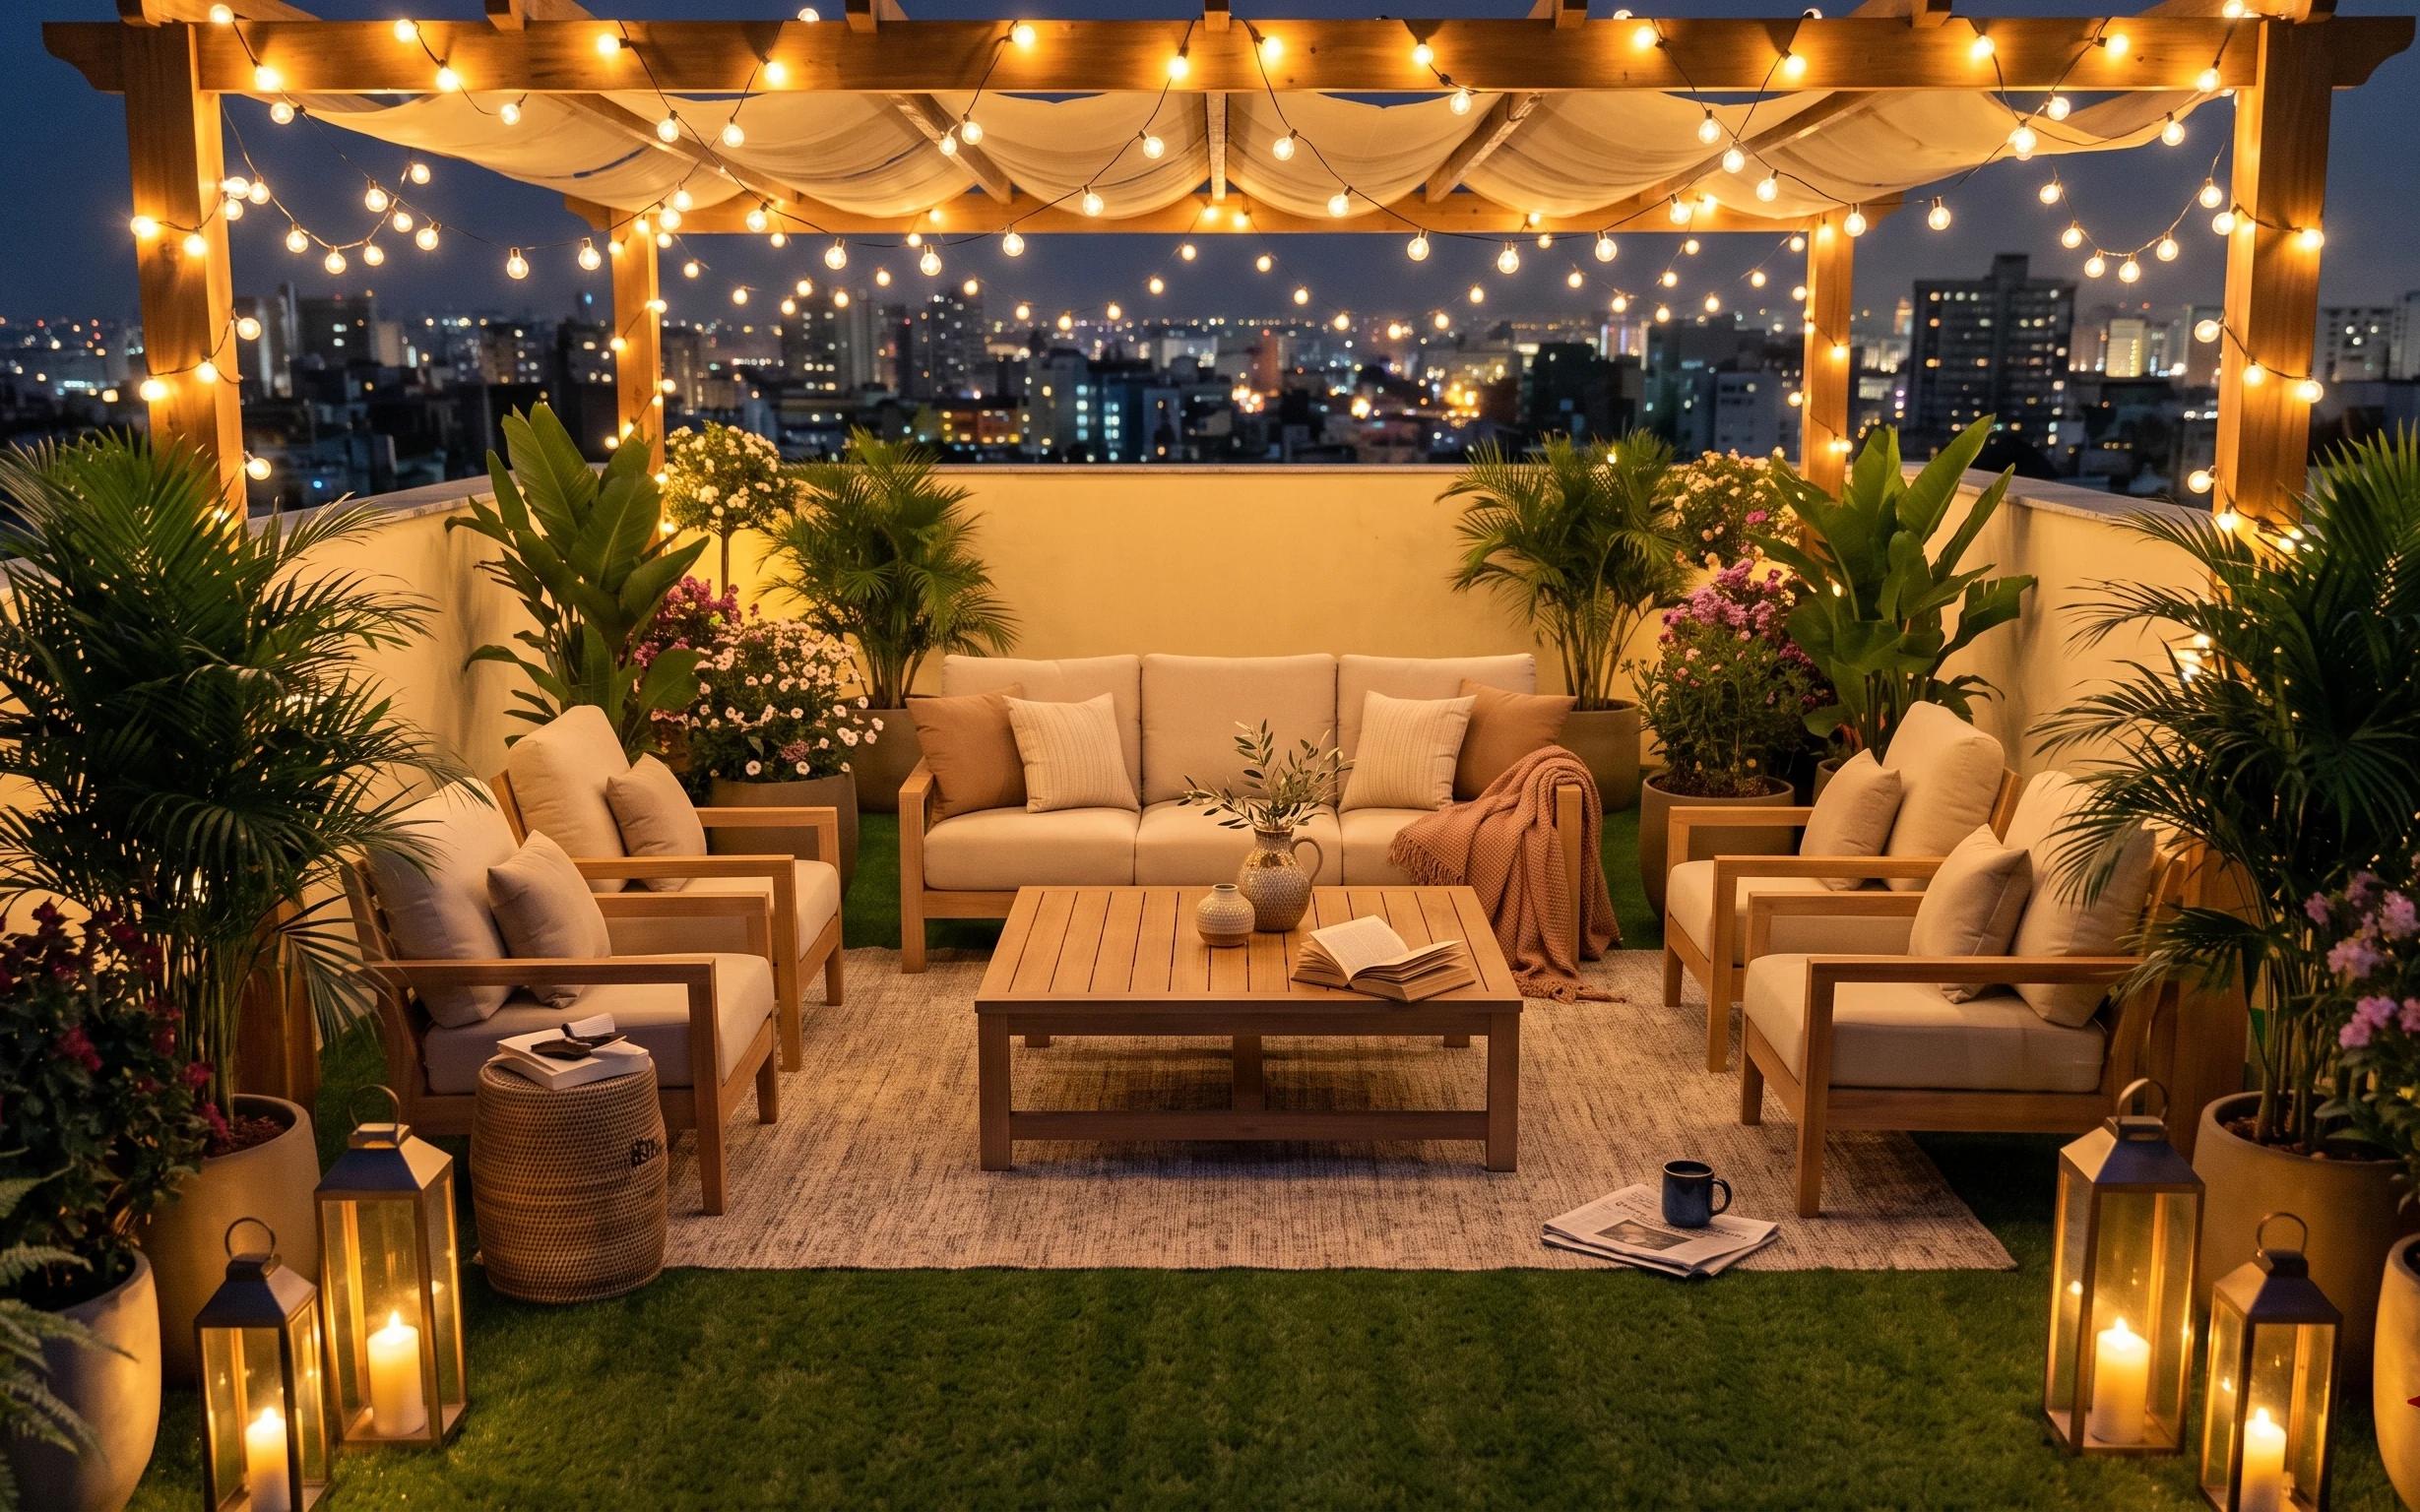
- Cost
- About $1,000
- Difficulty
- Confident DIY
- Renter-safe
- Mostly renter-safe with plug-in lighting
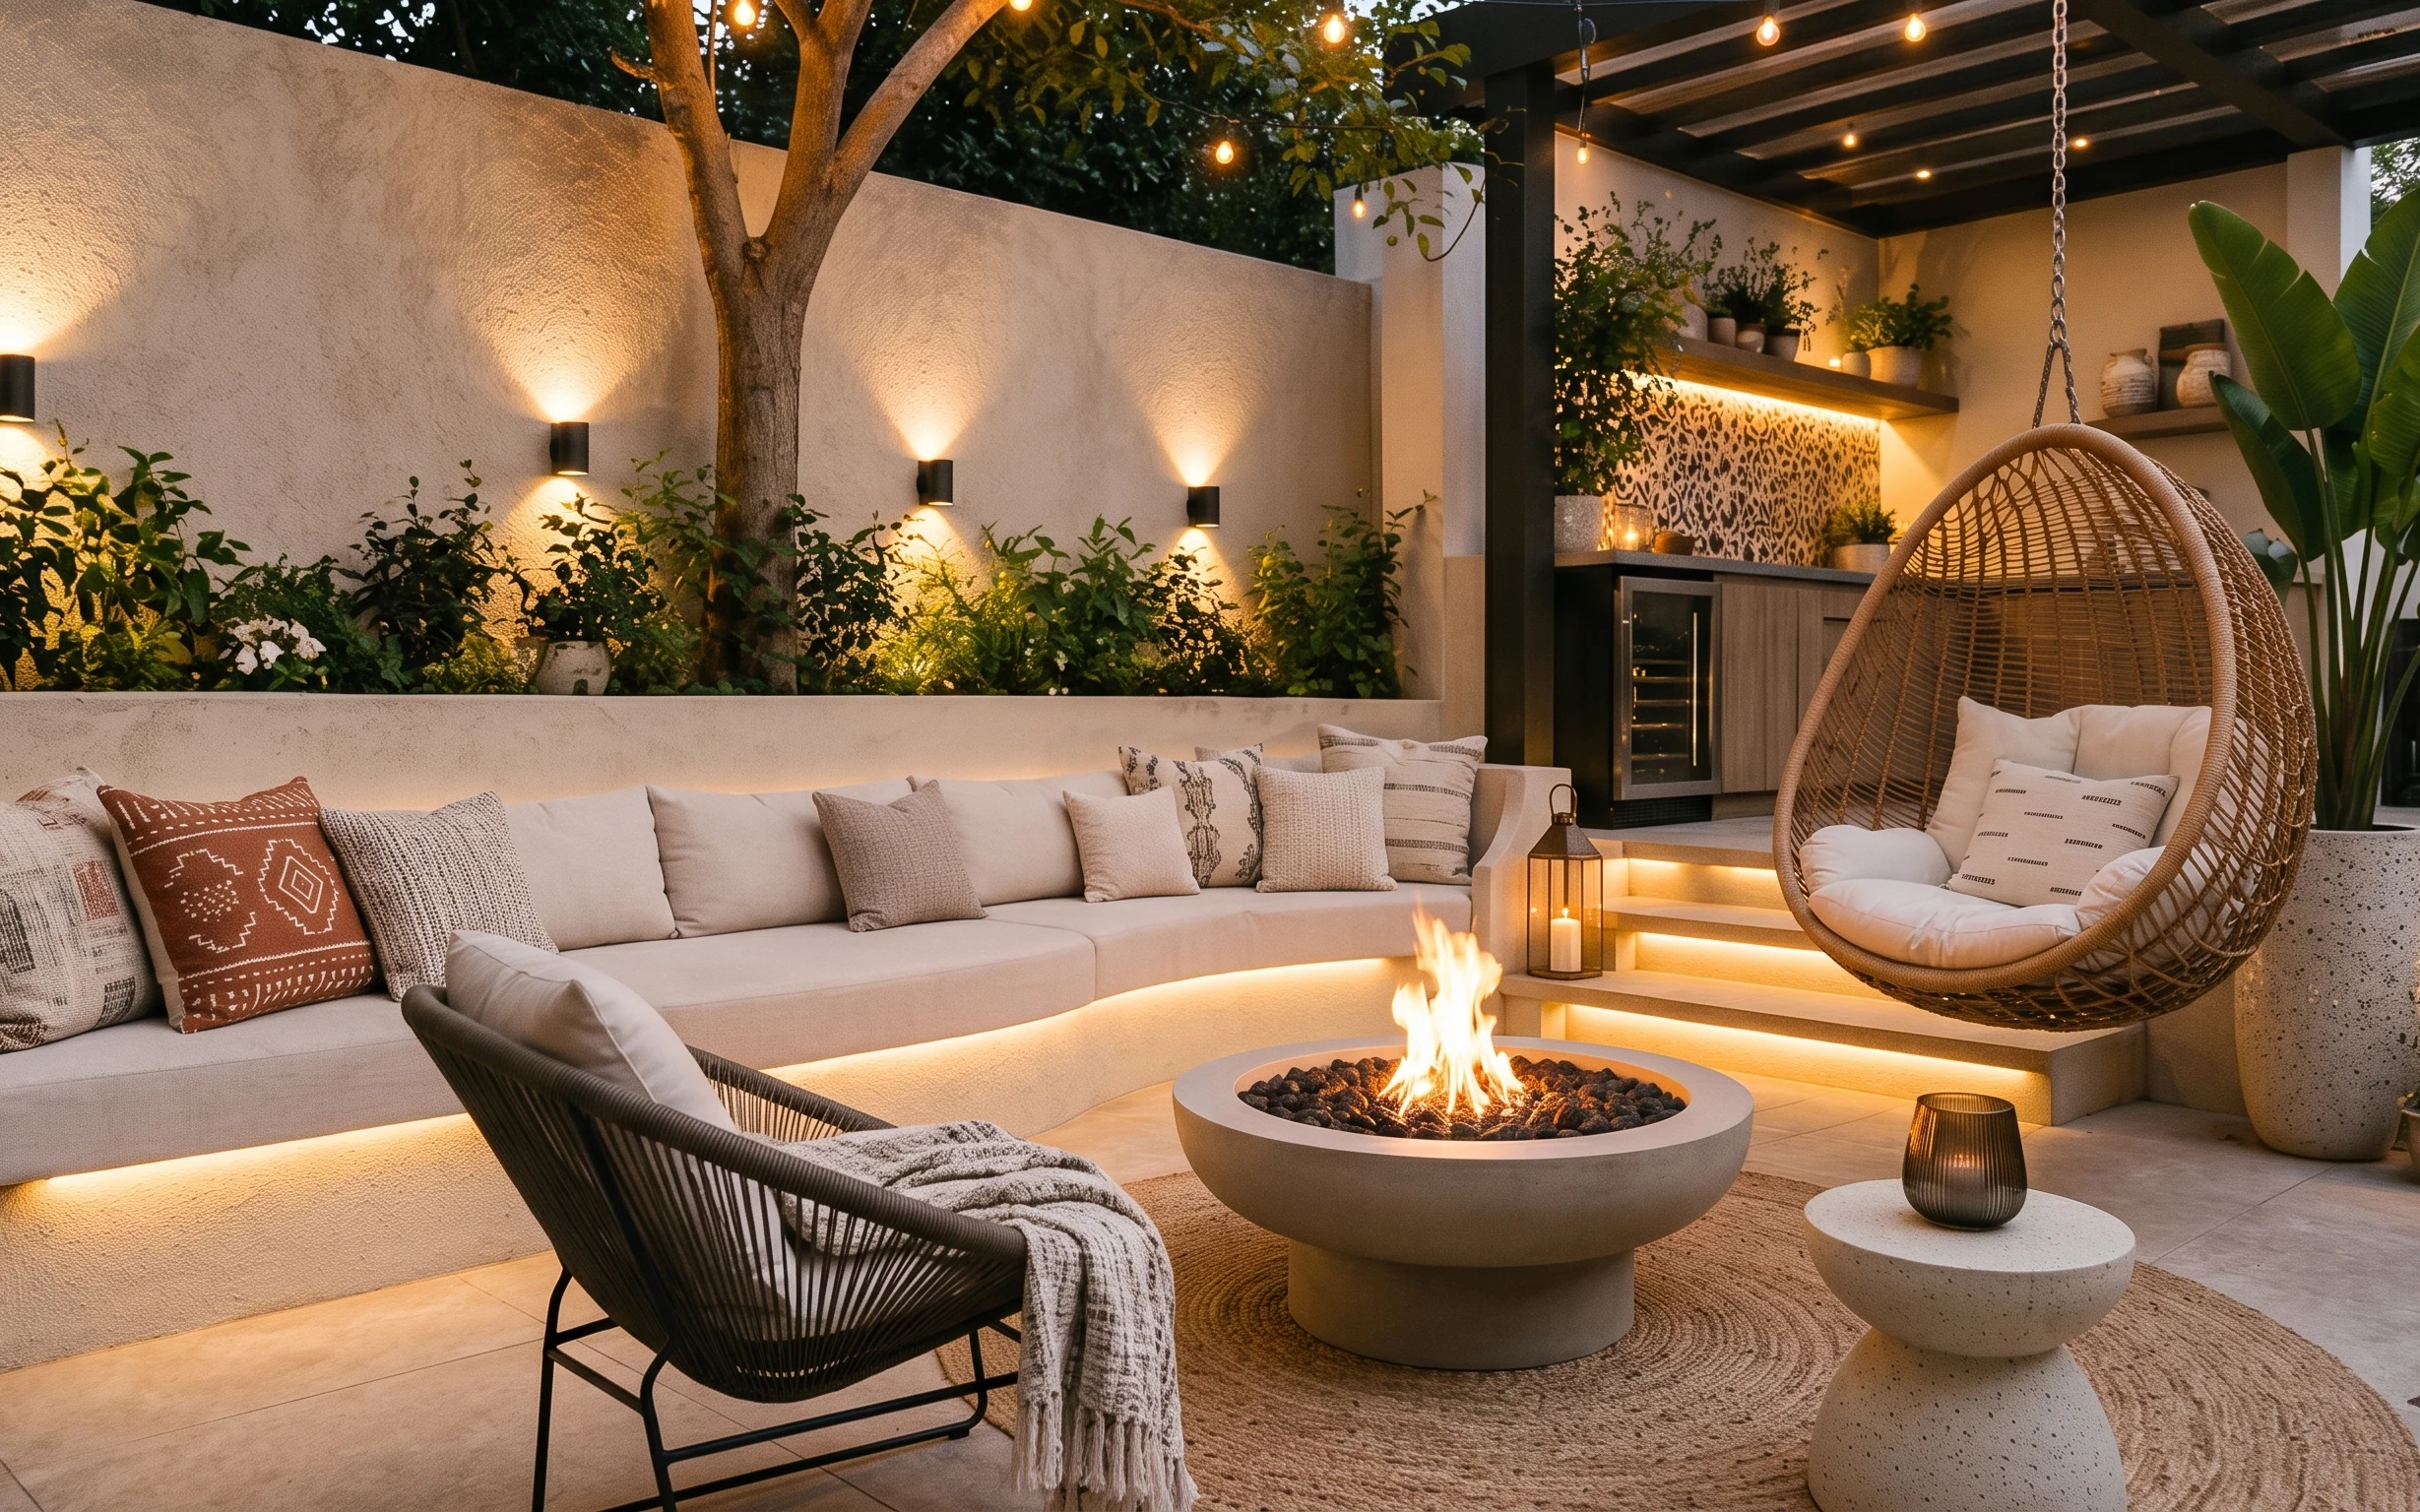
Why warm-beige-and-sage lighting is the firepit patio seating area of 2026
What makes this setup feel intentional isn’t just the fire pit—it’s the stacking of light and texture. The warm glow bounces off the stucco-like exterior wall and follows the line of those black cylindrical wall sconces. Underfoot, the area rug softens a light beige tile floor, while the sofa’s throw blanket and multiple pillows add that “lived-in” look without buying new furniture. For homeowners, this is a satisfying weekend refresh because you can pick the few biggest changes (lighting + rug + textiles) instead of spreading the budget thin.
I used to overthink patio decor and start with a “perfect” rug, then wonder why it still looked unfinished at night. The moment I started placing light higher (wall sconces plus string lights) and repeating warm neutrals in the fabrics, everything clicked. Here, the trick is making the glow feel directional, not random—especially around the fire pit. Once the lighting reads clearly, the plants and small styling details can stay simple.
Layer 1 — String lights with exposed bulbs ($15) hangs the glow at eye level
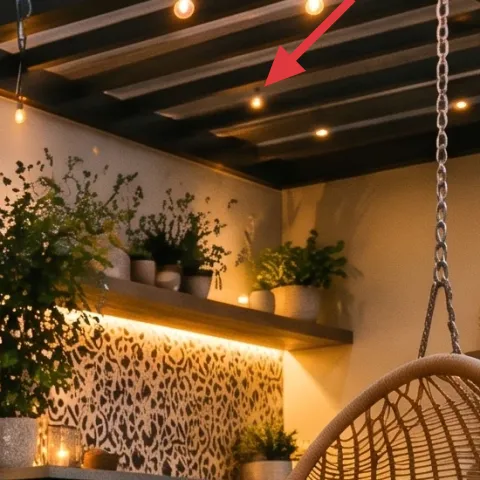
These exposed-bulb string lights do two jobs at once: they pull the ceiling beams visually up and make the fire pit feel like the focal point instead of a lone flame. In this photo they run across the covered outdoor ceiling, so the warm bulbs land above the seating line. That’s a better “nighttime mood” decision than swapping the fire pit first, because you can change the ambiance without rebuilding anything. The trade-off is that you’ll need an outdoor-safe plug-in setup and careful spacing so the bulbs don’t sag unevenly.
Match the color temperature
Use warm bulbs (around 2700K) so the wall sconces and string lights don’t fight each other.
Layer 2 — Brown patterned throw pillow ($30) adds grounded texture to the sofa
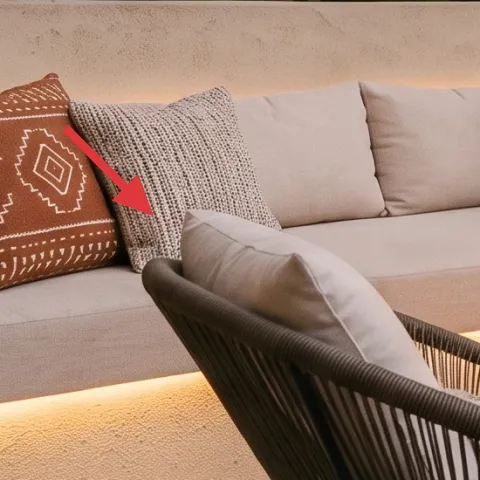
This brown patterned pillow on the left side of the sofa is small, but it’s doing a lot of visual work. The print echoes the warm, earthy palette—staying readable against the sofa’s lighter upholstery and the darker wall lighting. It also gives the eye a “stop point” when you’re standing near the fire pit, so the cushions don’t all blur into one soft color block. Choosing a patterned accent (instead of a second plain pillow) keeps the look layered. The trade-off: patterned pillows look best when the rest of the textiles stay mostly neutral, not loud.
Keep the palette tight
Pick one main warm tone (like brown) and keep the other pillows closer to cream, tan, or natural.
Layer 3 — Throw blanket draped on the sofa ($60) makes the seating feel “arranged”

The throw blanket draped over the sofa reads as casual on purpose: it softens the straight line of the cushions and adds visible texture near the foreground. Because it’s placed mid-throw rather than fully folded, it catches the fire pit glow and looks better from multiple angles. If you only bought a new pillow or rug, the sofa could still feel flat—this blanket fixes that with one simple move. Going with a chunky woven texture (instead of a thin throw) also hides minor fabric wear and makes outdoor seating look styled, not temporary.
Drape, don’t stack
Let the blanket fall in one direction; stacking can look lumpy and pulls attention away from the cushions.
Layer 4 — Black cylindrical wall sconces ($200) create warm pools of light on the stucco wall
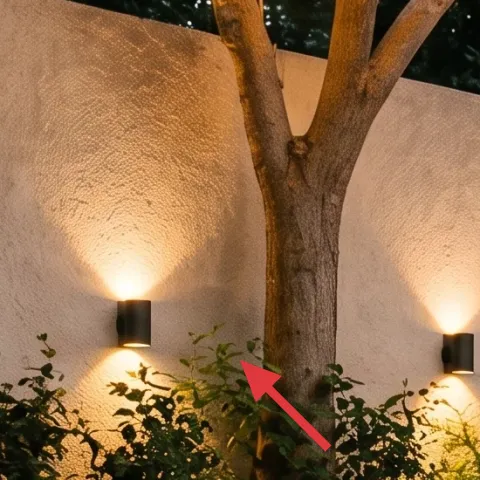
The black cylindrical wall sconces are the reason this patio looks curated after dark. They’re mounted on the exterior wall so the light blooms at seating height, and the warm shade color makes the stucco surface look richer instead of harsh. A ceiling fan of light or a single table lamp can’t do that—wall sconces create that layered depth you can see instantly in the background. The trade-off is planning placement so the sconces line up with seating sections (and making sure the wiring route works for your setup). If you go the plug-in route, keep cords hidden along wall edges.
Don’t choose cool-white bulbs
Cool-white light turns beige surfaces gray and fights the fire pit glow.
Layer 5 — large potted plant on the right ($40) adds height and a soft green frame
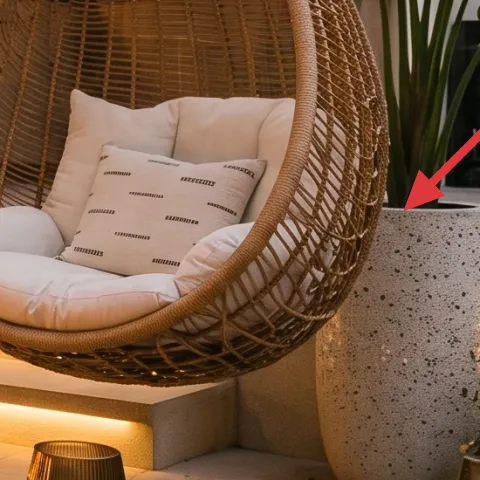
The large potted plant on the right balances all the hardscape: it brings movement with broad leaves and keeps the warm lighting from feeling flat. Even though plants aren’t “decor” in the strict sense, the pot and foliage act like vertical punctuation between the hanging chair and the tiled floor. This is a smart layer because you don’t need new furniture to get the same designed feel—you just need the right scale and placement. Painting the pot (instead of replacing it) is also a realistic weekend move for homeowners, especially if you already have a planter container that’s structurally fine.
Make it instead of buying it
Paint a basic planter pot in a warm neutral so it blends with the patio’s beige tile and keeps the foliage looking intentional under warm lights.
Materials
- Exterior spray paint — 12 oz — 1 can — $12
- Painter’s tape — 1 roll — $4
- Degreasing cleaner — 1 small bottle — $6
- Primer (spray) — 12 oz — 1 can — $8
- Clear outdoor topcoat — 1 small can — $10
Steps
- Wash the pot with cleaner, then let it dry fully.
- Tape off any rim areas you want to keep unpainted.
- Spray on a light, even coat of primer; let it dry.
- Apply 2–3 thin layers of exterior spray paint, drying between each coat.
- Seal with a clear outdoor topcoat for weather durability; let it cure.
- Remove tape and set the pot in its final spot to avoid scuffs.
Layer 6 — woven hanging chair ($350) brings curved comfort and visual softness
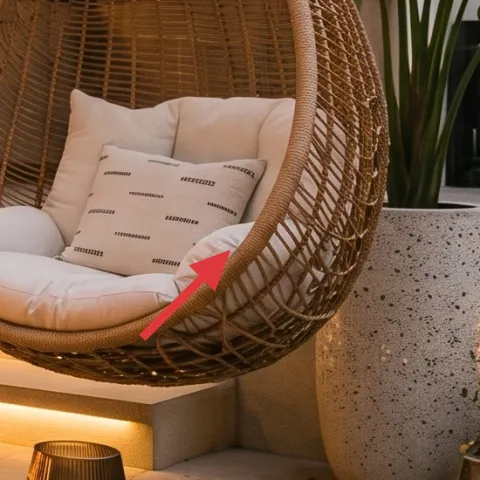
The woven hanging chair on the right adds curve and texture where the rest of the seating is mostly straight lines and flat cushions. It sits slightly forward of the kitchen wall shelf, so it frames the plants and makes the whole patio feel “designed,” not just decorated. Choosing a hanging chair instead of another standard outdoor armchair keeps the silhouette interesting—especially against the dark beams and wall sconces. The trade-off is that woven pieces need a little extra care (keeping them dry when storms hit) and you’ll want weather-appropriate cushions. Still, it’s a high-impact buy because it anchors the right side composition.
Seat it to face the fire
Angle the chair so the sitter looks toward the fire pit; it improves how the whole scene flows.
Layer 7 — round concrete fire pit ($300) turns the center into the gathering point
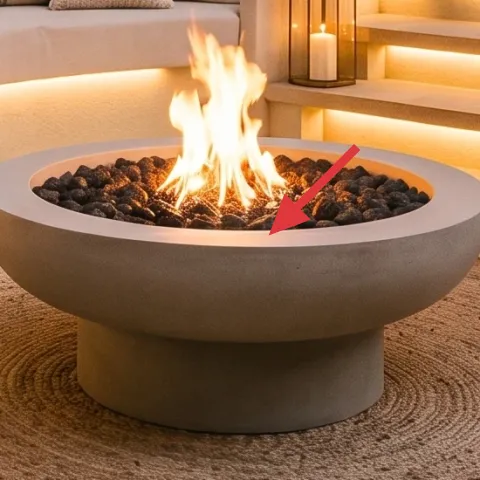
The round concrete fire pit is the literal centerpiece, and it deserves to stay visually bold even when you’re not lighting it. In this photo, the circular shape echoes the round stool accents and gives the firelight an easy path across nearby surfaces. If you tried to compete with the fire pit using too many patterns, the scene would get busy; instead, the rug and textiles stay neutral so the flame can do the work. The trade-off is weather and maintenance: concrete fire pits need periodic cleaning and safe fuel handling, but they’re still a weekend-accessible focal upgrade.
Keep the fuel area clear
Place plants and textiles far enough away that heat never touches dry leaves or fabric.
The cost, layer by layer
| Layer | Item | Cost |
|---|---|---|
| 1 | String lights with exposed bulbs | $15 |
| 2 | Brown patterned throw pillow | $30 |
| 3 | Throw blanket draped on the sofa | $60 |
| 4 | Black cylindrical wall sconces | $200 |
| 5 | Large potted plant on the right (DIY-painted pot) | $40 |
| 6 | Woven hanging chair | $350 |
| 7 | Round concrete fire pit | $300 |
| Total | $995 | |
If you want a cheaper version, start with the lighting (string lights + warm bulbs) and one big texture swap: a rug that matches the warm beige tiles. Add just two pillows and one throw, and postpone the hanging chair or fire pit for a later weekend.
What worked, what didn't (across the whole room)
The biggest win here is the lighting stack: string lights overhead plus wall sconces at seating height make the patio feel intentional. The second win is texture control—rug, pillows, and a draped throw keep the scene soft even with the dark beams and hard stucco walls. The only thing that feels fussy is the balance of green plants; too many varieties can compete with the firelight.
What worked
- String lights add warm overhead light that keeps the fire pit feeling central.
- Black wall sconces place brightness at seating height instead of only on the ceiling.
- The area rug anchors the seating and makes tile feel less slippery and more lounge-like.
- A brown patterned pillow gives a readable focal point without adding clutter.
- The draped throw creates depth and catches light along the sofa’s contours.
- The woven hanging chair softens the geometry with a curved, natural texture.
What didn't
- Too many mixed plant shapes can compete with the bold fire pit and lighting.
- Cool bulbs would flatten the stucco and make beige tones look washed out.
- If the throw blanket is stacked, it reads messy instead of styled.
- Placing plants too close to heat sources risks drying and leaf damage.
- Skipping the rug makes the whole seating feel floating on hard tile.
What we'd skip if we did it again
Skip buying a second matching “set” of outdoor seating pieces. A woven chair plus a single anchored sofa layout already gives you enough contrast in shapes without doubling the budget.
Skip cool-white string bulbs or mixed-temperature bulbs. Warm light is the cohesive thread here; once everything is 2700K-ish, the stucco wall and cushions look richer immediately.
Skip over-styling with lots of small objects near the fire pit. Two plant placements and a rug-and-textile base keeps the scene calm, so the flame remains the most expressive element.
Frequently asked
How long does this kind of outdoor refresh take on a weekend?
Plan for about 4–7 hours total, depending on how many lighting adjustments you make. String lights and pillow/blanket styling are quick. The slow part is usually placement: centering the rug, confirming sconce height, and arranging plants so they don’t block light. If you’re hard-wiring wall fixtures, treat that as a separate task (and factor in scheduling time).
Is this renter-friendly if I can’t change wall fixtures?
It can be mostly renter-friendly if you choose plug-in options for the sconces or skip wall sconces and lean harder on string lights plus one tall lamp. For the rest, pillows, throws, rugs, and patio planters are all removable. The key is to keep the same “lighting at two heights” idea—overhead string lights plus light near seating height.
What if my patio is smaller than the photo?
Go smaller on the rug first: choose a size that still lets you fit the front legs of your seating on it. Keep only one statement texture item (like the patterned pillow) and choose solid neutrals elsewhere. If you can, keep plants on one side so the center stays open around the fire pit. Overcrowding is what makes small patios feel tight.
What if my patio is larger and feels empty?
Add a second lighting line—another run of string lights or a taller plant at the opposite end—so the glow doesn’t fade in the distance. If the seating spread is wide, go up one rug size and add a second throw blanket to create matching texture on both sides. The goal is balance: fire pit glow in the center, visual weight distributed left and right.
Where should I shop if I want this look without overspending?
For textiles and lighting, start with big-box or home decor retailers for a rug and pillow covers that match the warm palette. For wall sconces, look for modern outdoor-rated fixtures or plug-in wall light conversions. Woven outdoor chairs are often best from mid-century or patio specialty brands, but you can offset cost by choosing the rug and one lighting upgrade first.
Biggest mistake people make with outdoor fire pit styling?
Trying to make every item equally loud—too many different prints, too many plant varieties, and mixed bulb temperatures. In photos like this, the coherence comes from limiting the palette and repeating warm neutrals. Keep patterns to one pillow and let lighting and texture (rug + throw) do the rest of the work.
More in Outdoor & Patio
What $1,000 buys: a firepit patio seating refresh
A firepit patio seating area can look custom without a renovation. With $1,000 in weekend upgrades—string lights, warm sconces, and a few t…
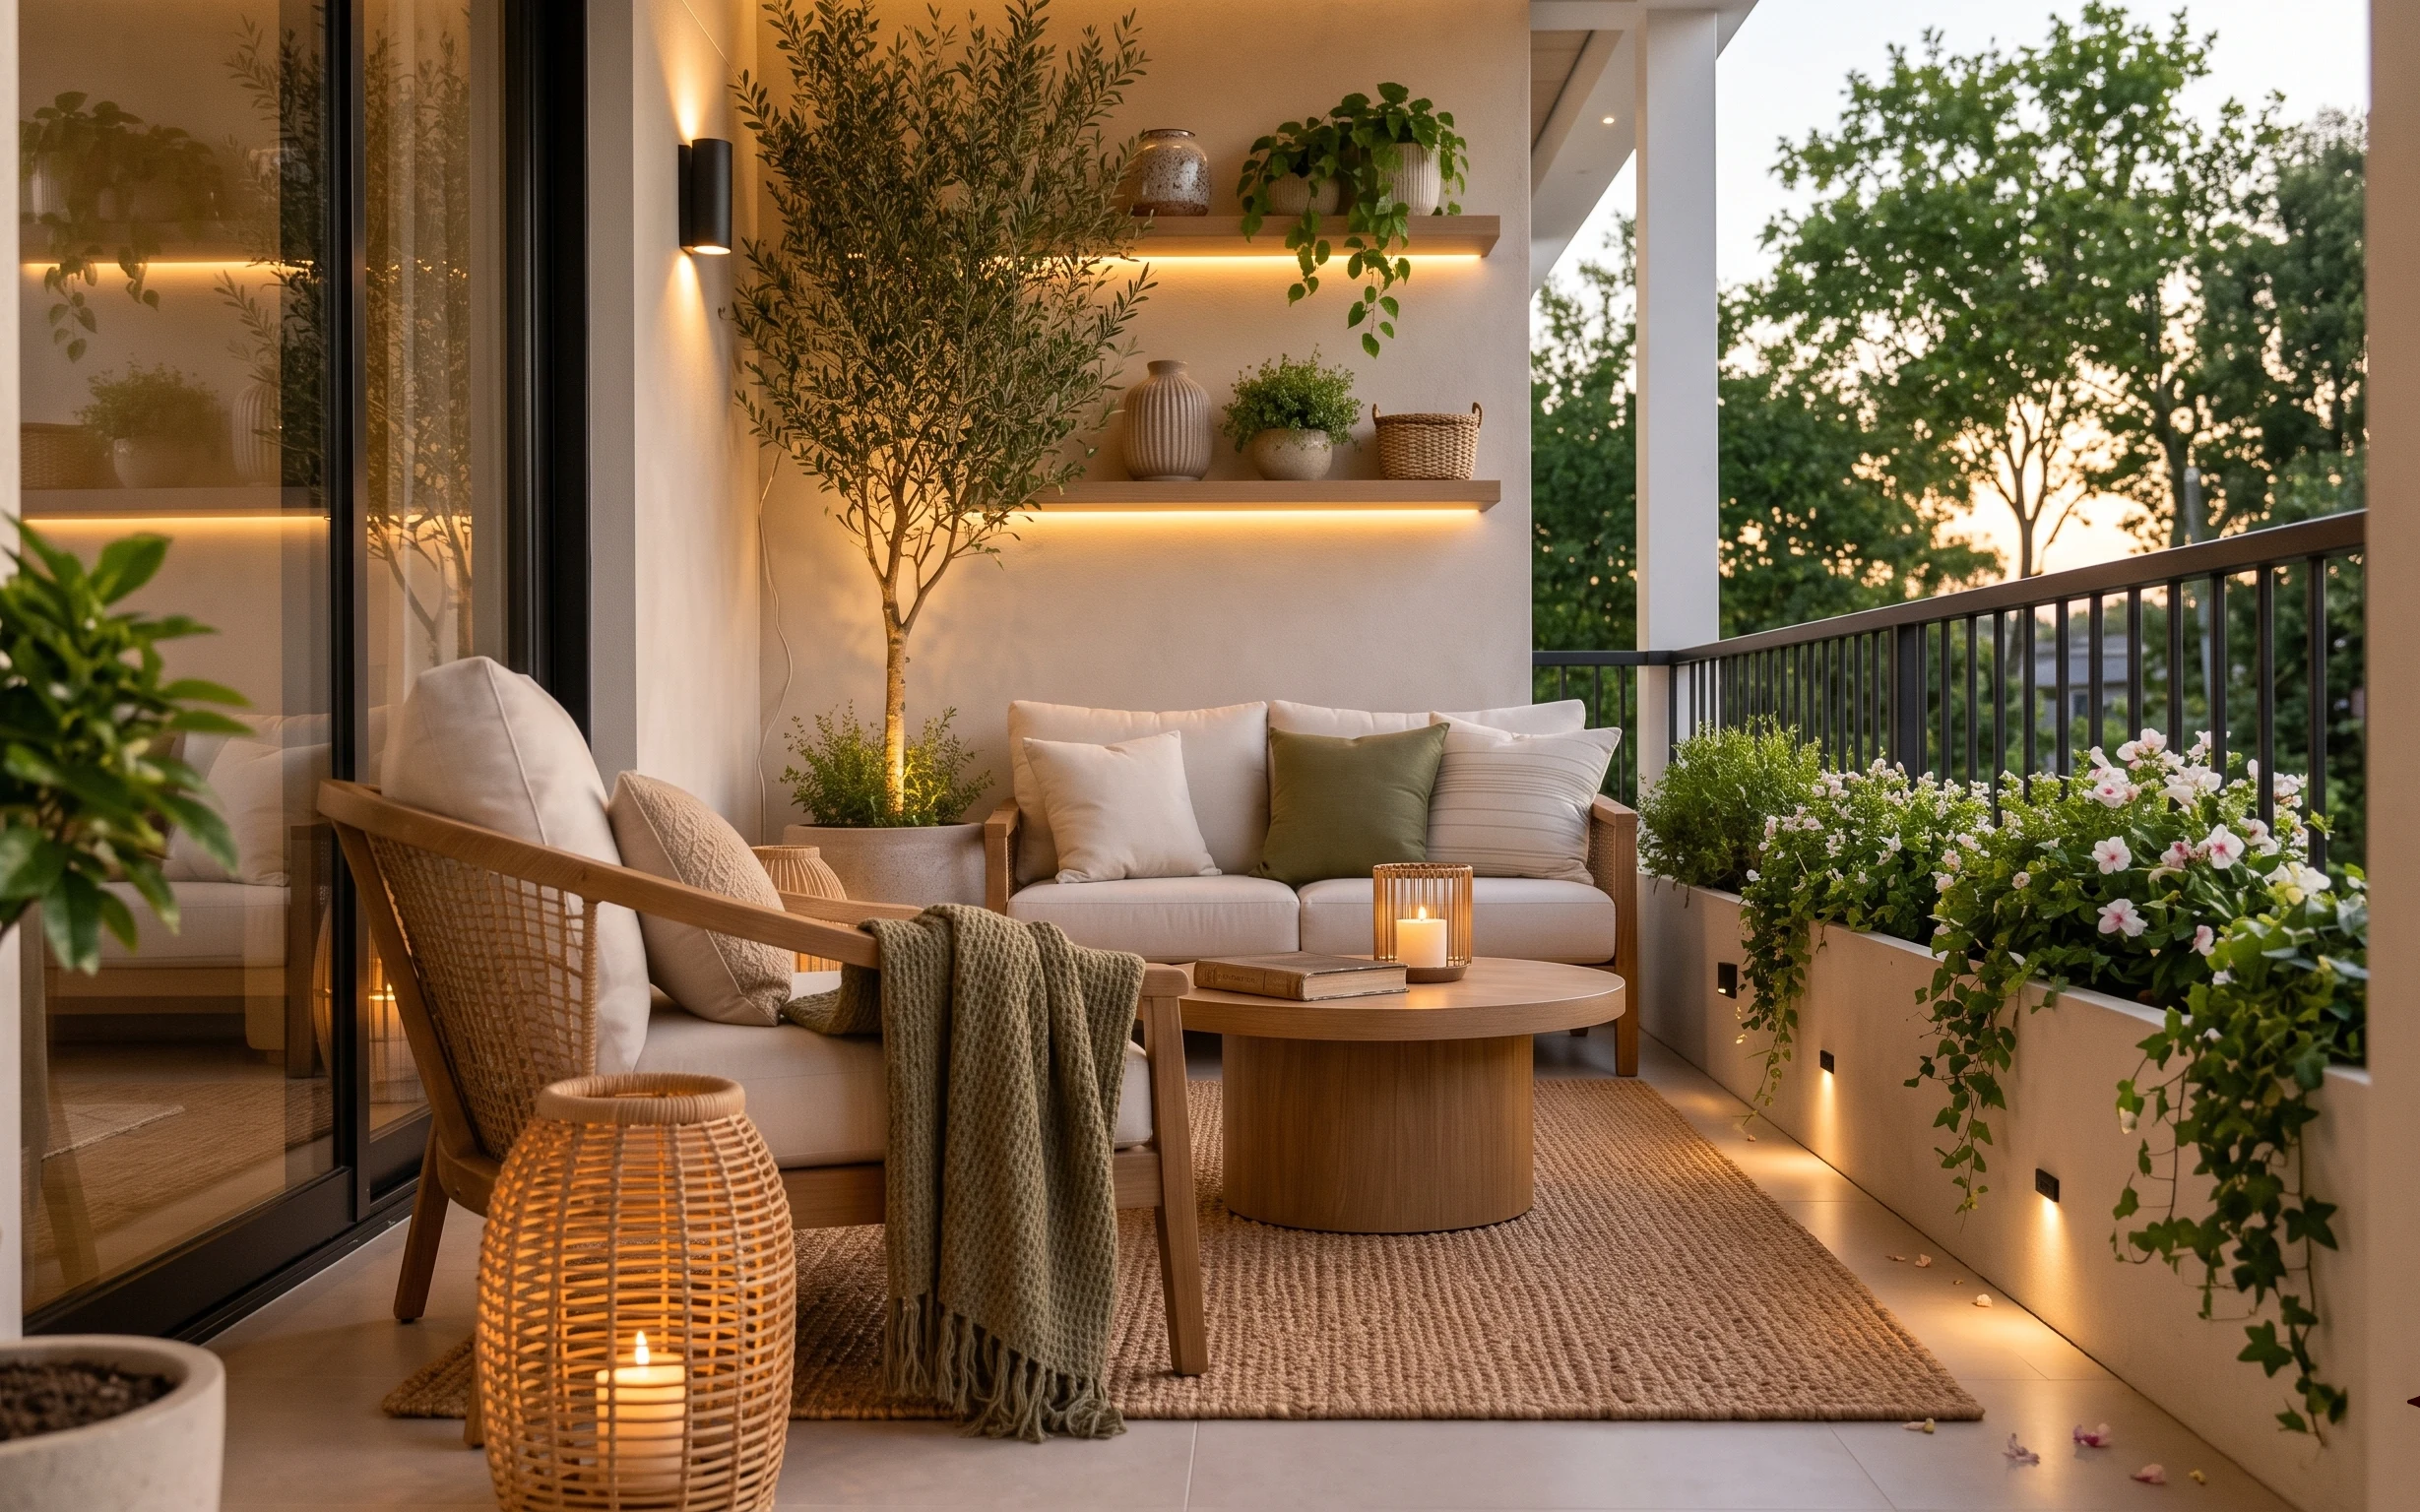
7 weekend swaps for a balcony seating nook with $300 impact
A balcony seating nook looks put-together fast when you swap in one grounding rug, a warm throw, and a few shelf accents. This $300 weekend…
7 no-drill patio lounge swaps for under $600
A patio lounge refresh for shared housing that relies on move-with-you upgrades: a patterned rug, cream outdoor cushions, and warm string-l…