- Best for
- Evening hangouts
- Cost
- Under $500
- Difficulty
- Beginner-friendly
- Renter-safe
- No-drill swaps + removable art
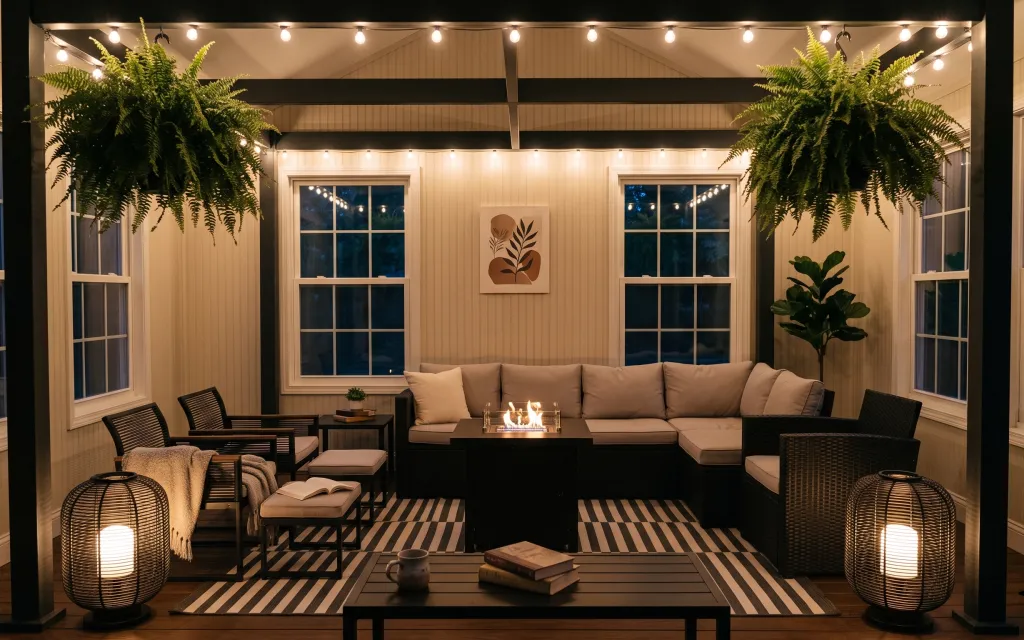
Why this black-and-green seating is the patio lounge of 2026
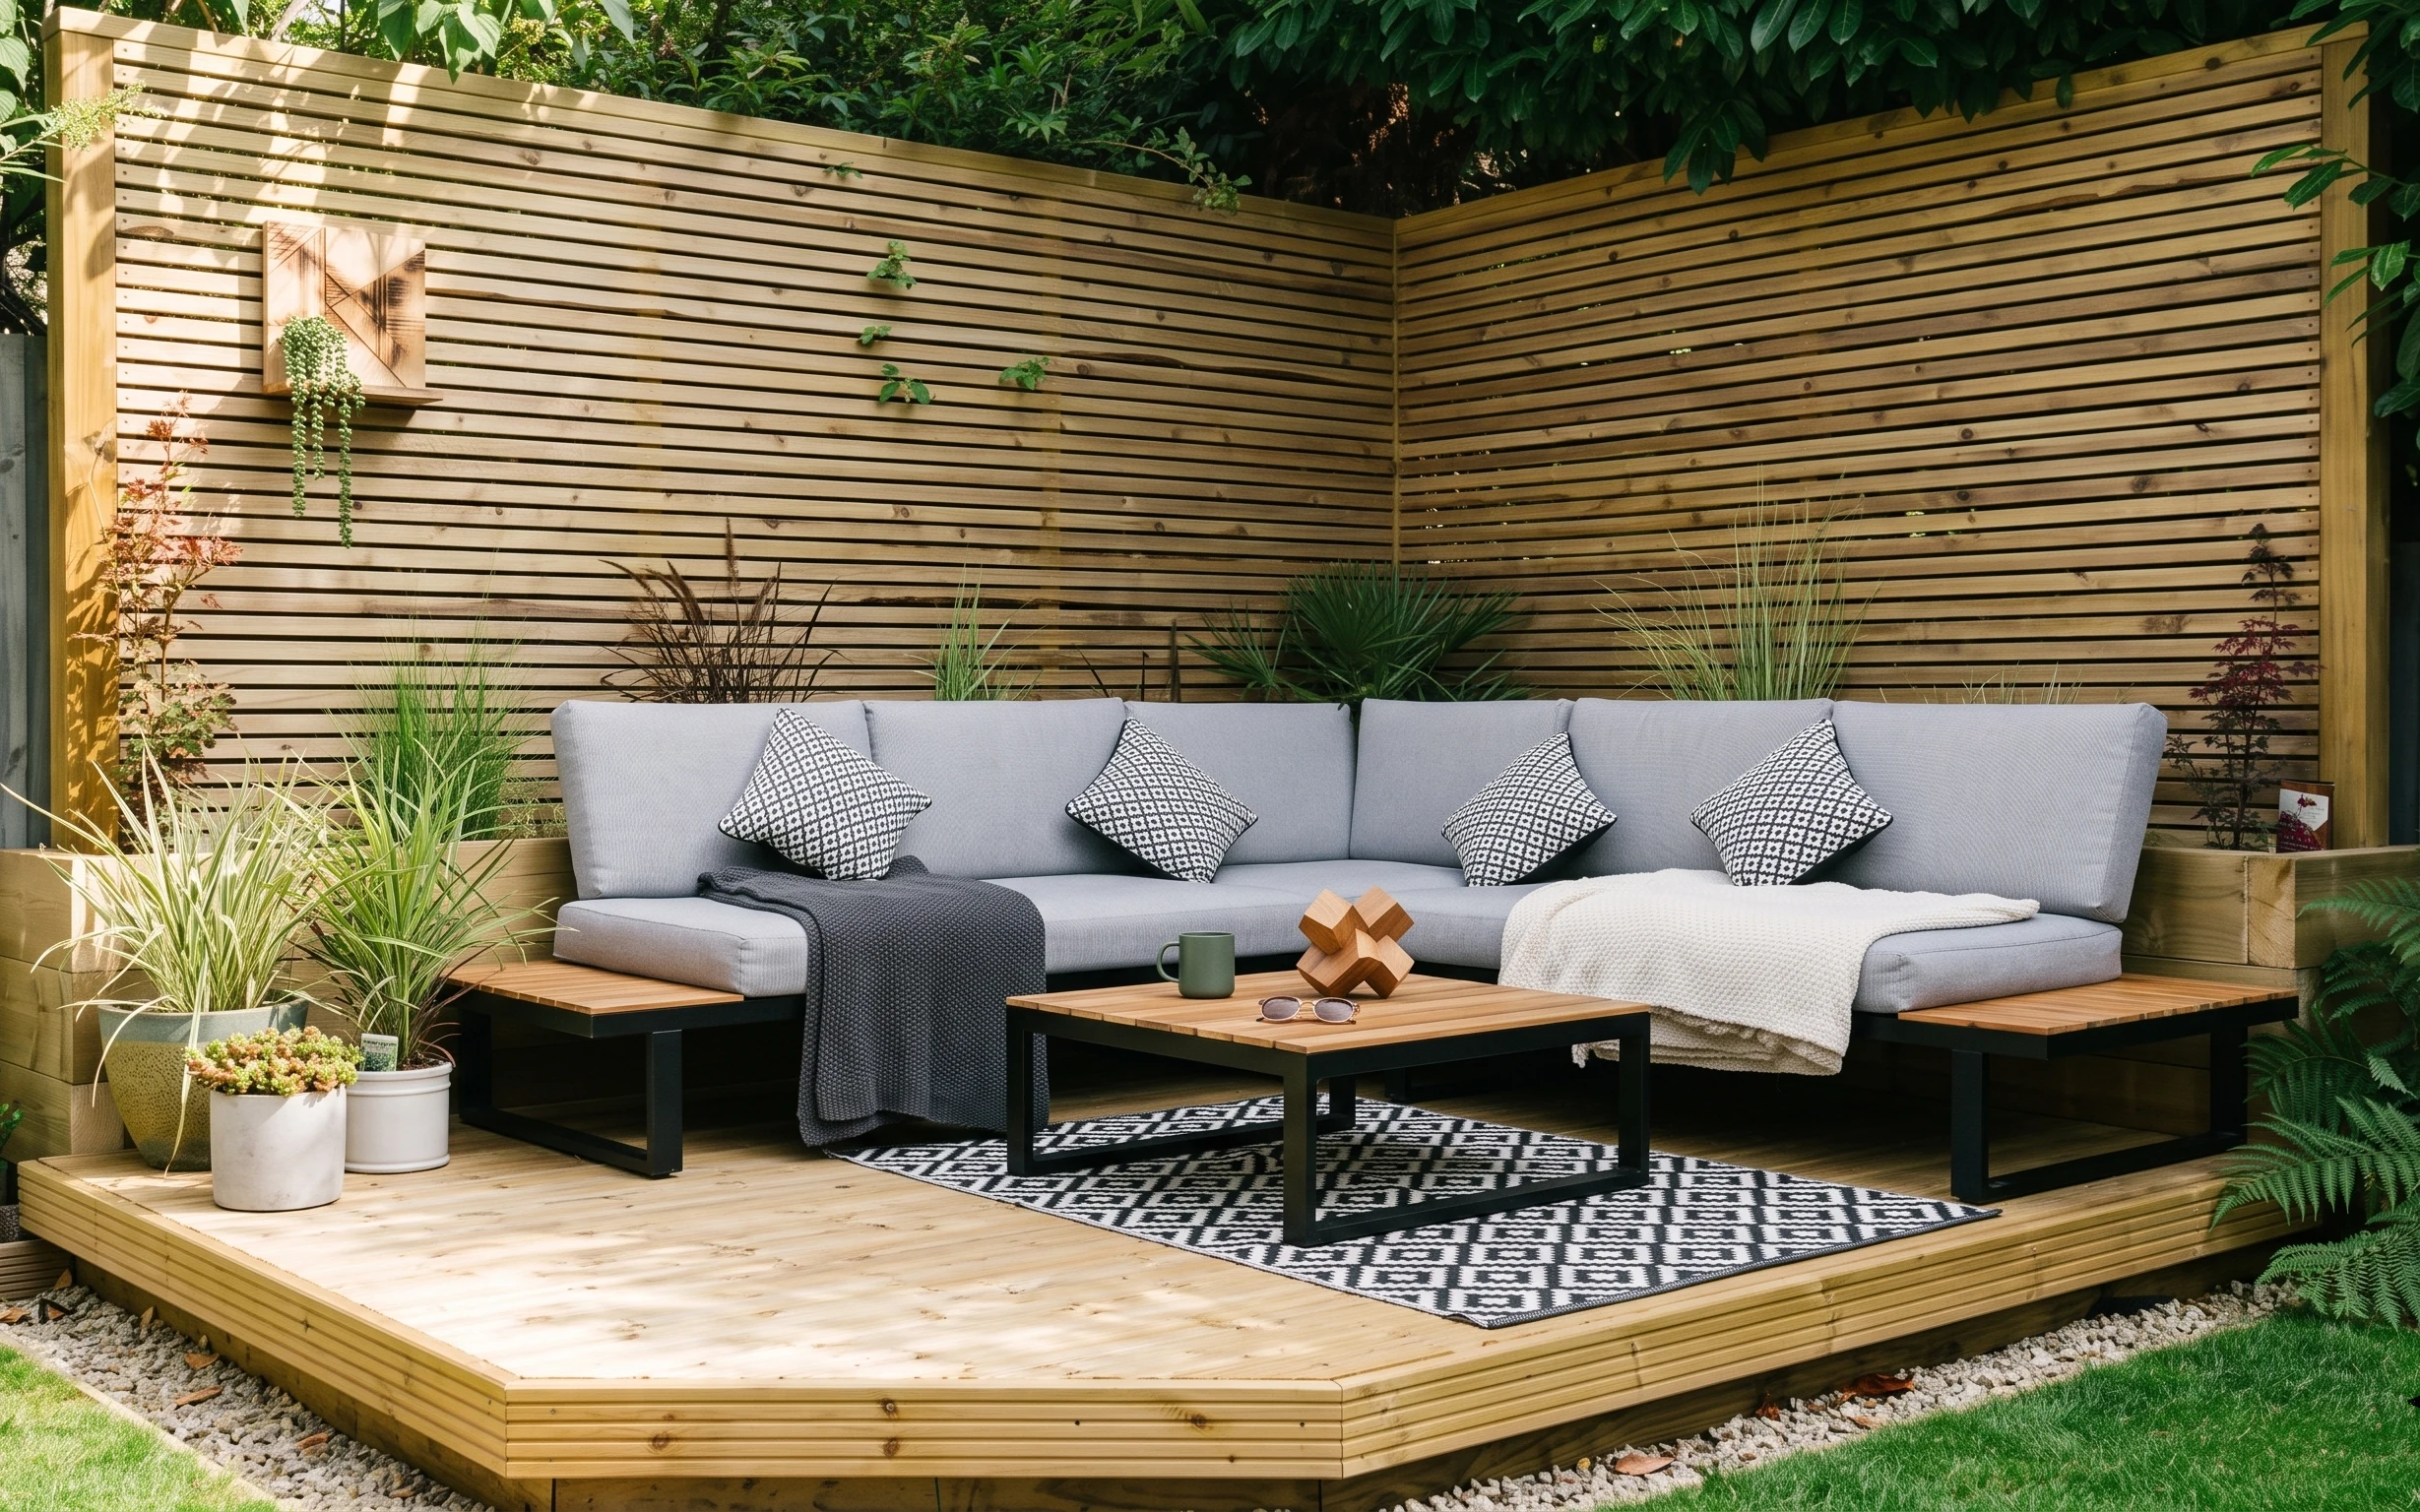
The moment you walk past the windows, the room reads as “intentional” mostly because of texture and warmth—not expensive furniture. You’ve got a striped outdoor rug anchoring the seating, beige pillows softening the black sectional, and a gray throw that adds a lived-in drape. The framed botanical wall art gives the wall somewhere to land, while the string lights keep the ceiling from feeling bare. For shared-housing lives, all of this is achievable with freestanding pieces and swaps that pack flat.
I used to overdo it with “proper” wall styling—like trying to solve the whole room with one big, permanent change. This setup is the opposite: it’s layered, movable, and forgiving. The lesson I caught is that warm candle glow plus string lights makes neutrals feel rich without repainting anything. When plants are part of the palette (not just decoration), the whole patio lounge looks finished even if you’re working with a limited budget.
Layer 1 — string lights along the ceiling ($15) Keep the ceiling from going dark
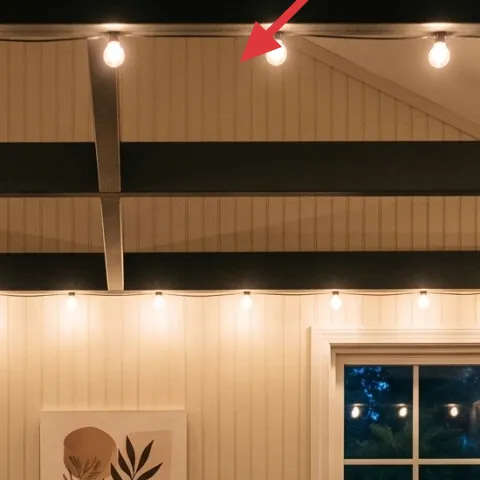
These string lights create the warm, low-glow canopy that makes black furniture feel welcoming. In the photo, they run along the ceiling line, so they visually “lift” the seating without adding extra bulky décor. The trade-off is that they read best when there’s already a ceiling beam or an edge to route them along, so placement matters. In a shared space, the upside is that you can keep them in a box and re-hang at the next place using clip-on hooks or Command-style adhesive (if your wall allows). It’s the kind of lighting detail you’ll still like after you move twice.
Hang for line-of-sight
Route the strand so the bulbs sit where your eye lands when you’re standing near the windows, not halfway behind a beam.
Layer 2 — multiple beige throw pillows ($24) Break up the black sectional
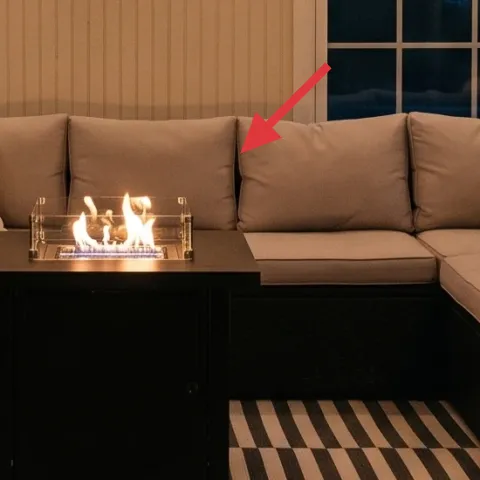
Beige throw pillows give the sectional visual breathing room against the dark frames. They also do real work at night: the warm string-light and candle glow reflects gently off lighter fabric, so the whole seating zone looks softer. This is a cheap way to avoid the “all black, no texture” problem that happens when you’re styling a built-in-ish layout. The trade-off I accept with neutrals is that you’ll want one darker or patterned element elsewhere (like the rug stripes) so the palette doesn’t feel flat. Packing-wise, pillow covers fold down easily for a move.
Choose removable covers
Pillow covers are the move-friendly version of “styling”—swap them like laundry and keep the inserts.
Layer 3 — gray throw blanket ($25) Add one draped softness moment
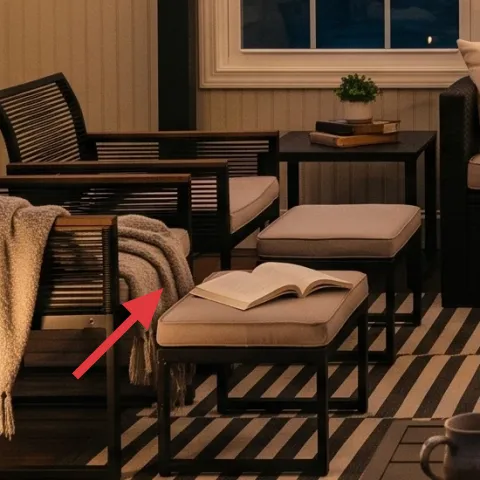
A gray throw blanket belongs on the arm or the corner of the ottoman because it reads as casual styling, not “stored decor.” In this photo it’s loosely folded, which matters: tight, perfectly placed folds can look fussy on day one and messy by day seven. The trade-off is that outdoor spaces get dust, so the fabric needs to be breathable enough to shake out. For shared housing, the upside is that a single throw changes the look dramatically without changing anything fixed. Pick a medium-weight knit or textured weave so it drapes instead of collapsing flat.
Let it hang 6–10 inches
A slight overhang makes the blanket look intentionally placed instead of like it got there by accident.
Layer 4 — framed botanical wall art ($55) Make the wall match the plants
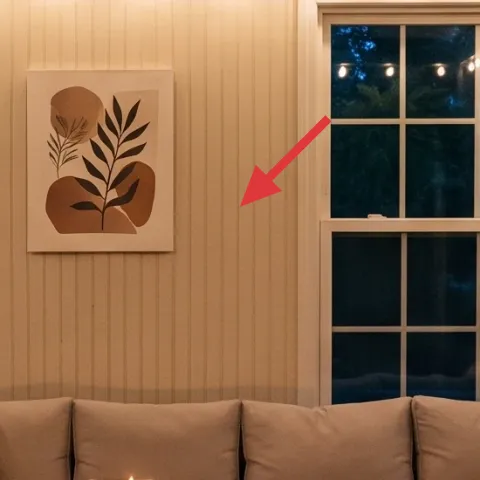
That centered botanical print is why the wall feels calm instead of empty. It echoes the real plants—greens and leaf shapes—so the look feels curated rather than random. The framed piece is also a smart move-friendly anchor: you can pack it in its frame and re-hang when the next lease starts. The trade-off is scale: the art needs to sit at a comfortable eye-line, otherwise it competes with the window grids. Instead of buying a new print, this is the one spot where DIY can save real money while keeping the same framed role.
Make it instead of buying it
DIY a hand-painted abstract on cardstock and swap it into the same framed botanical art role for a leafy, plant-matched wall moment.
Materials
- Cardstock (thick, 8.5×11) — 2 sheets — craft store — $3
- Small acrylic paint set (greens + warm beige) — 1 set — art store — $12
- Flat paintbrush (or mini sponge) — 1 — craft store — $4
- Black fine-tip marker — 1 — craft store — $6
- Command Strips multi-pack — 1 — hardware aisle — $8
Steps
- Measure the inner opening of the frame and cut cardstock to fit.
- Sketch a loose leaf-inspired shape with the black marker.
- Block in warm beige patches first, leaving gaps for texture.
- Layer green washes in the leaf areas, keeping edges imperfect.
- Let the paint dry fully before adding darker green details.
- Sprinkle in tiny specks or thin lines for movement.
Total DIY cost: $33 — saves about $22 over buying.
Layer 5 — black coffee table ($80) Keep the center grounded
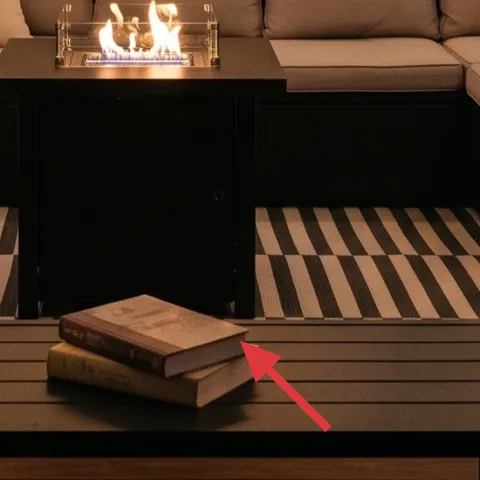
The black coffee table works like the visual “base” for everything else, especially with a fire bowl and candle light flickering above it. Because it’s low and dark, it doesn’t compete with the striped rug or the green plants; it anchors the center of the patio lounge without adding extra color. If you were starting from scratch, the obvious alternative is a lighter top, but that would pull focus from the warm candle glow. The trade-off with black is that you may see dust or fingerprints more, yet it reads sleek and cohesive in photos. Choose a table that packs flat or breaks down if you want the easiest move.
Don’t oversize for walkway space
If the table edge blocks your path between chairs, the patio starts feeling cramped fast.
Layer 6 — tall potted plant on right side ($80) Add vertical softness without clutter
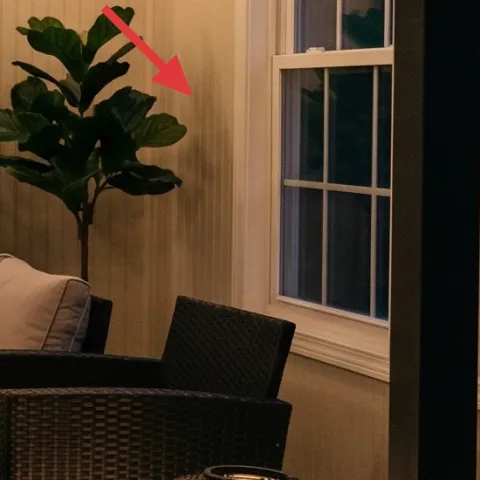
This tall potted plant gives you height on the right side, balancing the visual weight of the oversized greenery in the corners. It also repeats the same “leaf language” as the fern silhouette, so the whole room feels like one composition rather than separate decorations. The trade-off is that tall plants can look bare if they haven’t filled out yet, so choose one that already has strong leaves. In a shared space, the move-friendly part is that a pot plus some careful packing beats bulky furniture. Place it where the windows can backlight the leaves for that soft nighttime glow.
Let windows do the spotlighting
Backlighting from the glass makes leaf texture look richer than direct lamp lighting.
Layer 7 — striped outdoor rug ($150) Tie the seating into one zone
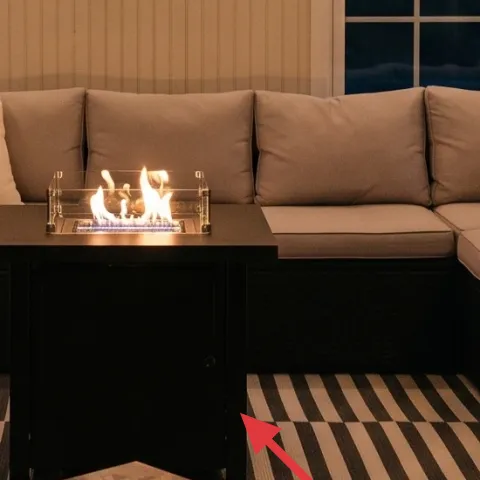
The striped outdoor rug is the pattern anchor, and it’s why the whole lounge reads styled instead of improvised. With black furniture and neutral cushions, the stripes introduce rhythm and help define a “here’s where we sit” rectangle. The rug also handles spills and daily life better than you’d think—especially outdoors—because textured stripes hide wear. The trade-off is that pattern can feel busy if the rest of the accessories are also patterned; that’s why the pillows and throw stay mostly solid. Packability is decent: rugs fold for moves, and you can roll them for a pickup truck without drama.
Match stripe scale to furniture size
With a sectional, choose bold-ish stripes that read from a few steps away.
The cost, layer by layer
| Layer | Item | Cost |
|---|---|---|
| 1 | String lights (set) | $15 |
| 2 | Throw pillow covers (set of 2) | $24 |
| 3 | Throw blanket | $25 |
| 4 | Framed botanical wall art (DIY cardstock insert) | $55 |
| 5 | Coffee table | $80 |
| 6 | Tall potted plant | $80 |
| 7 | Area rug 8×10 | $150 |
| Total | $429 | |
If you want a cheaper variant, keep the same layout formula but go smaller on the rug (a 5×7) and choose fewer pillow covers. You’ll still get the warm lighting + plants payoff; the biggest visual difference will be less pattern coverage under the seating.
What worked, what didn't (across the whole room)
This patio lounge works because every move-friendly swap supports a clear job: lighting for mood, rug for zone, pillows and throw for softness, and leaf-forward décor for continuity. The biggest win is that the wall art connects the live plants to the palette without overcomplicating the room.
What worked
- String lights along the ceiling keep the space warm without adding bulky fixtures.
- The striped rug defines a seating “square” under the sectional and chairs.
- Beige pillows soften black furniture and reflect candle glow after dark.
- The gray throw adds drape texture instead of another rigid geometric element.
- Botanical wall art repeats the leaf shapes already happening in the plants.
- The tall potted plant balances corner greenery so the room feels intentional.
What didn't
- If the rug stripes are too faint, the seating zone won’t read as one layout.
- Too many patterned textiles at once would fight the rug instead of supporting it.
- Using only warm light (no day-to-day neutral textiles) can make beige look dull.
- A wall print that’s off-center would compete with the window grid behind it.
What we'd skip if we did it again
Skip replacing large fixed things or adding permanent installs. In shared housing, the value is in swaps you can take with you—string lights, textiles, framed wall art inserts, and potted plants.
Skip “all-in” matching sets from one retailer. Keeping the coffee table, rug pattern, and pillows slightly different in texture looks more lived-in than perfectly coordinated.
Skip an oversized rug that bunches at the edges. The stripes need a clean rectangle under the seating; otherwise the layout looks accidental instead of composed.
Frequently asked
How long does this patio lounge refresh take?
Most of the work is textiles and staging: laying down the striped rug, swapping pillow covers, draping the gray throw, and positioning plants. The framed-art DIY (cardstock painting) is the only part that needs drying time, but it’s still a same-weekend project. Plan for about 2–3 hours total for setup, plus drying time for the DIY insert.
Will this work if my patio is shared and I can’t change the lighting permanently?
Yes—this plan relies on moveable lighting. The string lights are removable, and the main “glow” comes from candles in a fire bowl and warm bulbs. If you can’t use candles in your building, swap to battery candles inside the same glass vessel concept (without touching any hardwired fixtures).
What if my patio lounge is smaller than the one in the photo?
Go down a rug size and reduce the number of pillow covers by half. Keep the same pattern logic: define a seating zone with stripes, then soften with solids. For plants, choose either one tall plant or a pair of smaller pots so you don’t over-crowd. The goal is a clean rectangle underfoot and clear walking space.
What if my patio is bigger—how do I keep it from looking empty?
Use scale to your advantage: add a second rug layer (like a runner-style concept) or choose an even larger rug so the sectional sits fully on it. Add one more plant height point (a second tall pot or more coverage in one corner) rather than more patterned textiles. Keep the wall art centered so the composition stays intentional.
Where can I shop differently to keep the vibe without copying the brand?
For the rug and textiles, look for outdoor-safe stripes in home departments or discount retailers, but prioritize weave texture over exact colors. For the framed botanical look, thrift frames and print inserts, then DIY a cardstock painting insert. For plants, nursery shops and local garden centers usually have the best leaf texture.
Biggest mistake people make with this kind of outdoor lounge?
They buy a pretty rug but skip the layering that makes it feel warm at night. Without string lights (or another removable light) and beige/gray soft goods, black furniture can look stark. The second common miss is choosing wall art that doesn’t connect to the plant palette—leaf shapes in the print are what tie it together.
More in Outdoor & Patio

Under $500: no-drill patio lounge refresh with 7 swaps
A warm, plant-filled patio lounge can look styled without permanent changes. This $500 shared-housing refresh uses seven no-drill swaps (ru…

6 no-drill ways to make a covered patio lounge feel styled for $800
A covered patio lounge already has the bones—now it just needs a few high-impact swaps. This $800 weekend refresh focuses on a striped outd…
7 budget-friendly outdoor swaps for an outdoor lounge
A light-gray sofa, black-and-white rug, and wood coffee table turn a basic deck into an outdoor lounge. This $700 weekend refresh focuses o…