- Best for
- Weekend mirror-and-surface refresh
- Cost
- $800 budget plan
- Difficulty
- Confident DIY
- Renter-safe
- Mostly yes (paint only if allowed)
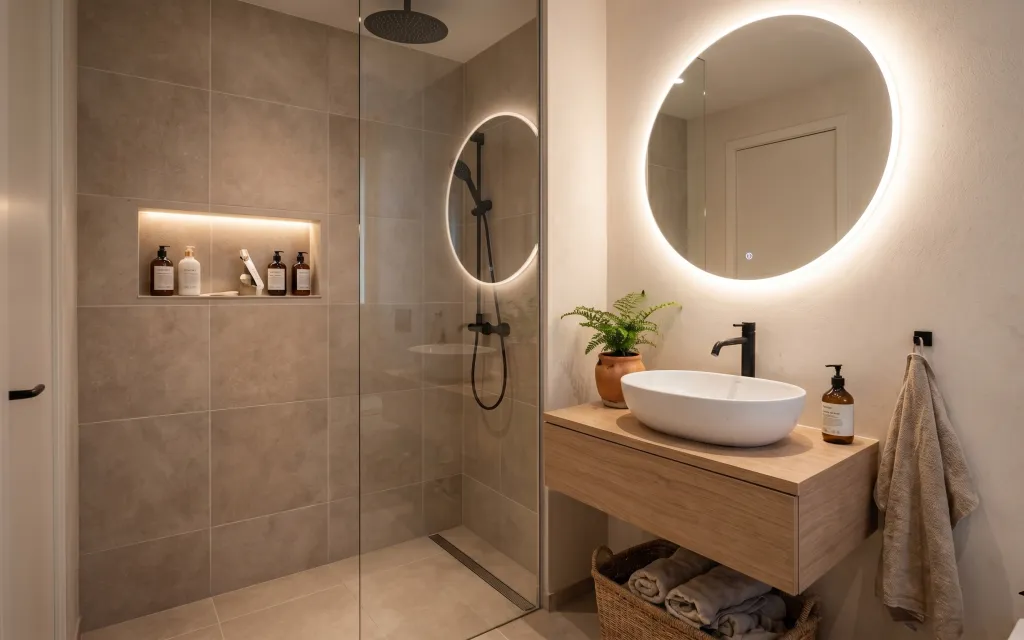
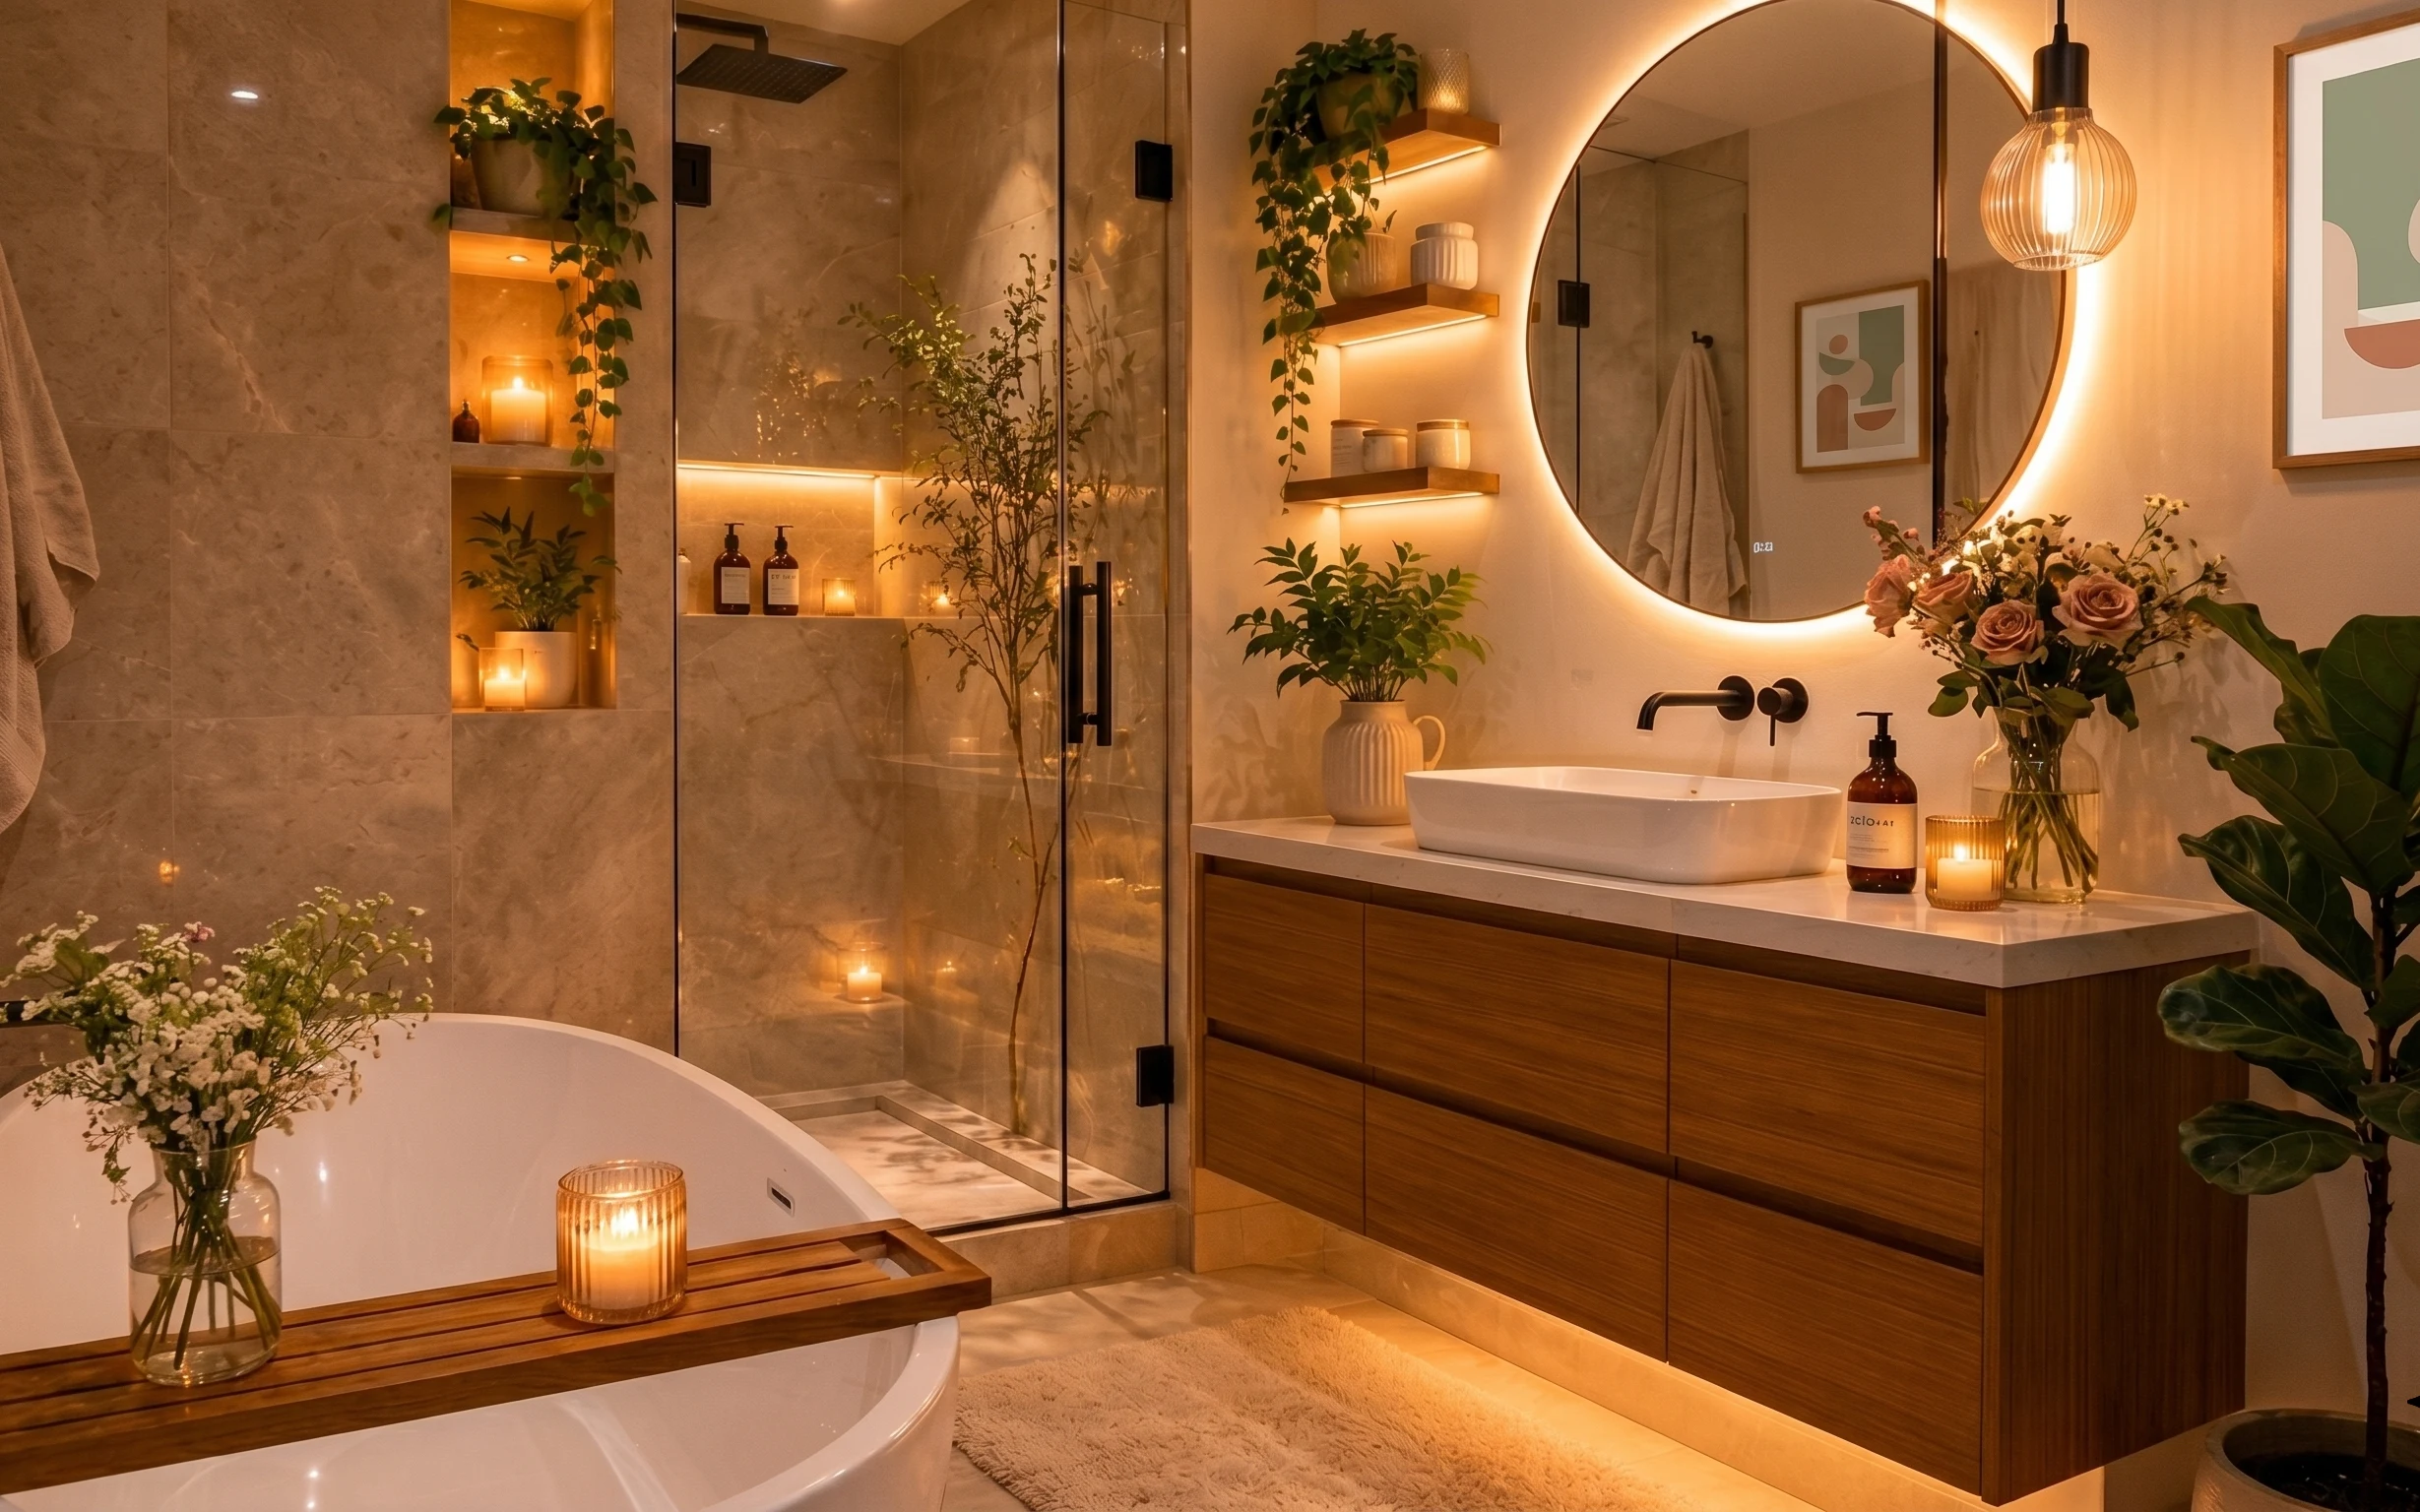
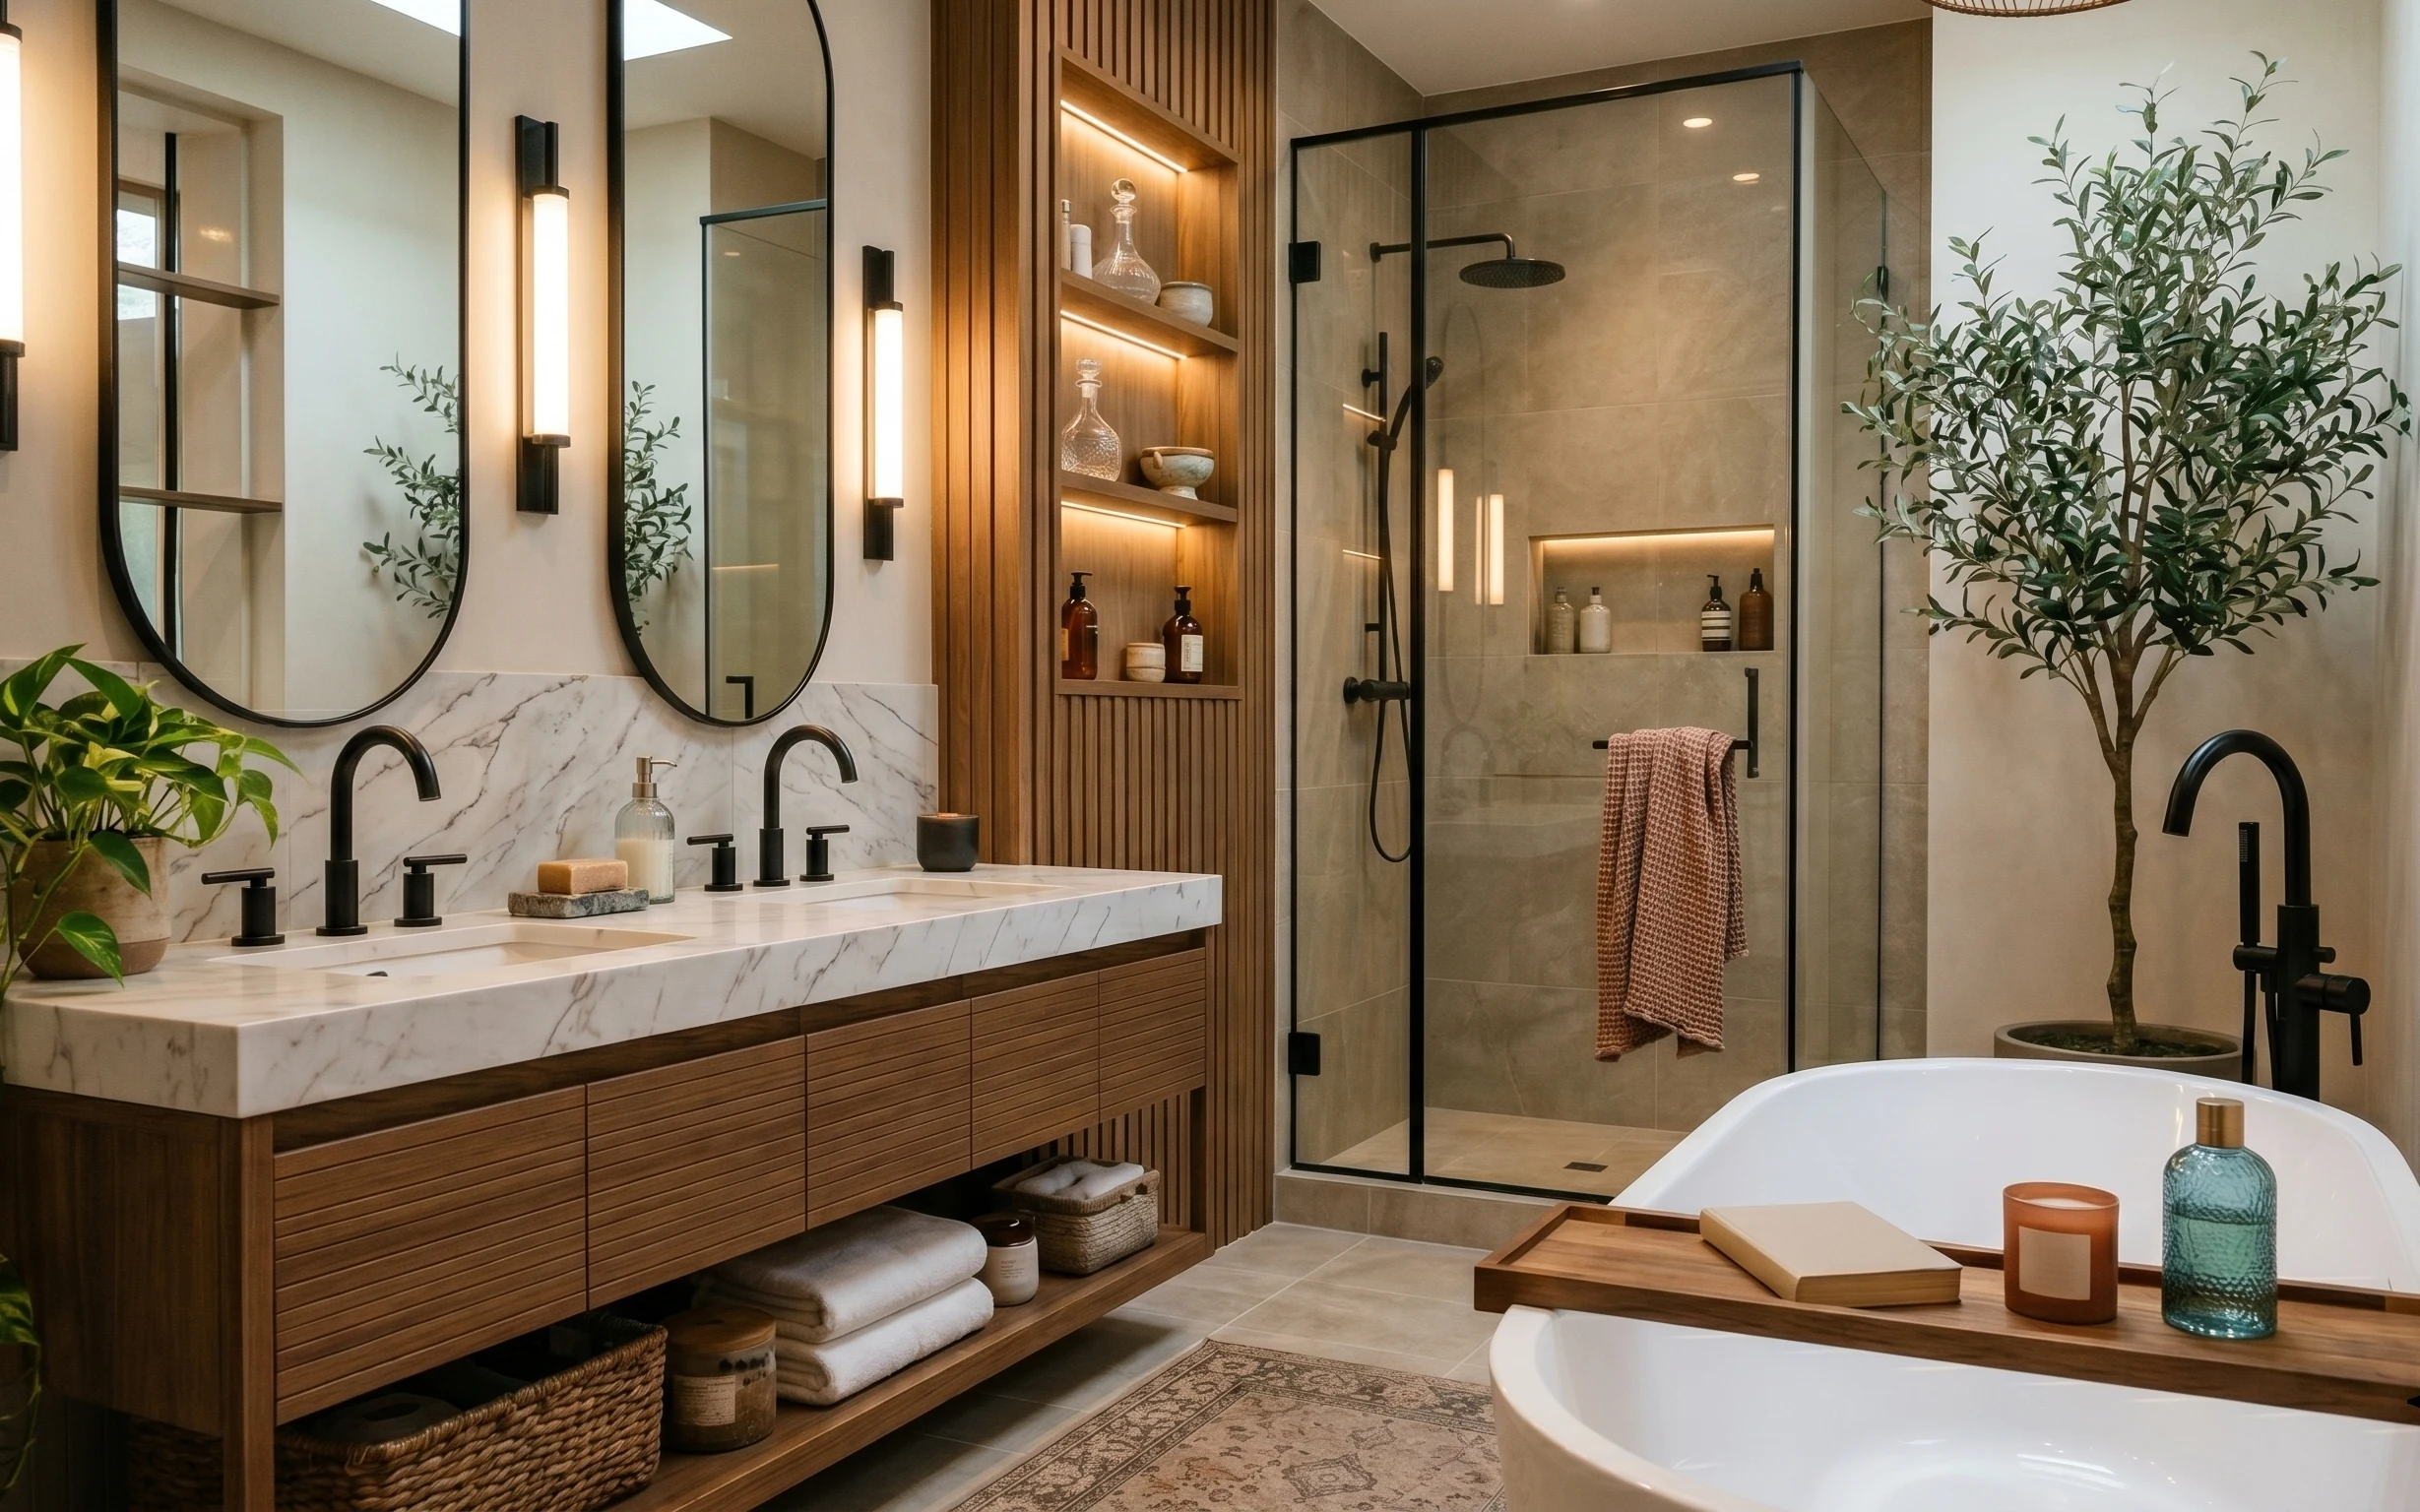
Why warm-gray tile and a backlit circle are the bathroom of 2026
The look starts with big, beige stone-look tile and a warm-white wall—so the room already reads calm when the rest stays orderly. In this photo you can see three tactile cues: the terracotta pot, the woven basket, and the towel’s plush texture. A backlit circular mirror adds a halo effect without needing extra fixtures. For US homeowners working fast (and without major demolition), this is achievable because you’re editing what the eye lands on most: the mirror, the vanity surfaces, and the small repeated “clutter items.”
When I did my first bathroom refresh, I kept moving the bottles around like the arrangement itself was the problem. It wasn’t. The real shift happened when I treated the surfaces like a styling shelf: fewer items, matching shapes, and the warmest lighting I could manage. Now I always look at where the eye goes first when you step in—usually the mirror—and build everything else from there.
Layer 1 — Shower niche toiletry bottles ($25) Match the shapes on repeat
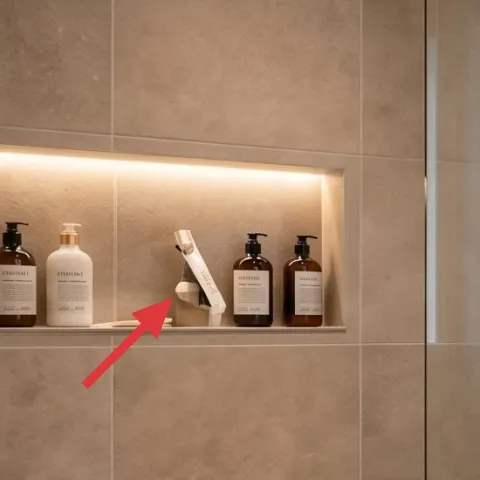
That recessed niche above the shower is acting like a built-in shelf, and right now it’s doing the job of making the space feel finished. The quickest upgrade is to refresh the bottles (or how they’re grouped) so they repeat in shape and height: pump bottles together, lotion bottles together, and keep labels oriented the same direction. Choosing a cohesive set matters more than spending on “fancier” individual items, because the niche is bright and the eye reads it fast. The trade-off: you’re committing to a small collection instead of keeping every product visible.
Layer the niche like a display shelf
Group bottles by type (hand wash vs. body) and stagger heights so the niche doesn’t look accidentally random.
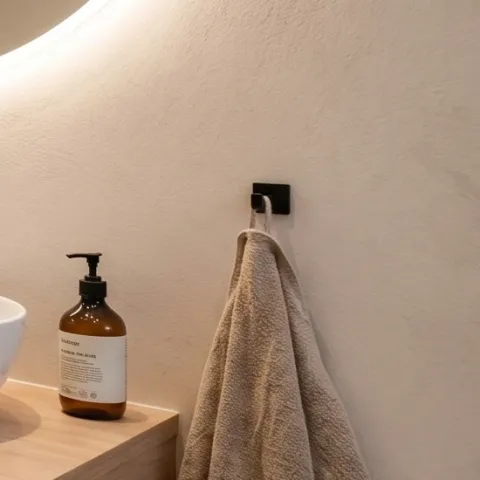
Layer 2 — Hanging bath towel ($30) Use one towel as your color anchor
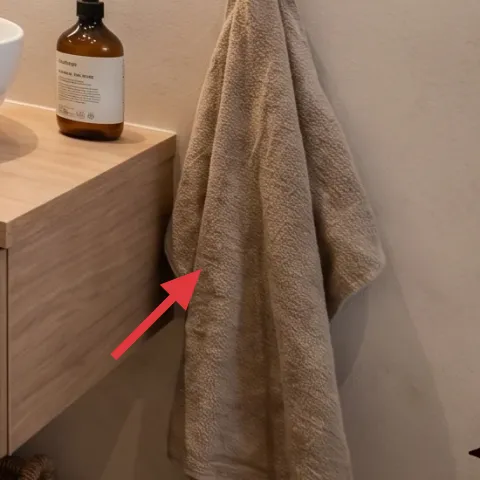
This hanging towel is doing more work than it looks like—it's the vertical, soft texture that breaks up the tile’s hard lines. For a refresh, pick a towel that matches the warm neutral direction of the room (oat, beige, or light sand) and hang it so it forms a clean drape rather than a lump. If the towel is too bright or too cool-toned, it will fight the beige stone-look tile. The trade-off is practical: keeping a single “display” towel means you rotate laundry more intentionally.
Thin towels can read flat in warm light
Choose a towel with real pile so it looks plush next to the smooth tile and bright mirror glow.
Layer 3 — Woven storage basket with folded towels ($30) Hide the everyday without hiding the texture

The woven basket at the bottom right adds warmth and pattern without changing the big surfaces. It’s also a visual container—when the towels are tucked in, the room looks organized even if you’re mid-week. A basket like this works best when it’s not overflowing; keep it to folded towels you’ll actually use, so the texture reads intentional, not clutter. The trade-off is capacity: woven baskets hold more than people expect, but not everything should live there. Keep the basket as a “backup linen” zone, not a catch-all.
Fold towels the same way every time
Consistent folds make the basket look curated, even when contents change from week to week.
Layer 4 — Potted green fern in terracotta pot ($45) Add one living color note
That fern in a terracotta pot brings the only strong color into the room—fresh green that works against the beige tile and warm white wall. The plant’s shape matters: a leafy, slightly arching texture keeps the countertop from looking too straight and horizontal. For a homeowner weekend project, it’s an easy win because you’re not changing plumbing or tile; you’re adding a single, visible element. The trade-off: plants need a simple maintenance rhythm. If the fern browns, replace it quickly, because sad greenery reads worse than no greenery.
Don’t oversize the plant
A huge plant crowding the vanity makes the room feel smaller; match the pot scale to the counter depth.
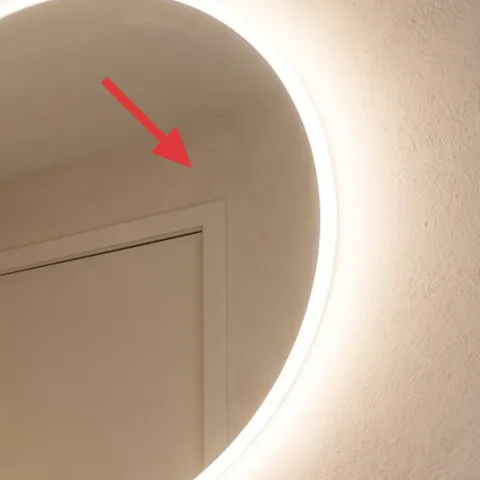
Layer 5 — Warm white wall paint around the mirror ($70) Keep the halo area clean
The warm-white painted field around the backlit circle mirror is what makes the light feel intentional instead of harsh. If your wall is off-white-yellow, too gray, or patchy from prior touch-ups, the glow will look uneven—especially near the mirror’s bright edge. A weekend paint job in this zone is a high payoff because it affects the most photographed part of the room. The trade-off is prep: you’ll need masking and careful edging so tile lines stay crisp.
Make it instead of buying it
This is a warm white paint touch-up around the mirror so the halo reads even and clean against your existing tile.
Materials
- Wall paint (warm white, sample-to-gallon match) — 1 quart or small can — paint store — $40
- Painters tape — 1 roll — hardware store — $8
- Microfiber roller cover (trim/small area) — 1 pack — hardware store — $5
- Disposable tray liners / small disposable brush — 1 set — hardware store — $7
Steps
- Mask edges: tape along tile grout lines and around the mirror trim so you only paint the wall field.
- Wash the wall lightly with a damp cloth and let it dry completely.
- Stir paint thoroughly, then cut in the edges with a small brush.
- Roll the center with a thin, even coat using light pressure.
- Let the first coat dry fully, then check for streaks under the mirror’s warm light.
- Apply a second thin coat if needed for an even halo glow.
- Peel tape while the final coat is slightly tacky to keep a sharp line.
Total DIY cost: $60 — saves about $10 over buying.
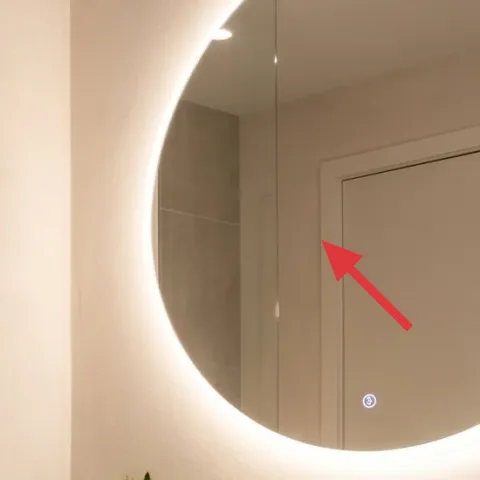
Layer 6 — Backlit circular mirror ($120) Make the light do the decorating
A backlit circular mirror changes how a bathroom feels because it turns lighting into an architectural shape. Here, the mirror’s warm glow softens the beige tile and makes the vanity surface look cleaner than it actually is. For homeowners, upgrading the mirror is one of the fastest ways to get “spa” energy without touching the tile. The trade-off is decision fatigue: choose the size that matches your vanity width, or you’ll either crowd the wall or leave too much negative space around it.
Match mirror size to vanity width
If the circle is too small, the glow looks like an accent; if it’s too big, it dominates.
Layer 7 — Bathroom vanity with drawers ($450) Keep the wood warm and uncluttered
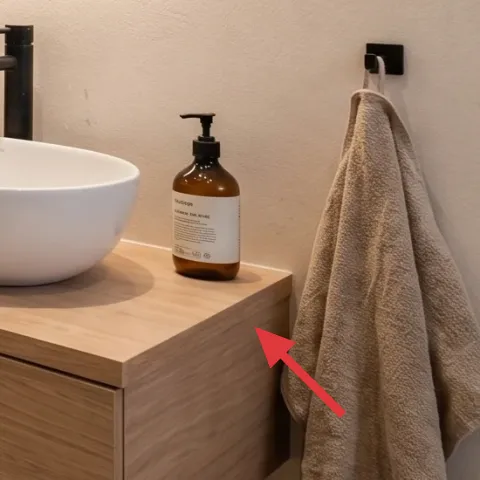
That light wood vanity brings warmth to the room’s stone-look tile and keeps the whole setup from feeling cold. A vanity refresh matters because it’s the base for everything: the sink bowl, the faucet area, and the countertop styling. If your current vanity reads worn—scratches, dull finish, or mismatched tone—upgrading (or replacing) the unit is the move that makes the rest look “intentional,” not temporary. The trade-off is cost and timeline: it’s the biggest ticket item here, but it also locks in the bathroom’s overall proportion.
Leave the counter mostly empty
One pump bottle set plus a small plant beats stacking multiple containers every day.
The cost, layer by layer
| Layer | Item | Cost |
|---|---|---|
| 1 | Shower niche toiletry bottles | $25 |
| 2 | Hanging bath towel | $30 |
| 3 | Woven storage basket with folded towels | $30 |
| 4 | Potted green fern in terracotta pot | $45 |
| 5 | Warm white wall paint touch-up around the mirror (DIY) | $70 |
| 6 | Backlit circular mirror | $120 |
| 7 | Bathroom vanity with drawers | $450 |
| Total | $770 | |
A cheaper route keeps the vanity and mirror, then spends the money on fresh bottles, a nicer towel, and one warm-white paint band around the mirror. That still delivers the same “clean glow” feeling, just with less structural change.
What worked, what didn't (across the whole room)
The best parts of this setup are the ones you can repeat with restraint: warm light from the circular mirror, a few textured accessories, and a consistent beige palette. When the shower niche and vanity stay mostly tidy, the whole bathroom reads like a spa even without extra décor.
What worked
- The backlit circular mirror makes warm light feel intentional, not fixture-driven.
- Terracotta and woven textures add warmth against the smooth, large-format tile.
- Keeping the shower niche styled reduces clutter at the most visible height.
- The fern adds a single green note that softens the neutrals.
- One hanging towel gives the wall a clear vertical “anchor.”
What didn't
- Mixed label directions on niche bottles makes the shelf look busy under bright light.
- Overstuffing the woven basket turns texture into visual noise.
- Cold or gray wall paint around the mirror edge can make the glow look uneven.
- An oversized plant crowds the vanity and steals negative space from the mirror.
What we'd skip if we did it again
Skip repainting the entire bathroom. The tile is already doing the heavy lifting, and the biggest visual win is the warm-white halo area around the mirror, not a whole-room reset.
Skip buying multiple small décor pieces to “fill” the counter. In this layout, a couple of repeatable essentials (bottles, one towel, one plant) read more elevated than a rotating mix.
Skip a mirror that’s too small for your vanity. If the circle doesn’t feel proportional, the light becomes an accent instead of the focal glow that makes the room feel finished.
Frequently asked
How long does this bathroom refresh take on a weekend?
Most homeowners can do it in two days. Styling the shower niche, towel placement, and basket/plant setup are a couple of hours total. The only schedule-heavy part is the paint touch-up around the mirror: plan for masking, two coats, and drying time between coats so you don’t peel tape too early. If you’re swapping the vanity or mirror, build in extra time for delivery and basic alignment checks.
If I rent, can I still copy this look?
Yes—copy everything that doesn’t involve permanent changes. Keep the tile-and-wall calm, then focus on non-drill moves: towel color, a styled niche shelf of matching bottles, a woven basket, and a fern in a terracotta pot. For lighting, a new mirror depends on how your rental handles mounts, so choose a renter-friendly option first. If painting isn’t allowed, concentrate the “warm halo” effect with better mirror cleaning and a warm-toned bulb (if your setup allows).
My bathroom is smaller—what should I scale down first?
Start by scaling down the accessories, not the mirror. In a compact room, the woven basket and plant can overwhelm the counter if they’re oversized. Use a smaller fern or a slimmer pot, keep only one hanging towel, and reserve the niche shelf for a minimal set of bottles. The backlit mirror is usually the best “shape” upgrade because it adds light without adding furniture volume.
What if my bathroom has brighter or cooler lighting than this photo?
Cool lighting can make warm neutrals feel gray. In that case, lean harder into warm white paint around the mirror (or at least keep the mirror area visually consistent), and choose accessories in oatmeal or sand tones instead of stark white. The key is to keep label colors and bottle finishes consistent so they don’t reflect harsh highlights. If you can choose bulbs, aim for warm temperature rather than daylight.
Where should I shop for the backlit circular mirror and vanity style?
For the mirror, look for brands that list exact dimensions and color temperature for the backlight—size matters because the circle needs to sit proportionally to the vanity. For the vanity look, search for light oak or warm wood finishes with simple drawer fronts and a clean countertop line. If you’re on a tight timeline, buying a vanity in-store can beat custom orders. For the accessories, buy the towel and basket locally so the textures match the room tone immediately.
What’s the biggest mistake people make when recreating this bathroom style?
Over-accessorizing the surfaces. This photo works because it has repeated shapes (bottles), controlled texture (woven basket + terracotta + towel pile), and one strong focal light (the circular backlit mirror). If everything is “equal importance,” the room looks busy instead of curated. Pick a small set of essentials and keep the counter and niche shelf from becoming a catch-all.
More in Bathroom

Warm-gray tile bathroom refresh, $800
A warm, spa-like bathroom refresh that leans on renter-proof updates: fresh toiletries styling, a better towel setup, a potted fern, warm w…
What $250 buys: a renter-friendly bathroom spa corner
A renter-friendly bathroom spa corner built from 7 no-drill upgrades—warm lighting cues, soft textiles, and styled countertop moments. With…
Bathroom spa-style nook refresh for $400: 7 budget swaps
A spa-style bathroom nook can look designed without a gut job. This $400 refresh leans on one grounding patterned rug, warm lighting, and e…