- Best for
- Warm spa glow with small swaps
- Cost
- $705 total plan
- Difficulty
- Weekend-friendly
- Renter-safe
- Mostly (wall peel-and-stick + decor swaps)
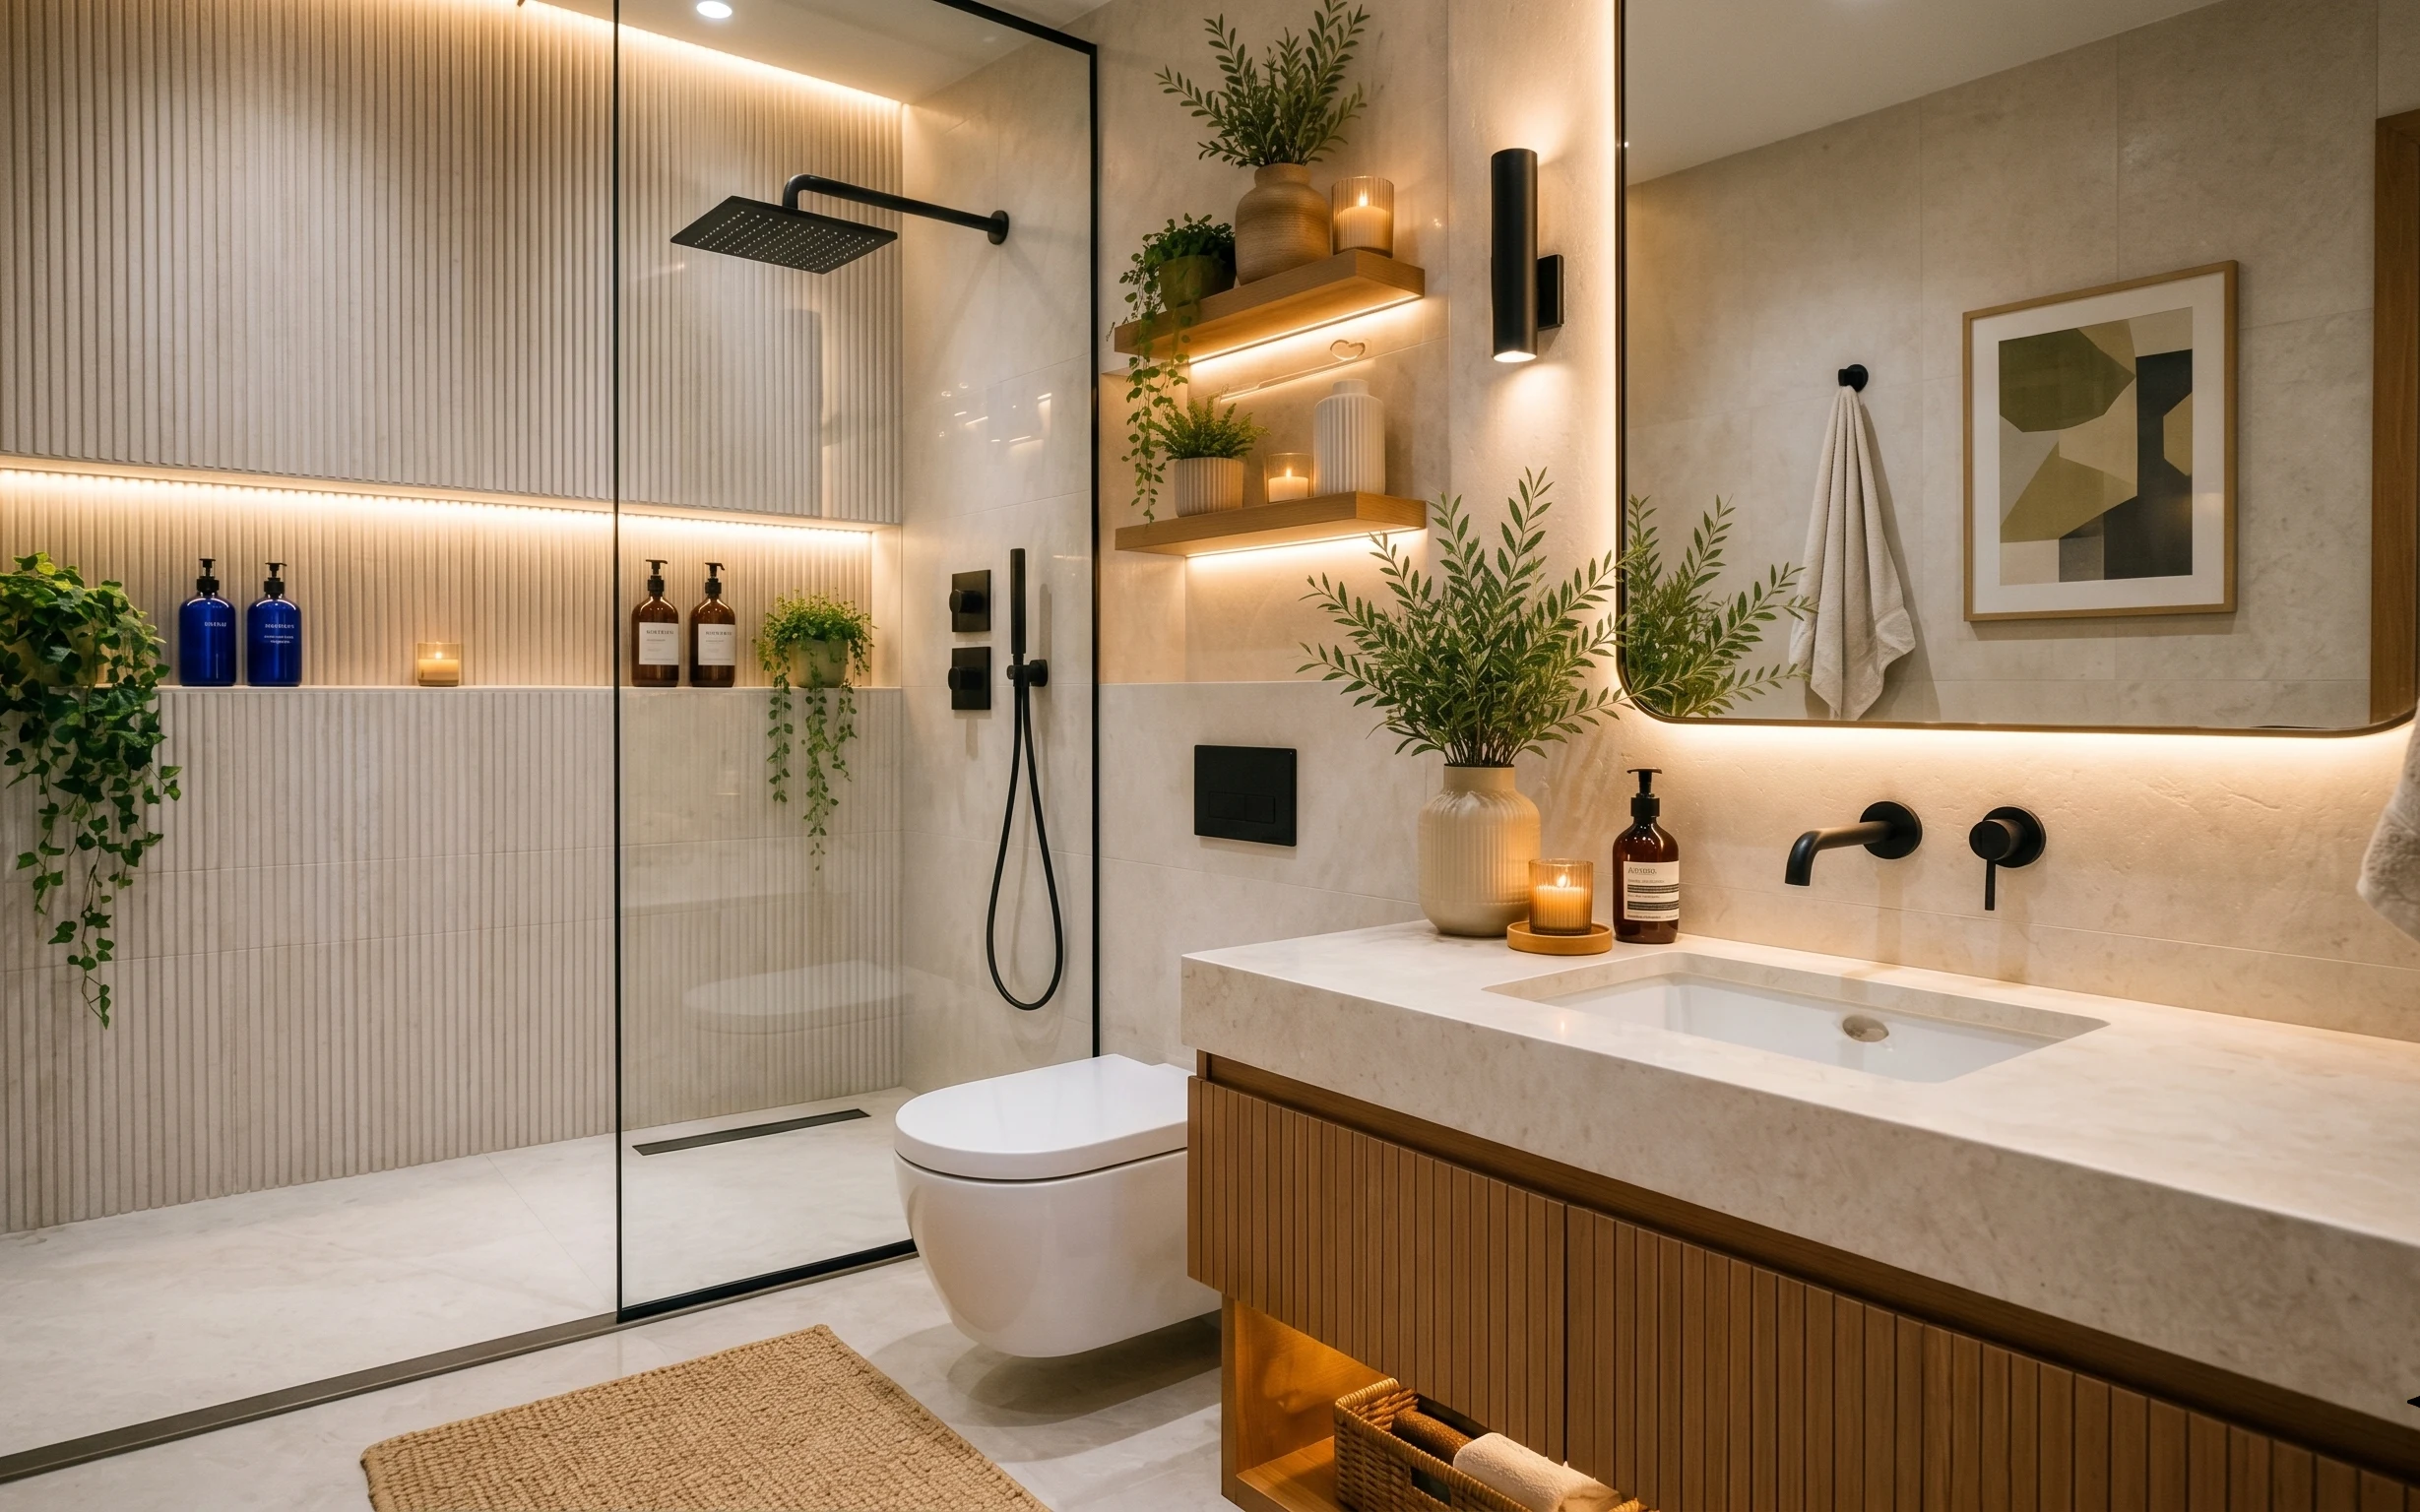
Why warm marble-and-brass detailing is the luxury bathroom of 2026
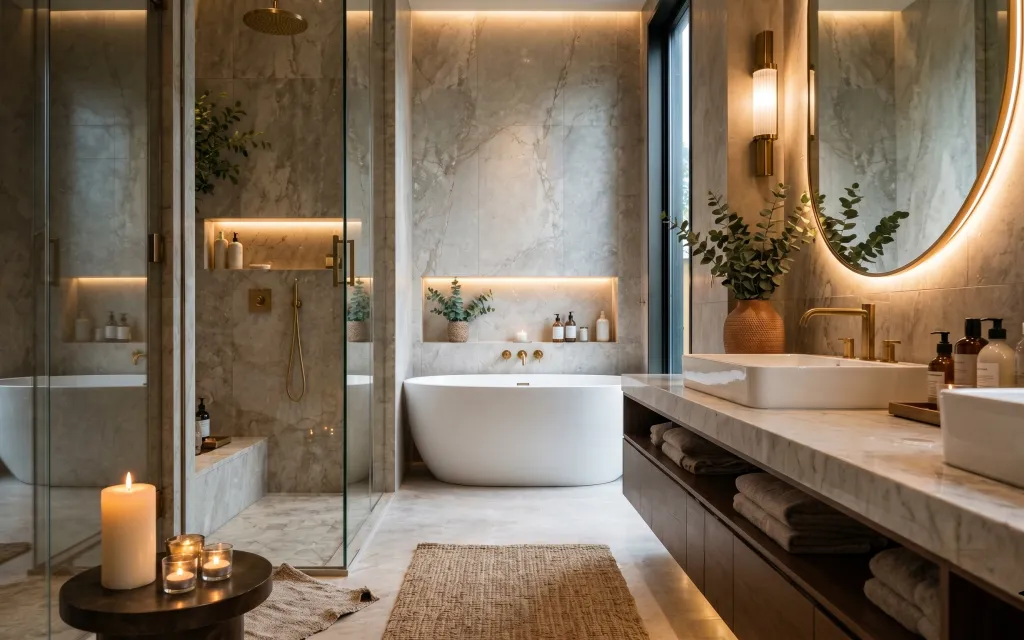
That warm glow is doing more than you think. In this bathroom, the marble-look tile reads cool at first glance, then brass pulls it back into a gentler temperature. The woven bath rug adds texture underfoot, while the vanity countertop and folded towels keep the center calm instead of cluttered. Even the eucalyptus in a textured vase gives you that “spa pause” feeling without needing new plumbing or demolition—just swaps and a focused accent wall.
I almost over-decorated the counter the first time I tried this look. Then I caught myself stacking too many small items near the mirror and it started to feel busy instead of restful. What fixed it was choosing one vessel (the eucalyptus vase), one scent moment (the candles), and letting everything else stay tall, straight, and limited. The result reads intentionally styled even when you’re moving fast on a weekend.
Layer 1 — Woven bath rug ($80) Cushions your feet without stealing attention
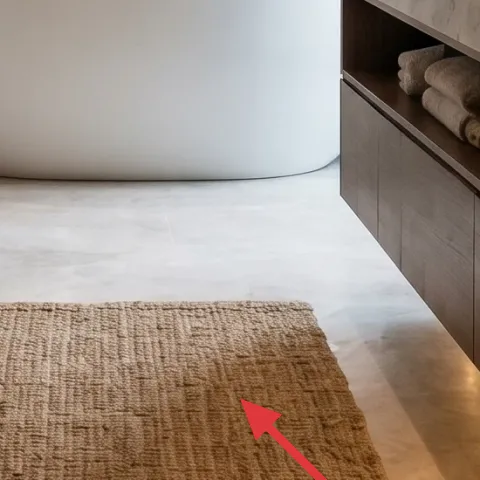
That rectangular woven bath rug in the foreground is the easiest way to soften hard tile. It gives you a textured landing where bare feet meet marble-look flooring, and the neutral tone keeps the vanity and mirror from competing. The alternative—skipping a rug or going for a shiny bath mat—tends to look temporary and doesn’t absorb the visual “edges” of the room. A 5×7-style woven look also helps the candles and towels feel coordinated instead of random. In a space this reflective, texture is the difference between spa and sterile.
Layer for comfort, not clutter
Choose one larger rug and stop there—two small mats often look fussy in a bright, tile-heavy bathroom.
Layer 2 — Brass wall sconce ($120) Adds warm light where the mirror actually lives
The brass wall sconce is positioned where your eyes go first, right beside the oval mirror area, and it makes the marble-look wall feel warmer. When the light is the right color temperature, the countertop and towel tones read creamy instead of gray. Swapping to a brass finish (or replacing the shade/light source) is a stronger move than adding more décor because it changes the room’s “time of day.” The trade-off: you want to match brightness so it doesn’t overpower the candle glow. Aim for a soft warm output that complements the evening mood instead of replacing it.
Match the brass family
If your faucet or hardware leans gold, choose a sconce finish with a similar brass tone so everything looks like a set.
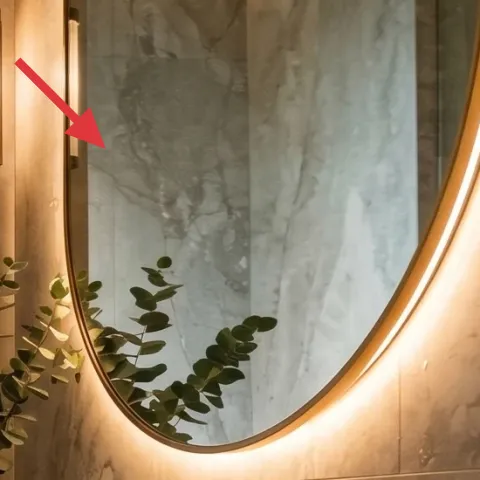
Layer 3 — Oval mirror ($120) Makes the vanity feel wider and cleaner
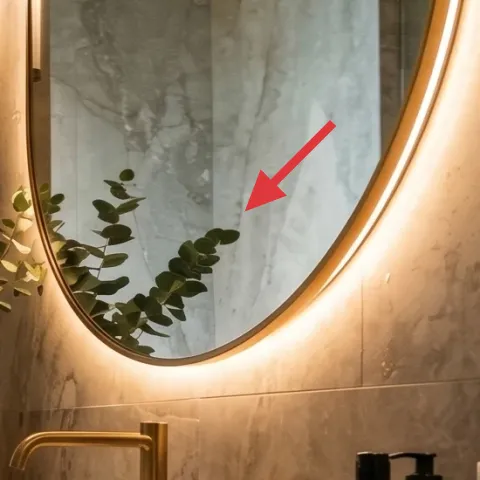
The oval mirror changes the bathroom’s geometry. Instead of sharp rectangles, you get a gentle curve that plays nicely with the round side table and the soft bath rug. It also enlarges the perceived space by reflecting the warm niche light and the vanity line, so your eye lands farther back. Buying a mirror can feel like a luxury, but here it’s functional: it concentrates light and makes the countertop look intentional. The trade-off is scale—an oval that’s too small will feel decorative; too big will fight the door and shower line.
Don’t block the view from the shower door
Before buying, measure the swing area and spacing so the mirror doesn’t visually collide with the glass shower door.
Layer 4 — Peel-and-stick wallpaper on the niche wall ($120) A backdrop that frames the vanity moments
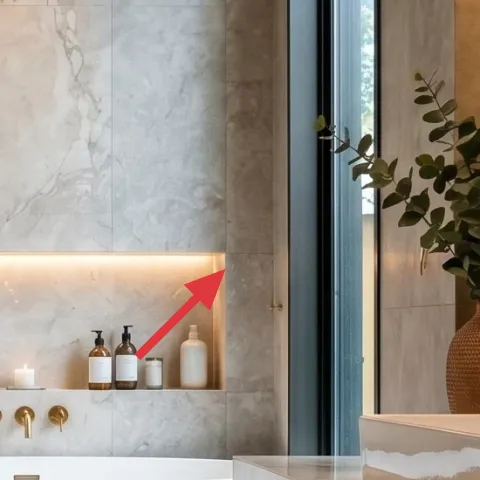
The niche wall is already a focal point because it’s lit from behind, so giving it pattern or subtle texture turns the whole vanity area into a feature. Peel-and-stick wallpaper works especially well here: it’s a high-impact “frame” for the bottles, vase, and candle glow, without committing to tile removal. The alternative is relying on styling alone, but in a marble-look bath that can flatten everything into one neutral slab. With a backdrop, your accessories read with more contrast and less effort. Keeping the pattern restrained ensures the room stays calm, not busy.
Make it instead of buying it
This is a peel-and-stick niche-wall install that reads like custom tile backdrop—minus the mess and weekend limits.
Materials
- Peel-and-stick wallpaper roll — enough for one niche wall — $80
- Smoothing plastic tool (or squeegee) — 1 — $10
- Utility knife + extra blades — 1 kit — $5
- Measuring tape + level (or small spirit level) — 1 set — $15
Steps
- Clean the niche surface and let it dry fully so the adhesive bonds flat.
- Measure the niche width and height; mark a straight plumb starting line with the level.
- Cut your first vertical strip with a little extra margin for trimming at edges.
- Peel back a small section of backing and apply from the starting line, smoothing as you go.
- Trim around corners and edges last, using the utility knife for crisp lines.
- Press seams firmly with your smoothing tool so they don’t lift near the light.
Total DIY cost: $110 — saves about $10 over buying.
Keep the pattern small
In a marble-look bathroom, a subtle-scale pattern holds up better than bold motifs under warm niche light.
Layer 5 — Vase with eucalyptus ($30) One textured plant moment on the vanity
The eucalyptus in a textured vase gives you height and movement without visual clutter. Because the leaves are matte and the vase has a speckled, earthy texture, the greenery looks like it belongs next to marble-look tile and brass. This is the kind of styling that makes the bathroom feel lived-in, but there’s a reason it works here: the arrangement is placed near the center line of the counter, so it doesn’t fight with the bottles to the right. Buying a fresh plant every season can get expensive, so the smarter trade-off is using a single statement vase and keeping the rest of the counter minimal.
Pick one “hero” plant
One tall stem cluster beats several small pots—especially in a mirror reflection-heavy layout.
Layer 6 — Decorative candles ($35) Warmth you can see at night
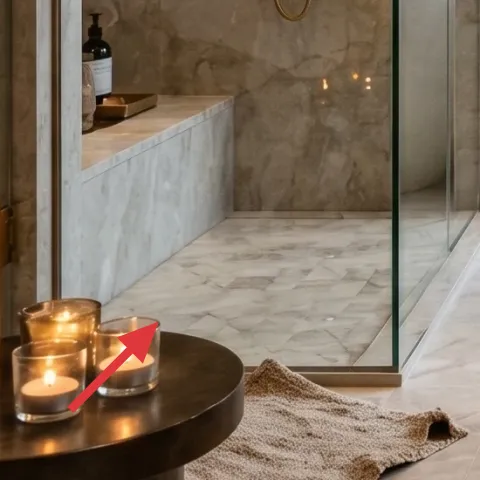
Those decorative candles bring the spa tone that the overhead lighting can’t always nail. When your bath is reflective—glass, metal, and polished surfaces—the warm flicker softens edges and makes the room feel slower. Candles also work with the layered materials already present: marble-look tile stays elegant, brass stays warm, and the woven bath rug keeps everything grounded. The trade-off is safety and frequency: you’ll need to place candles away from drafts and keep them supervised, especially near the glass shower. Consider using holders like you see here to keep everything stable.
Use holders to protect surfaces
Keep wax from pooling on stone by using a tray or base under each candle.
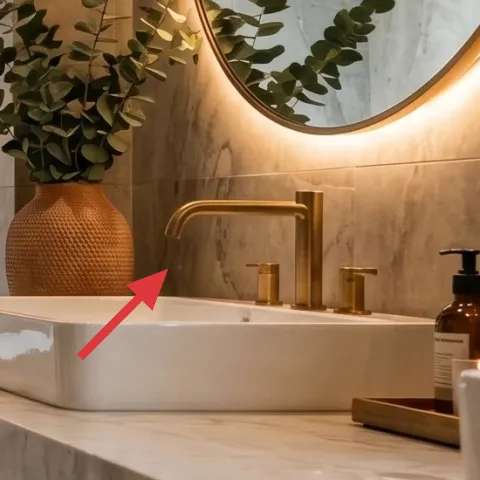
Layer 7 — Bathroom faucet ($200) The quickest hardware upgrade for brass continuity
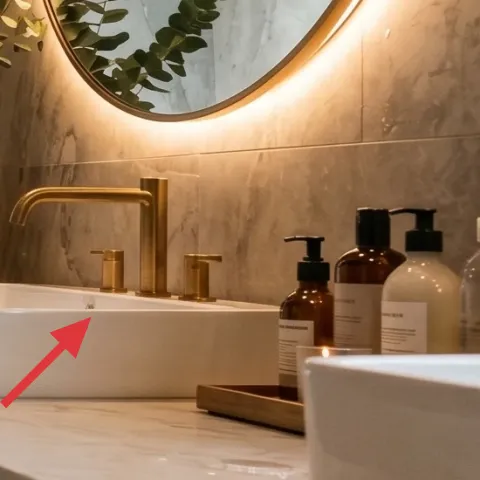
The bathroom faucet is small compared to the tile and mirror, but it anchors the entire brass story. When the finish matches the wall sconce and other metal accents, the room looks curated instead of assembled. If you’ve got mismatched metals now, this is often the first place the eye notices. A faucet swap also reads “complete” because it affects the look of both the vanity surface and how the niche light reflects around it. The trade-off is budget: it’s a bigger purchase than textiles, but it’s also one of the clearest ways to get that cohesive warm-minimal finish without redoing the tile.
Plan the swap timing
Even when it’s not a major plumbing job, schedule it when you can avoid rushing the days after installation.
The cost, layer by layer
| Layer | Item | Cost |
|---|---|---|
| 1 | Woven bath rug | $80 |
| 2 | Brass wall sconce | $120 |
| 3 | Oval mirror | $120 |
| 4 | Peel-and-stick wallpaper on the niche wall (DIY ~$110 materials) | $120 |
| 5 | Vase with eucalyptus | $30 |
| 6 | Decorative candles | $35 |
| 7 | Bathroom faucet | $200 |
| Total | $705 | |
If you want a cheaper variant, skip the faucet swap and put that money into the niche backdrop plus a nicer rug. You still get contrast from the wallpaper and comfort from the woven mat, which is where this look earns its calm.
What worked, what didn't (across the whole room)
This bathroom refresh nails the “warm marble” balance by pairing brass lighting with soft textiles and one centered plant moment. The niche backdrop idea does a lot of heavy lifting visually, but only when the pattern stays subtle.
What worked
- The woven bath rug softened the tile reflections and made bare-foot comfort feel intentional.
- Brass wall lighting next to the mirror made the vanity palette read creamy instead of gray.
- The oval mirror softened the bathroom’s edges and helped the vanity feel more spacious.
- The eucalyptus vase added height without crowding the bottles and counter line.
- Candles added visible warmth at night and made the whole space feel calmer.
- Coordinating the faucet finish kept the brass story consistent across fixtures.
What didn't
- A second small mat near the rug edge looked messy in the mirror reflection.
- Too-bright sconce output made the niche glow harsh instead of flattering.
- An overly bold niche pattern would fight with marble-look veining rather than frame it.
- Over-styling the vanity with extra bottles pulled focus from the mirror line.
What we'd skip if we did it again
Skip replacing everything at once and start with one “light + reflection” upgrade: the sconce and mirror placement. In bathrooms like this, changing how light lands on tile and glass creates the biggest emotional shift fast.
Skip a loud niche pattern. Under warm glow, larger motifs can feel busy against marble-look veining; a subtle scale keeps it spa-like instead of decorative-chaotic.
Skip mixing too many metals. If the room is already brass-forward, don’t add silver or chrome shine through small accessories—hardware continuity is what makes the look feel designed.
Frequently asked
How long does this bathroom refresh take on a weekend?
Most people can do the bath rug and styling in a first pass (about 1–2 hours). The peel-and-stick niche wall takes the bulk of the time—usually 3–5 hours including measuring and trimming. Swapping a sconce or faucet can add time depending on access, so build in a buffer day if you’re coordinating any harder work.
Can this work for renters?
Yes, if you keep the changes to peel-and-stick wallpaper, rugs, and countertop styling. A mirror swap or faucet swap may require permission, so consider using renter-safe versions: keep the existing mirror frame and focus on replacing lighting bulbs/shades only if allowed. For the niche, peel-and-stick is the most effective place to create a custom look without commitment.
What if the bathroom is smaller or the niche is a different size?
Go smaller on the scale, not the idea. For a smaller niche, choose a subtle-pattern wallpaper with less contrast so it doesn’t overwhelm the marble-look tile. For the rug, pick the largest shape that fits comfortably in front of the vanity without blocking walking paths.
Where should I shop differently to match this look on a budget?
Start with home lighting retailers or big-box stores for brass-toned sconces and compatible bulbs, then shop rugs and mirrors at places with frequent markdowns. Decorative candles and vases are often cheaper at home goods sections rather than full décor boutiques—saving there makes the lighting upgrades feel more attainable.
What’s the biggest mistake people make with this style?
The most common issue is adding too many small counter items that compete with the mirror reflection. This look works when accessories repeat the same warm materials (brass tone, earthy textures) and stay in a tight visual rhythm. One plant vessel, a small candle moment, and a few neatly grouped bottles is the sweet spot.
More in Bathroom

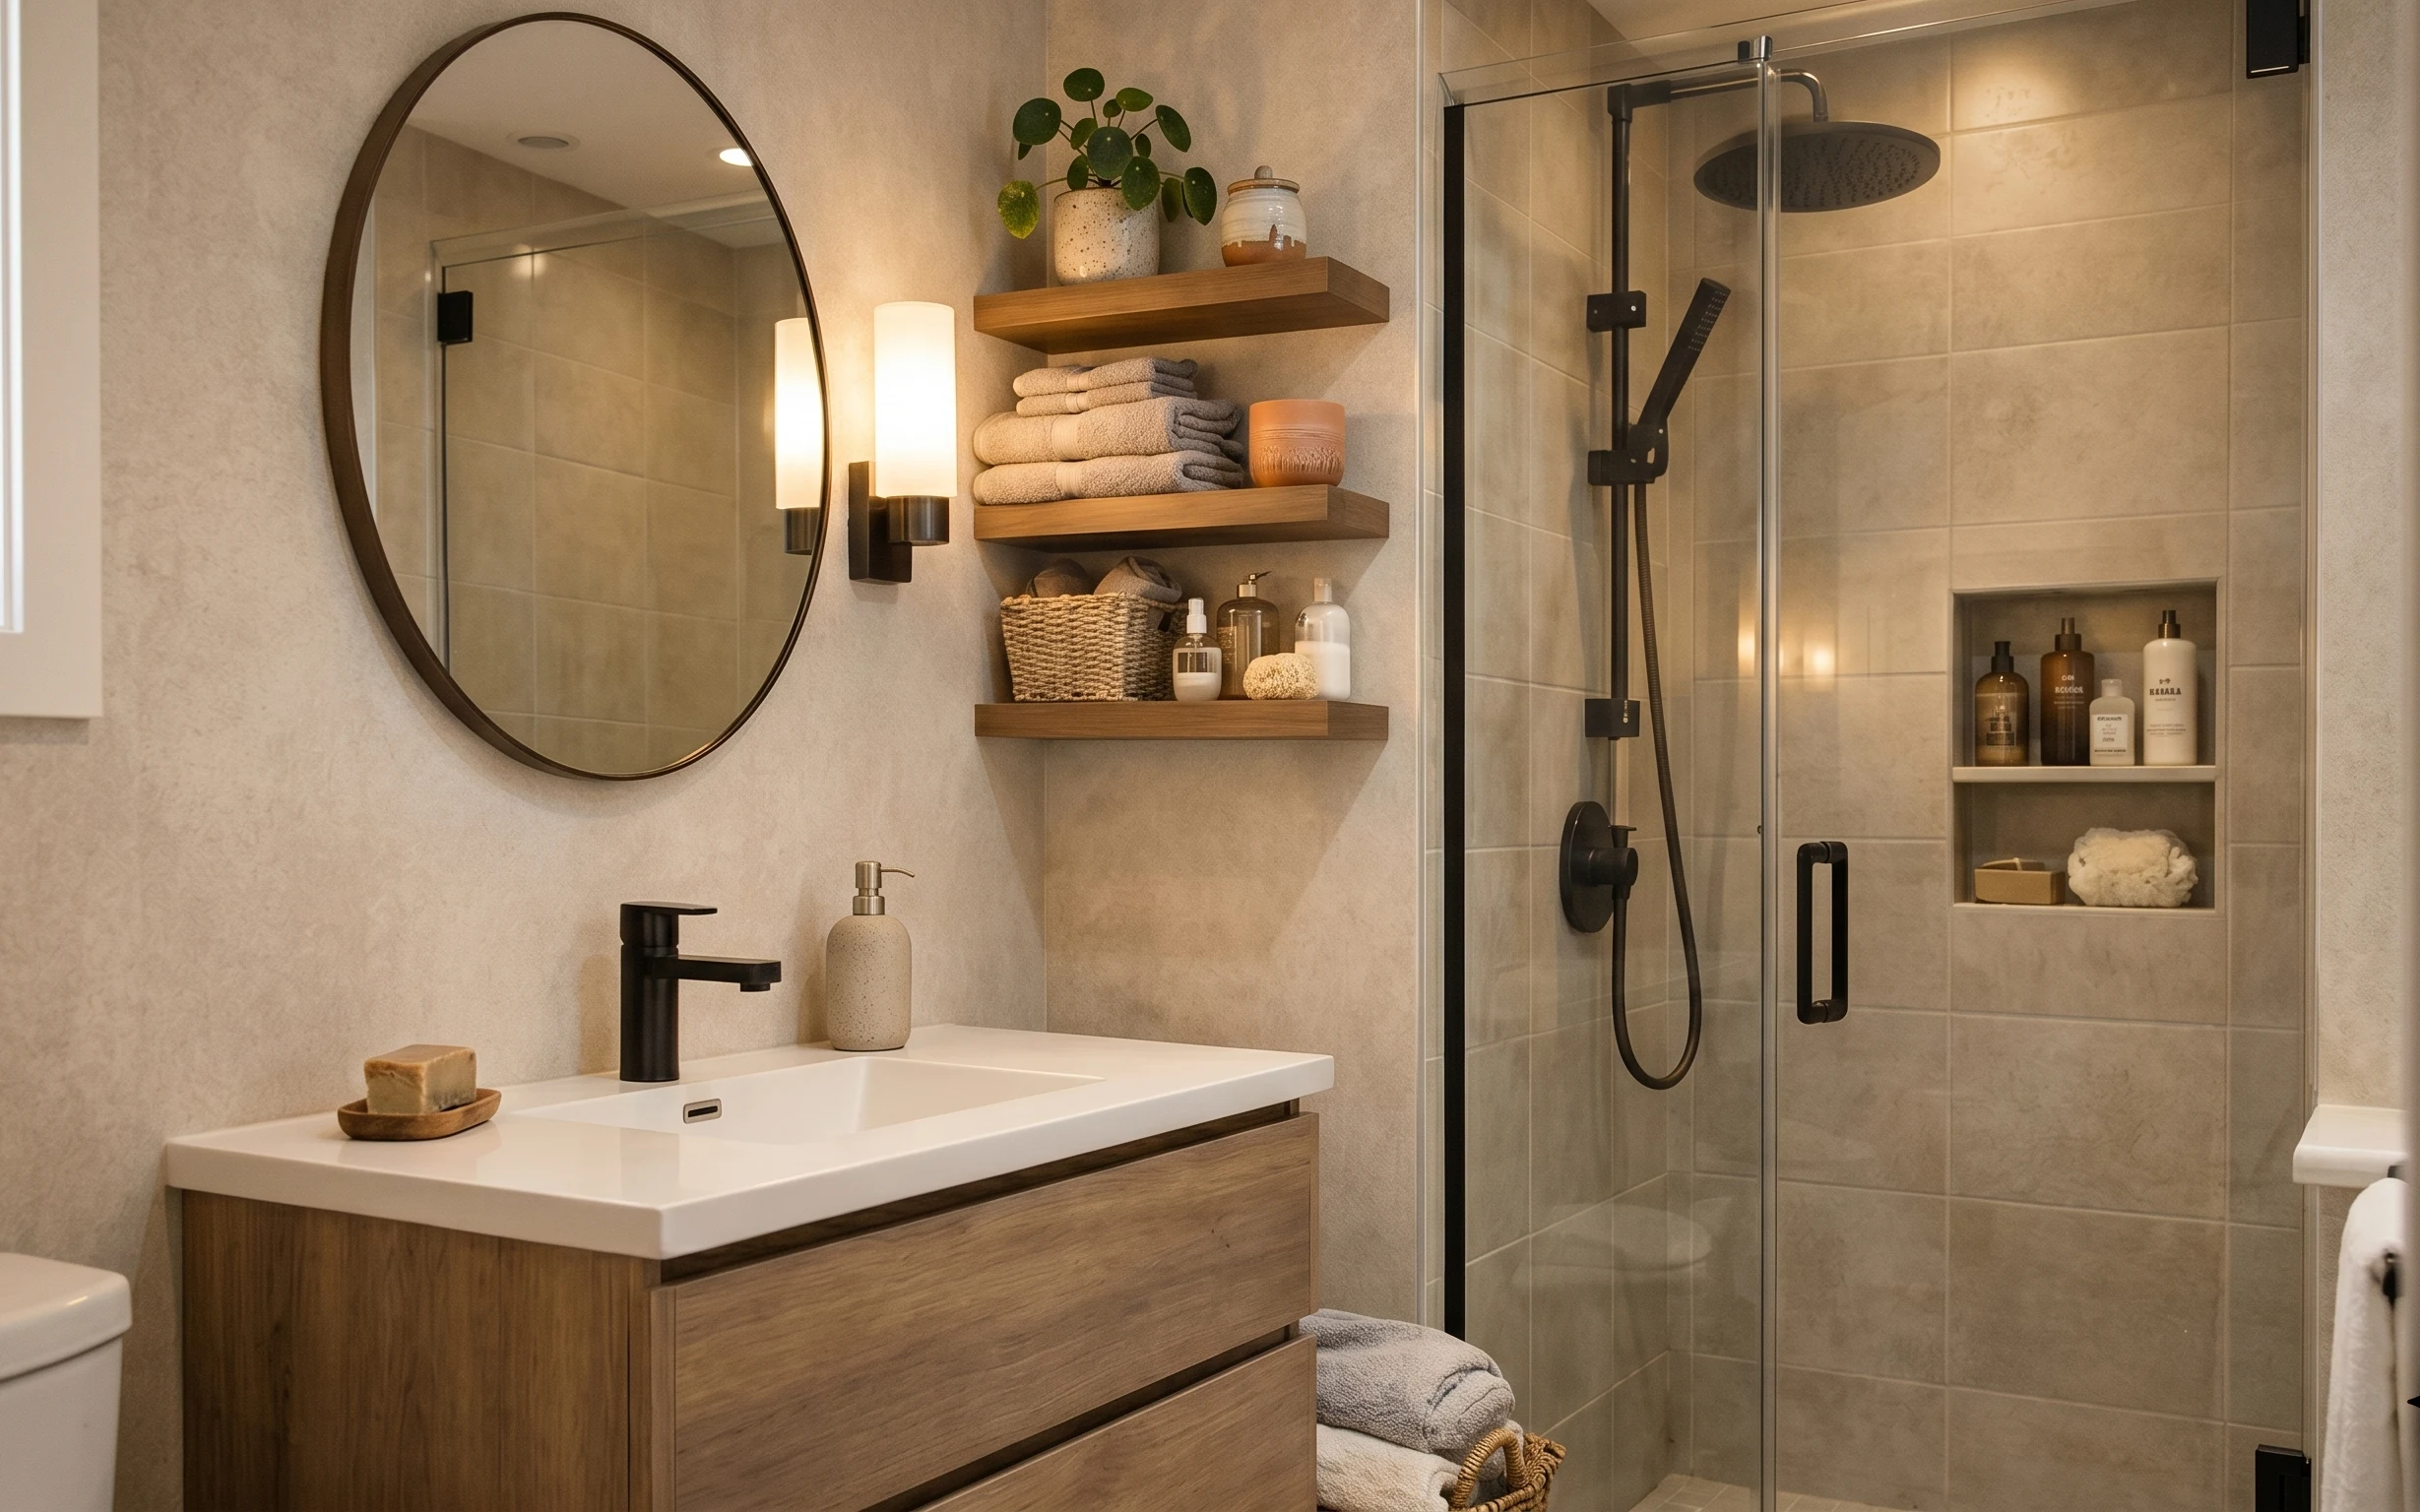
Warm marble-and-brass bathroom refresh, $800
A warm marble-and-brass bathroom refresh on a weekend budget ($800). Swap in a softer bath rug, sharpen the mirror and lighting, and add a …
5 weekend swaps for a spa-like bathroom vanity wall, $1000
A spa-like bathroom vanity wall refresh on a $1000 weekend budget—starting with a wood vanity, oval mirror, and floating shelves. The resul…
What $300 buys: a spa-like bathroom corner refresh
A spa-like bathroom corner refresh that leans into warm wood, cream tile, and black accents with seven practical swaps—starting with a soft…